Why Photographers Shoot in Manual Mode?
With a manual, you're in charge. Give the camera free reign over all adjustments. The camera will record using the settings it considers optimal, not the ones you select. When talking about exposure, the exposure triangle is examined. The specifics will be discussed in greater depth later. The triangle consists of three different camera options. Light in the scene is altered by them. Subjects can now freeze in place and use differential attention. Bokeh necessitates a large aperture and differential focus. For blurred movement, a slow shutter speed is necessary. Using ISO, aperture, and shutter speed, the triangle may determine how much light is there in a given situation. The camera settings will be chosen at random because it has no way of knowing that you desire motion blur.
Photographers with experience know when to employ the Shutter or Aperture Priority modes. These allow them to zero in on a specific parameter while the camera adjusts everything else. With manual mode, you can adjust the camera's settings on the fly to suit different lighting conditions or focal points. This was a lesson that was necessary for all of us.
If you need advice on your wedding photography, check out our photography packages and services at Wild Romantic Photography.
Two words: total mastery. There aren't many secrets left to uncover in photography once you've mastered manual mode and have complete command over aperture, shutter speed, and ISO. For now, here's a rundown of some of the instances in which knowing manual mode may be quite helpful; we'll go into deeper detail on each of these issues in the following paragraphs.
- Bokeh refers to the intentional blurring of backgrounds in photographs, resulting in bright, luminous rings.
- To forestall the use of an accidental flash when photographing in dim light.
- Silhouettes
- Implementing blurred movement for aesthetic purposes.
- Anything that calls for a novel perspective, emphasis, or shot.
You have total creative freedom when shooting in manual mode, but it will take you noticeably longer to set up each shot. Expert photographers know how and when to make advantage of autofocus, pre-programmed settings, and preset modes.
You should use manual mode if you can take your time before snapping the image. It's possible that another mode has the necessary settings pre-configured and ready to go at the click of a button, making it ideal if you need to act quickly.
What Is Manual Mode For On A Camera?
In manual mode, the photographer decides both the aperture and the shutter speed, giving them complete control over the final image's exposure. This will give you full creative freedom over the final product, but understanding how shutter speed and aperture effect exposure is essential.
Most amateur photographers start off by using their cameras' fully automated shooting modes, which let the device itself decide what level of exposure is best. On a DSLR, this setting is often labelled with the letter P for "Program." Most photographers, as their proficiency with photography grows, switch to one of two semi-automatic exposure modes: aperture priority or shutter priority (AV, TV). By selecting one of these modes, the photographer can manage the camera's aperture or shutter speed while letting the camera decide the other parameters required to get the desired exposure.
The manual mode takes it one step further and gives you control over both, but why would you want to use it? Choosing the right wedding photographer in Melbourne to capture every moment on your wedding day.
There is typically a very challenging lighting situation, such as a strong backlight, for example, or rapidly changing light due to weather conditions such as passing clouds.
How to Shoot in Manual Mode
Do you really believe that nobody here cares about improving their photography skills? The most important thing you can do to advance your photography skills is to learn how to shoot in manual mode. The article 5 Reasons to Shoot in Manual Mode should help sway your decision. To master shooting in manual mode, you must first be familiar with the "exposure triangle." Aperture, shutter speed, and ISO are the elements that make up these parameters.
You'll need these three parts to get the light metre back to zero. To discover the light metre, simply peer into the viewfinder of your camera. A little line graph like this one near the page footer is what you're looking for: - 2. . . 1 . . . 0 . . .1 . . .2+ (behind the graph, you should see a flashing vertical line or "ticker," and this is what you'll be adjusting.) **Be sure the plus and minus indications on your light metre are facing the right way around.
The best way to make sure those moments are preserved for posterity is with a professionally made wedding film. Get in touch with us at Wild Romantic Photography right away to talk about our wedding film videography services.
Light Meter
Perhaps you've noticed the tiny number line that appears at the viewfinder's bottom. It takes one of two forms: either -2...1...0...1...2+ (Canon) or +2...1...0...1...2+. (Nikon). The exposure of your photo will be just right if you set the light metre to zero before you snap it. Obviously, if you want a certain effect, you may need to be somewhat overexposed or underexposed, and the light metre may help you do that.
Aperture
The aperture is the hole in the middle of your camera's shutter or iris. If you want to achieve a professional blurred background or the beautiful Bokeh, setting your aperture, also known as your f-stop, is a great place to start. Reducing the f-number lets more light into the camera, which in turn blurs the background further.
When the f-number is raised, a larger section of the image will be in crisp focus. If you want more light but a softer background, choose a low f-number; if you want less light but a sharper background, choose a high f-number.
Shutter Speed
Shutter speed is the time that the shutter of your camera is open and light is able to enter and be detected by the camera's internal light sensor. The sharpness of your shot will be affected by your shutter speed, which is usually expressed as a fraction of a second (for example, 1/125).
To avoid blur when shooting with a slow shutter speed, which allows more light in, you should keep your hand as steady as possible or use a tripod. Although less light can enter the camera at a faster shutter speed, the subject is typically sharper and the photographer's hand movements are less noticeable in the final shot.
ISO
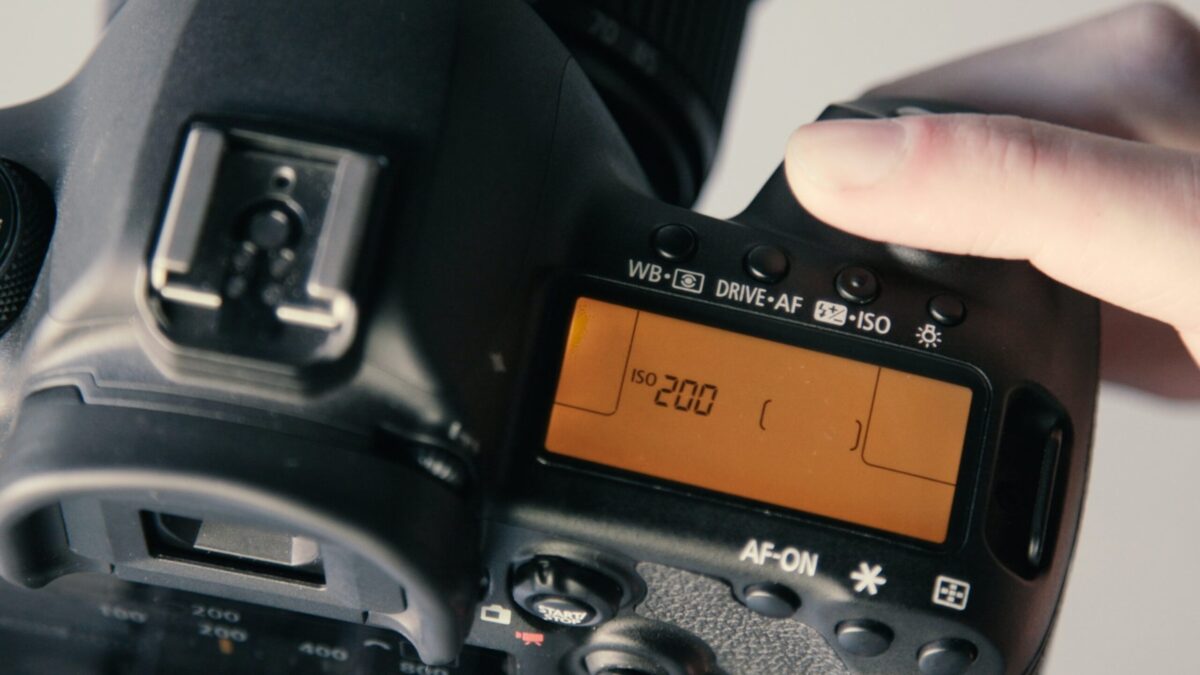
Digital single-lens reflex cameras often have an ISO range from 200 to 1600, and this setting controls how sensitive the camera is to light. The lower the ISO setting, the more light is required for an adequate exposure, but the lower the ISO setting, the less noise will be visible in the final image. The higher the ISO setting, the better the shots will turn out even in low light, although the noise in the background may increase.
DSLRs' image sensors feature bigger pixels, allowing them to capture more light and create higher-quality photos even at higher ISO settings. They also typically have noise reduction as an added feature, which aids in retaining quality even at higher ISO settings. A decent rule of thumb is to use an ISO setting of 100–200 when taking pictures of subjects outside in bright sunshine and an ISO setting of 800–1600 while taking pictures of subjects indoors in low light.
We have the best wedding photographer in Yarra Valley to capture your beautiful moments on your wedding day.
Why You Need to Learn Manual Mode
Both small and digital single-lens reflex cameras (DSLRs) on the market today are designed to be as user-friendly as possible. Once you have taken the camera out of its box, installed the battery, and turned it on, the first image can be taken in a matter of seconds. What's more, because to the proliferation of cellphones, we can snap a photo whenever we like, no matter what time of day it is.
To say that technology capabilities have advanced significantly over the past few decades is, at best, horribly insufficient. The world is shifting due to the remarkable simplicity with which we can do any given task, including snapping images.
But sometimes convenience can be our subtle enemy. Planning your dream wedding and don’t want to miss out on the special moments on your big day? Worry no more, Wild Romantic Photography has you covered.
Every single point-and-shoot and tiny digital camera out there is simple to operate. Simply remove it from its packaging, put in the battery, and you can begin shooting within minutes. Thanks to cellphones, we can take pictures almost instantaneously, at any time of day.
The ease of use may hinder our photographs at first. Instead of going through the motions, we need to carefully examine each image.
With the camera's mode switched to Automatic, the electronics make all the judgement calls. Aperture, shutter speed, ISO, and focus are all used to make an educated guess at the subject matter depicted in the mind's eye. Because you know what you want better than anyone else, why not set the controls yourself?
We learned from the Exposure Triangle that the three factors that control exposure can have an impact beyond simple pixel brightness. The time to act on this information is now.
You take a picture of the sun going down over a brightly illuminated countryside. In low light, when the camera is set to Automatic, it chooses a large aperture and a high ISO to compensate. The resulting photo is grainy and blurry.
Envision yourself in charge of the environment. The combination of a low ISO and a narrow aperture is necessary for outstanding image quality, therefore you'll want to use a tripod and a longer shutter speed to compensate. To get a better end product, wait just a little bit longer.
The camera's operation makes sense, but leaving it on automatic mode is for tourists. To become a better photographer, you should stop relying on the camera to make choices for you.
At Wild Romantic, we have the best wedding photographer in Mornington Peninsula to capture every single moment on your wedding day.
How Does Shooting in Manual Help?
By taking responsibility and selecting the Manual option on the camera, we may adjust the exposure settings as we see fit. We can fine-tune the settings until the shot is just how we envisioned it before we ever take it.
Instead of struggling with the choices made by auto mode, you may simply turn a dial to increase the shutter speed and achieve the desired effect of smoother waves. You won't have to stress over making a choice.
Do you keep getting unclear images of your daughter playing outside? To stop action, try using a large aperture in conjunction with a fast shutter speed.
It's as simple as that! If you’d like to work with professional photographers for your wedding, book with us at Wild Romantic Photography.
The most notable advantage of shooting in Manual mode is the freedom to make precise alterations to our photos. And yet, there is one more crucial reason why I think all amateurs should give it a try: every time you push the shutter button, you are forced to give some consideration to the snapshot you are generating. This is great news since it will help you refine your photographic composition skills.
Conclusion
With a manual, you're in charge. The camera will record using the settings it considers optimal, not the ones you select. Expert photographers know how and when to make advantage of autofocus, pre-programmed settings, and preset modes. You should use manual mode if you can take your time before snapping the image. In manual mode, the photographer decides both the aperture and the shutter speed.
This gives them complete control over the final image's exposure. The most important thing you can do to advance your photography skills is to learn how to shoot in manual mode. Read 5 Reasons to Shoot in Manual Mode by Wild Romantic Photography Melbourne. Digital single-lens reflex cameras often have an ISO range from 200 to 1600. The higher the ISO setting, the better the shots will turn out even in low light.
A decent rule of thumb is to use an ISO setting of 100–200 when taking pictures of subjects outside in bright sunshine. With a digital camera, the electronics make all the judgement calls for you. Aperture, shutter speed, ISO, and focus are all used to make educated guess at subject matter. In low light, when the camera is set to Automatic, it chooses a large aperture and high ISO to compensate. The combination of a low ISO and narrow aperture is necessary for outstanding image quality.
Shooting in Manual mode gives us the freedom to make precise alterations to our photos. Every time you push the shutter button, you are forced to give some consideration to the snapshot you are generating. This is great news since it will help you refine your photographic composition skills.
Content Summary:
- With a manual, you're in charge.
- Give the camera free reign over all adjustments.
- The camera will record using the settings it considers optimal, not the ones you select.
- When talking about exposure, the exposure triangle is examined.
- The triangle consists of three different camera options.
- Light in the scene is altered by them.
- Bokeh necessitates a large aperture and differential focus.
- For blurred movement, a slow shutter speed is necessary.
- Using ISO, aperture, and shutter speed, the triangle may determine how much light is there in a given situation.
- The camera settings will be chosen at random because it has no way of knowing that you desire motion blur.
- Photographers with experience know when to employ the Shutter or Aperture Priority modes.
- With manual mode, you can adjust the camera's settings on the fly to suit different lighting conditions or focal points.
- If you need advice on your wedding photography, check out our photography packages and services at Wild Romantic Photography.
- There aren't many secrets left to uncover in photography once you've mastered manual mode and have complete command over aperture, shutter speed, and ISO.
- For now, here's a rundown of some of the instances in which knowing manual mode may be quite helpful; we'll go into deeper detail on each of these issues in the following paragraphs.
- Bokeh refers to the intentional blurring of backgrounds in photographs, resulting in bright, luminous rings.
- To forestall the use of an accidental flash when photographing in dim light.
- Silhouettes Implementing blurred movement for aesthetic purposes.
- Anything that calls for a novel perspective, emphasis, or shot.
- You have total creative freedom when shooting in manual mode, but it will take you noticeably longer to set up each shot.
- Expert photographers know how and when to make advantage of autofocus, pre-programmed settings, and preset modes.
- In manual mode, the photographer decides both the aperture and the shutter speed, giving them complete control over the final image's exposure.
- This will give you full creative freedom over the final product, but understanding how shutter speed and aperture affect exposure is essential.
- Most amateur photographers start off by using their cameras' fully automated shooting modes, which let the device itself decide what level of exposure is best.
- Most photographers, as their proficiency with photography grows, switch to one of two semi-automatic exposure modes: aperture priority or shutter priority (AV, TV).
- By selecting one of these modes, the photographer can manage the camera's aperture or shutter speed while letting the camera decide the other parameters required to get the desired exposure.
- The manual mode takes it one step further and gives you control over both, but why would you want to use it?
- Choosing the right wedding photographer in Melbourne to capture every moment on your wedding day.
- Do you really believe that nobody here cares about improving their photography skills?
- The most important thing you can do to advance your photography skills is to learn how to shoot in manual mode.
- The article 5 Reasons to Shoot in Manual Mode should help sway your decision.
- To master shooting in manual mode, you must first be familiar with the "exposure triangle."
- Aperture, shutter speed, and ISO are the elements that make up these parameters.
- You'll need these three parts to get the light metre back to zero.
- To discover the light metre, simply peer into the viewfinder of your camera.
- The best way to make sure those moments are preserved for posterity is with a professionally made wedding film.
- Get in touch with us at Wild Romantic Photography right away to talk about our wedding film videography services.
- Perhaps you've noticed the tiny number line that appears at the viewfinder's bottom.
- The exposure of your photo will be just right if you set the light metre to zero before you snap it.
- Obviously, if you want a certain effect, you may need to be somewhat overexposed or underexposed, and the light metre may help you do that.
- Aperture The aperture is the hole in the middle of your camera's shutter or iris.
- If you want to achieve a professional blurred background or the beautiful Bokeh, setting your aperture, also known as your f-stop, is a great place to start.
- Reducing the f-number lets more light into the camera, which in turn blurs the background further.
- Shutter speed is the time that the shutter of your camera is open and light is able to enter and be detected by the camera's internal light sensor.
- The sharpness of your shot will be affected by your shutter speed, which is usually expressed as a fraction of a second (for example, 1/125).To avoid blur when shooting with a slow shutter speed, which allows more light in, you should keep your hand as steady as possible or use a tripod.
- Although less light can enter the camera at a faster shutter speed, the subject is typically sharper and the photographer's hand movements are less noticeable in the final shot.
- Digital single-lens reflex cameras often have an ISO range from 200 to 1600, and this setting controls how sensitive the camera is to light.
- The lower the ISO setting, the more light is required for an adequate exposure, but the lower the ISO setting, the less noise will be visible in the final image.
- The higher the ISO setting, the better the shots will turn out even in low light, although the noise in the background may increase.
- DSLRs' image sensors feature bigger pixels, allowing them to capture more light and create higher-quality photos even at higher ISO settings.
- They also typically have noise reduction as an added feature, which aids in retaining quality even at higher ISO settings.
- A decent rule of thumb is to use an ISO setting of 100–200 when taking pictures of subjects outside in bright sunshine and an ISO setting of 800–1600 while taking pictures of subjects indoors in low light.
- We have the best wedding photographer in Yarra Valley to capture your beautiful moments on your wedding day.
- Both small and digital single-lens reflex cameras (DSLRs) on the market today are designed to be as user-friendly as possible.
- Once you have taken the camera out of its box, installed the battery, and turned it on, the first image can be taken in a matter of seconds.
- What's more, because of the proliferation of cell phones, we can snap a photo whenever we like, no matter what time of day it is.
- To say that technology capabilities have advanced significantly over the past few decades is, at best, horribly insufficient.
- The world is shifting due to the remarkable simplicity with which we can do any given task, including snapping images.
- But sometimes convenience can be our subtle enemy.
- Every single point-and-shoot and tiny digital camera out there is simple to operate.
- Simply remove it from its packaging, put in the battery, and you can begin shooting within minutes.
- Thanks to cell phones, we can take pictures almost instantaneously, at any time of day.
- With the camera's mode switched to Automatic, the electronics make all the judgement calls.
- Aperture, shutter speed, ISO, and focus are all used to make an educated guess at the subject matter depicted in the mind's eye.
- Because you know what you want better than anyone else, why not set the controls yourself?
- We learned from the Exposure Triangle that the three factors that control exposure can have an impact beyond simple pixel brightness.
- The time to act on this information is now.
- You take a picture of the sun going down over a brightly illuminated countryside.
- In low light, when the camera is set to Automatic, it chooses a large aperture and a high ISO to compensate.
- The resulting photo is grainy and blurry.
- Envision yourself in charge of the environment.
- The combination of a low ISO and a narrow aperture is necessary for outstanding image quality, therefore you'll want to use a tripod and a longer shutter speed to compensate.
- To get a better end product, wait just a little bit longer.
- The camera's operation makes sense, but leaving it on automatic mode is for tourists.
- To become a better photographer, you should stop relying on the camera to make choices for you.
- At Wild Romantic, we have the best wedding photographer in Mornington Peninsula to capture every single moment on your wedding day.
- By taking responsibility and selecting the Manual option on the camera, we may adjust the exposure settings as we see fit.
- We can fine-tune the settings until the shot is just how we envisioned it before we ever take it.
- Instead of struggling with the choices made by auto mode, you may simply turn a dial to increase the shutter speed and achieve the desired effect of smoother waves.
- You won't have to stress over making a choice.
- To stop action, try using a large aperture in conjunction with a fast shutter speed.
- It's as simple as that!
- If you'd like to work with professional photographers for your wedding, book with us at Wild Romantic Photography.
- The most notable advantage of shooting in Manual mode is the freedom to make precise alterations to our photos.
- And yet, there is one more crucial reason why I think all amateurs should give it a try: every time you push the shutter button, you are forced to give some consideration to the snapshot you are generating.
- This is great news since it will help you refine your photographic composition skills.