What Mode Do Most Professional Photographers Shoot In?
Shooting in manual mode is the best option sometimes, but there are times when it is not. Rather than calculating the exposure manually and potentially missing the perfect moment to capture a memorable moment, even the most experienced professional photographers occasionally resort to using a pre-programmed mode so that they can focus their full attention on the shot at hand. But if you've never picked up a camera before or you want to expand your photography skills beyond Auto mode, you should practise by going beyond the green box first.
There are four outcomes to consider when setting up a camera to take a picture: a shallow depth of field, a deep depth of field, motion blur, and freezing the action. How do you know which Mode to use to adjust these fundamental camera settings?
Let's take a look. If you need advice on your wedding photography, check out our photography packages and services at Wild Romantic Photography.
Advice to shoot only in manual mode should be rethought if you've ever been given it. Each Mode serves its own unique function and provides its own unique benefits. Knowing the best Mode to use in any given circumstance will increase your chances of getting the desired exposures and other benefits. Learning about each of them is beneficial, so let's get started!
Professional Photographers Never Use Anything But Manual Mode, Right?
You are already aware of our stance on this issue, but please allow us to elaborate on why we think it is a bad idea to think and act in this way.
Inexperienced Users May Feel Overwhelmed When Switching To Manual Mode.
Shooting in Manual Mode can be intimidating if you're already struggling to master your camera's controls. It's like trying to master a manual transmission while you're still getting the hang of driving an automatic!
Rather than trying to learn everything at once, it is much more efficient to take things slowly and learn one new thing at a time. First, get a firm grasp on the basics, put your foot on the gas (figuratively speaking), and take things slowly and methodically. You could go to "Program" and from there pick one of the semi-automatic modes that are described below.
Now that you've mastered the basics of your camera and put it through its paces a few times, you're ready to switch to Manual Mode. Looking for wedding photography Melbourne? Look no further! Wild Romantic Photography has you covered.
Sometimes Automatic Is Better Than Manual!
Believe it or not, most working photographers don't always use manual mode. They choose the shooting mode that will give them the best results instead. To save space, we will summarise what's going to be discussed in greater depth later in this post regarding each mode, but here's the gist of it:
- Aperture Priority mode should be used when you want more say over your depth of field.
- The Shutter Priority mode should be used when blur from movement must be minimised (freezing action or creating blur).
- If the lighting and subject aren't going to change,if you have access to a tripod and the luxury of shooting, reviewing, and retaking photos as needed, Manual Mode is your best bet. If you have the luxury of time to shoot, review the images, and retake any that are underexposed, then you should definitely switch to Manual Mode.
Manual Focus Is Not the Same as Manual Mode!
Beginner photographers frequently make this mistake because they conflate shooting in Manual Mode with using Manual Focus. It's easy to confuse them because their names sound so similar to one another. But they are not interchangeable in their roles.
- In Manual Mode, you have full control over the exposure by adjusting the ISO, shutter speed, and aperture independently of one another. Using the manual focus mode on your camera ensures that your images are crisp.
- If you enable Autofocus, the camera will try to focus for you; if you use the right settings, it will usually do a respectable job.
- You have to manually turn a ring on a lens to get it in focus. It will be difficult to get sharp images without a tripod or a mirrorless camera with a zoom feature on the LCD screen or focus assist/peaking.
In light of this, it is crucial that you realise the two are NOT mutually exclusive. It is possible to switch between Autofocus and Manual Focus regardless of whether the camera is set to Manual or Automatic mode, though it is recommended that you use Autofocus whenever possible and leave Manual Focus to the camera.
Shooting Modes for Cameras
There are typically five main shooting modes available on cameras:
- Full Automatic Mode (typically represented as a green square or box on the mode dial of your device)
- Despite common belief, the capital letter P does not stand for "Professional Mode"; rather, it represents Program Mode, which is the default setting.
- Priority-based Aperture Mode (shown as A or Av on your dial)
- Focus-Priority Shutter Mode (usually shown as S on your dial or Tv for Canon)
The main difference between these modes is the amount of assistance provided by the camera and the number of settings left to your discretion.
The Major Drawback of Using Your Camera's "Icon Modes"
People often ask, "Why do I need to learn how to set my camera's settings manually when my camera already has built-in modes for sports, portraits, landscapes, etc.?" when we discuss shooting modes. Photographers call these modes "icon modes" due to the graphical representations of the available shooting scenarios that they provide on the mode dial. If you're serious about becoming a "real" photographer, this diagram will show you why you shouldn't use the icon modes.
Since you have recently upgraded your photography skills and purchased a state-of-the-art camera, your relatives have decided that you should take charge of taking official photos at the reunion. It's time for the massive group photo, which will feature more than 60 people. Which shooting mode do you typically use? The portrait-like icon, because that's what it actually is.
That raises serious worries that must be addressed. Portrait modes on cameras automatically set the aperture to a small value, assuming you want a shallow depth-of-field for the portrait you are taking. But in this particular situation, there is such a large group of people that you require a full depth-of-field to ensure that none of the individuals in the background are blurry. A large portion of the group is blurry because the camera has no idea what you want to do with this portrait.
The tiny automatic icon modes, such as landscape, portrait, and sports, are not suitable for photographers who wish to learn how to take photographs at a professional level. Planning your dream wedding and don’t want to miss out on the special moments on your big day? Worry no more, Wild Romantic Photography has you covered.
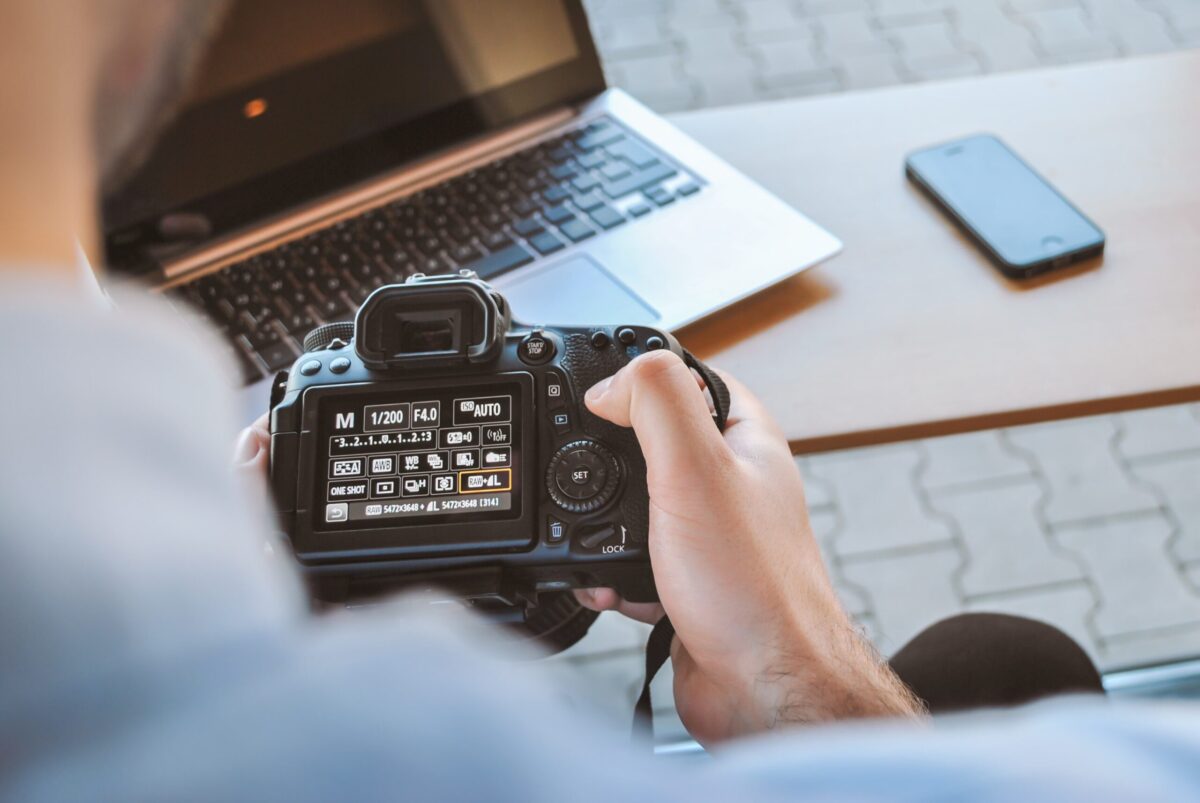
Auto (Green Box)
The camera's pop-up flash, as well as the shutter speed, aperture, ISO, and white balance, will be automatically set and activated when you switch to the Auto mode. In this Mode, the camera will decide everything for you, and all you have to do is press the shutter button to start taking pictures. Not only does it choose the shutter speed, aperture, and ISO, but it also chooses the focus mode and points, white balance, and drive mode. For you, it is the deciding factor in any and all situations. Unfortunately, you're out of options, but on the bright side, you should get some decent exposure with minimal effort.
All of the choices labelled with tiny icon graphics of a runner, mountain, lady, flower, etc., and clustered together on the same side of the dial are variations of Full Automatic. Each one has unique uses that are determined by the nature of the subject you are photographing.
Do not feel bad about yourself if you find yourself in need of those methods. This sort of conduct is perfectly fine. Read the camera's manual to familiarise yourself with their functions, and then use them as needed. However, the results of these auto modes may not capture the mood or style you were going for. If you're ready to take charge of the situation, we'll move on to the next choice, Program.
Advantages:
If you're just getting started with digital photography, this is a great option, but you shouldn't get too comfortable with it. Only use it temporarily while you learn how to operate your camera.
Disadvantages:
Images captured with auto settings aren't always to your liking, especially in low light. For instance, if the subject of a portrait is heavily backlit, a silhouette could be created. Low-light photography can produce grainy, unclear images. Even if you don't want the flash to go off, many camera models don't offer a way to prevent it from doing so automatically if the camera detects dim lighting.
When to use:
Use this setting when you want your camera to function as a pure point-and-shoot device.
Program Mode (P)
Program mode is the next tier of control after Automatic. As a "P" on the dial, you can use that as a point of reference. In Program Mode, the camera determines the optimal combination of ISO, aperture, and shutter speed without requiring the photographer to make any adjustments. The exposure is managed by these dials. This feature does not change the exposure, but it does allow you to change the focus mode, drive mode and white balance.
If you want to use a specific setting, like an aperture of f/4, the camera will automatically adjust the rest of the settings to achieve the desired effect. Because of this, it is a useful technique for learning navigational skills.
If you want to learn, Program Mode is a great way to do it. First, let the camera decide on the exposure for you, then look over its choices and try recreating them in Manual Mode.
If you need to snap a picture quickly but don't have time to fiddle with the camera's settings, Program mode is your best bet. Use Program when you are at a loss for what to do, the light is changing too quickly, the subject is moving too quickly, or you are taking too long.
Your camera's ISO, exposure compensation, white balance, and flash settings can all be modified manually while in Program mode, despite the fact that the shutter speed and aperture will be set automatically. Create lasting memories through your Yarra Valley wedding photography that will be cherished forever.
Advantages:
This is a major step up for beginners who want to improve their photography by taking more control of their cameras.
Disadvantages:
Like the Auto setting, the partial automatic settings leave some creative decisions to chance, which can lead to unexpected results.
When to use:
If you want to take a solid first step towards mastering your camera's settings, switching to this Mode is a great place to start.
Shutter Priority (Tv – Canon) (S – Nikon)
By switching to Shutter Priority, you can set the shutter speed and ISO independently, allowing the camera to determine the correct f-stop for the exposure. When should you switch to Shutter Priority? Our suggestions for when this is appropriate are as follows:
- When you are planning to take a photo of a moving subject.
- Since this is more advanced photography, you shouldn't worry about getting as much of the natural light coming into the room as you can when shooting with a flash indoors.
The first example is the one presented above, and it's fairly easy to understand. Shutter Priority Mode and a slow shutter speed allow you to blur the background while photographing a moving subject like a cyclist or a moving car by simply panning the camera.
Advantages:
Excellent for managing both the freezing effect and the blurring of motion. In the Shutter Priority mode, the shutter speed is under your command while the camera automatically chooses the appropriate aperture for the scene.
Disadvantages:
Since you're in charge of setting the shutter speed in this Mode, you'll need to make sure your camera can choose the right f-stop to achieve the desired exposure. Having a lens of a certain type at your disposal is crucial. Most cameras can shoot at extremely fast shutter speeds, but the resulting image will be underexposed if your lens does not have an aperture large enough to match it. If you're using a shutter speed of 1/4000 of a second and your subject's rate of movement calls for an f-stop of f/2.8, but your lens's widest aperture is f/3.5, your image will be underexposed. Another scenario would be shooting at f/22 with a shutter speed of 1/8000 of a second because that is the optimal exposure for the subject's rate.
When to use:
Use this Mode when you need to control the subject's motion in your photos. You should use a fast shutter speed if you want to capture every moment in sharp focus, but a slow one if you'd rather blur the motion. When shooting with a large mm lens, this Mode is also useful because it enables a fast shutter speed, which reduces the effects of camera shake. Some good shutter speeds to use when shooting in Shutter Priority are:
- Freeze frames at a rate of one thousandth of a second per second.
- The action of athletes captured between 1/500th and 1/1000th of a second later
- The flight of birds takes between 1/1000th and 1/2000th of a second.
- People walking at a pace of one-fiftieth of a second
- 1/30th of a second to 125th of a second for panning moving objects
- 1/8 of a second for blurring effects caused by fast-moving water
- Water that is moving slowly and blurring between 0.5 and 1 second
Aperture Priority (Av – Canon) (A – Nikon)
With the camera set to Aperture Priority, you decide on the aperture and ISO, and the camera then selects the shutter speed it thinks is best for the exposure you've set. It gives the photographer the flexibility to take pictures without having to constantly monitor the exposure levels for each and every shot.
Advantages:
Aperture Priority is the most widely used shooting mode among photographers. This is primarily due to the fact that it enables the photographer to control the elements of an image that are brought into sharp focus. And in the vast majority of instances, the component that you have in Focus will be the factor that determines whether or not your image is successful.
Disadvantages:
In low-light conditions, your camera may choose a slow shutter speed, resulting in a blurry picture. This fuzziness could have been brought on by subject movement or by camera shake.
When to use:
DoF (depth of field) can be adjusted more precisely in this Mode. A shallower depth of field is achieved by increasing the aperture, which allows more light into the camera. On the other hand, a shallower depth of field will result from a smaller gap because less light will reach your camera sensor. Any adjustment you make to the aperture will also affect the shutter speed, so keep that in mind. Shutter speeds must be faster when more light is streaming through wider openings and slower when less light is shining through narrower crevices.
The following f-stops are some suggestions for shooting in Aperture Priority:
- Landscapes: use an aperture of f/8 or higher for more depth of field
- When shooting portraits, use a wide aperture (f/2.8) to achieve a shallow depth of field and blur the background.
- Macro: f/8 or higher for a greater depth of field
Manual (M)
In Manual Mode, you can adjust the shutter speed and aperture separately from one another. There won't be any automatic camera settings. Your camera's internal light metre will suggest an exposure setting based on the conditions it detects. Nevertheless, you can adjust the shutter speed and aperture to achieve the exposure you think is best for the image you're making.
Before switching to manual Mode, you should be familiar with the exposure triangle (comprising shutter speed, aperture, and ISO) and how each element affects the final image. Are you just now starting to think about booking a wedding photographer? Check out our range of Mornington Peninsula wedding photography here.
Advantages:
When shooting in this mode, you can do whatever you want with the picture you're taking.
Disadvantages:
There are many opportunities for artistic expression when shooting in this Mode; however, you must always double-check the exposure of your photographs, especially when working with changing lighting.
When to use:
Once you've learned the ins and outs of this Mode and how the various settings affect one another, you'll likely never use any other. Here is a rundown of some examples of shots that are better taken in Manual mode:
- Photography taken at night
- Close-up or macro photography
- Taking Photos with a Lot of Time Between Shots (star trails, waterfalls, car trails)
- Portraits that are posed (meaning that the subject is not moving, the light is not changing, and the photographer is not moving)
- HDR (bracketed images to merge later)
Scene Modes
Scene mode is very similar to the Auto setting. To get the best possible shot of your subject, simply tell the camera what you plan to shoot, and it will adjust its settings accordingly. Different camera models may offer slightly different scene modes, but here are some of the most frequently used ones:
- When you set your camera to sports mode, the ISO will be increased and the shutter speed will be quick so that you can catch every exciting moment as it happens.
- An increased depth of field (DOF) is achieved by using a small aperture and disabling the flash when photographing landscapes.
- The camera will leave a wide aperture open when taking a portrait, blurring the background. For this setting, some cameras will also make use of facial recognition technology.
- When set to macro mode, the camera will automatically select a small aperture to maximise depth of field.
- Benefits These Scene modes, like the Program mode, are great for learning how to use your camera. In most cases, they'll be more successful than shooting in the automatic mode.
Disadvantages:
Although these parameters have the potential to generate visually appealing images, they are not necessarily stable or predictable.
When to use:
Take advantage of these scene modes as a jumping-off point for learning your camera and developing your photographic eye. Although these scene modes are an improvement over Auto mode, they should still be used as a last resort.
Which Model Performs Best, Then?
The choice of which Mode is most convenient for you to use is entirely up to you. But let's say you're shooting in Auto, Scene, or Program mode and you want to learn how to set exposures using the exposure triangle on your shutter to improve your photography skills. If that's the case, knowing how to use aperture and ISO to your advantage will help you take better photos. It's common knowledge that the two shooting modes most frequently used by working photographers are Manual and Aperture Priority. Remember that everyone, even the most seasoned veterans, once had to start somewhere. Regardless of which camera you end up purchasing, may you have a wonderful time using it! If you’d like to work with professional photographers for your wedding, book with us at Wild Romantic Photography.
Conclusion
If you've ever been told that you should only shoot in manual mode, you might want to reconsider. If you're still feeling overwhelmed by your camera's other settings, taking the plunge into Manual Mode may seem like a good idea. Understanding each Mode will help you get more of the exposures you want. Manual Mode Is Different Than Manual Focus! Each camera has five primary settings for taking pictures.
Whether the camera is in Manual or Automatic mode, you can still toggle between Autofocus and Manual Focus. No, "Professional Mode" is not an abbreviation for the capital letter "P." This diagram will explain why you shouldn't use the icon modes if you're serious about developing your skills as a photographer. Assuming you want a shallow depth-of-field, portrait modes set the aperture to a low value automatically. Anyone with aspirations of becoming a professional photographer should avoid using the auto setting.
If you switch to Auto, the camera will make all the choices for you. This entails adjusting the ISO, shutter speed, aperture, and focus mode and points. This is a great temporary setting for beginners to experiment with while they figure out the basics of digital photography. When the camera is set to Program Mode, the photographer doesn't have to worry about figuring out the best ISO, aperture, or shutter speed settings because the camera will do it for them. You can adjust the focus, drive, and white balance, but not the exposure, with this function.
On the dial, it appears as a "P," which serves as a handy reference. When shooting in Shutter Priority Mode, the shutter speed is under your control while the camera determines the best aperture for the shot automatically. You can blur motion by using a slow shutter speed, or you can freeze it by using a fast one. In photography, Aperture Priority is the default setting and is used by the vast majority of photographers. The photographer is then able to decide exactly what in the shot will be in sharp focus.
A larger aperture allows more light to reach the sensor, while a smaller one produces a shallower depth of field. Putting your camera into sports mode will increase the ISO and quicken the shutter speed, allowing you to snap photos of every thrilling moment as they unfold. There may be slight variations in scene modes available across camera models, but here are a few of the most popular ones. Macro settings on a camera cause the aperture to be narrowed to maximise focus. Though an improvement over Auto mode, these scene modes should only be used in extreme circumstances. Professional photographers typically switch between Manual and Aperture Priority modes.
Content Summary
- There are scenarios in which shooting in manual mode is optimal, but there are also those in which it is not.
- However, you should practise shooting outside the green box if you are new to photography or want to improve your abilities beyond Auto mode.
- If you've ever been told that you should only shoot in manual mode, you might want to reconsider.
- Understanding which Mode is most appropriate for a given situation improves your chances of achieving the desired results.
- If you're still feeling overwhelmed by your camera's controls, attempting shots in Manual Mode may seem like an even greater leap of faith.
- You should start by getting a firm grasp on the fundamentals, then slowly and methodically working your way forwards from there.
- Having practised with the camera and learned the basics, you are now prepared to use Manual Mode.
- As an alternative, they select the shooting mode that will produce the best results.
- With the luxury of time to shoot, review, and retake any underexposed photos, Manual Mode is where you want to be.
- Manual Mode Is Different From Manual Focus
- This is a common misconception among new photographers, who often think that shooting in Manual Mode automatically entails using Manual Focus.
- Taking clear photos requires switching to manual focus mode on your camera.
- It is recommended that you use Autofocus whenever possible and let the camera handle Manual Focus. However, you can switch between Autofocus and Manual Focus regardless of whether the camera is set to Manual or Automatic mode.
- The Biggest Problem with Using the "Icon Modes" on Your Camera.
- These modes are referred to as "icon modes" by photographers because they provide visual representations of the various shooting situations.
- This diagram will explain why you shouldn't use the icon modes if you're serious about developing your skills as a photographer.
- Your relatives have decided that you should be in charge of taking official photos at the reunion because you have recently improved your photography skills and purchased a state-of-the-art camera.
- By default, most cameras' portrait modes set a small aperture, assuming you want a shallow depth-of-field for your portrait shot.
- If you want to learn how to take professional-quality photographs, you shouldn't use the tiny automatic icon modes like landscape, portrait, or sports.
- When you switch to Auto mode, the camera's pop-up flash, as well as the shutter speed, aperture, ISO, and white balance, will be automatically set and activated.
- To begin taking pictures in this Mode, simply press the shutter button.
- The problem is that these auto modes don't always produce the desired results in terms of mood and style.
- This is just a stopgap measure while you get the hang of using your camera.
- Disadvantages: Auto settings don't always produce the best results, especially in low light.
- Use it when: If you just want to point and shoot with your camera, this is the mode for you.
- After Automatic, the next level of control is Program.
- When the camera is set to Program Mode, the photographer doesn't have to worry about figuring out the best ISO, aperture, or shutter speed settings because the camera will do it for them.
- Program Mode is an excellent educational tool.
- Program mode is the best choice if you need to take a picture quickly but don't have time to fiddle with the camera's settings.
- If you're stuck for ideas, the light is shifting too quickly, the subject is moving too fast, or you're taking too long, pull up Program and let it do the heavy lifting for you.
- While in Program mode, your camera's shutter speed and aperture will be determined automatically, but you will still be able to manually adjust ISO, exposure compensation, white balance, and flash.
- Use it when: Changing to this Mode is a great first move towards becoming an expert with your camera's controls.
- Priority Shutter (Canon TV) (S – Nikon)
- The camera's f-stop is calculated automatically when you switch to Shutter Priority, letting you focus on controlling shutter speed.
- When using a flash indoors, you shouldn't worry about capturing as much of the ambient light as possible because that would be too simple for this level of photography.
- Photographing a moving subject, such as a bicyclist or a moving car, with a slow shutter speed and the camera set to Shutter Priority Mode allows you to blur the background without changing camera settings.
- If you switch to Shutter Priority, you'll have control over the shutter speed while the camera determines the best aperture settings for you based on the scene.
- Having a specific lens available is essential.
- While the majority of cameras boast impressively fast shutter speeds, the resulting image may be underexposed if the lens was not equipped with an aperture large enough to compensate.
- It's impossible to get a properly exposed photo with a lens that has a maximum aperture of f/3.5 and a shutter speed of 1/4000 of a second, because the faster shutter speed will cause the subject to blur.
- Use this Mode whenever you want precise command over your subject's movement in the frame.
- In Shutter Priority mode, some recommended shutter speeds are:
- The frames should be frozen at a rate of one thousandth of a second per second.
- Canon's Av-Priority Aperture Mode (A – Nikon)
- In Aperture Priority mode, you choose the aperture and ISO, and the camera chooses the shutter speed it thinks is best based on those two parameters.
- It's important to remember that changing the aperture will also change the shutter speed.
- Nevertheless, you can control the exposure by adjusting the shutter speed and aperture to the settings you deem most appropriate.
- The exposure triangle, which consists of shutter speed, aperture, and ISO, and their respective effects on a photograph, must be thoroughly understood before switching to manual Mode.
- The benefits of shooting in this mode include complete creative control over the final image.
- While shooting in this Mode opens up a wide range of creative possibilities, it also requires more careful attention to exposure, particularly in low-light situations.
- In most cases, you won't need to use any other Mode once you've learned how to get the most out of this one and how the different controls interact with one another.
- Tell the camera what you intend to shoot, and it will automatically adjust the settings to produce the highest quality image possible of your subject.
- By decreasing the aperture size and turning off the flash, DOF can be increased in landscape photographs.
- Macro settings on a camera cause the aperture to be narrowed to maximise focus.
- Advantages These Scene modes, along with the Program mode, are perfect for getting a feel for your camera and learning its controls.
- They will be more effective than the automatic setting in the vast majority of situations.
- Use it when: If you're just starting out with your camera, I recommend using one of the scene modes as a starting point.
- These scene modes are a step up from Auto mode, but they shouldn't be used unless absolutely necessary.
- It's up to you to decide which Mode is the most practical for your needs.
- But let's say you want to improve your photography skills by learning how to set exposures using the exposure triangle on your shutter while shooting in Auto, Scene, or Program modes.
- If that's the case, then learning to manipulate aperture and ISO will improve your photography skills.