Which Aperture Is Best for Portraits?
It might be challenging for a rookie photographer to get good shots of people. Beautiful portraits are always a treat to look at, whether they are of loved ones or random strangers. One of the best parts of being a photographer is the immediate gratification of creating a finished image, therefore it's frustrating when technical difficulties prevent us from doing so.
This being the case, we have compiled a list of technical tips that should help you take better portraits and make the best use of your camera's features. If you need advice on your wedding photography, check out our photography packages and services at Wild Romantic Photography.
Choosing the proper aperture for portraiture doesn't have to be complicated, but there are some guidelines to follow if you want your photos to look great. In the paragraphs that follow, we shall supply you with specifics. Here, we'll go over the appropriate aperture settings for various portrait types, so you can go into your next photoshoot with confidence.
In other words, what size of hole would work best? The number of times this enquiry is made could surprise you. Similarly to how your kindergarten teacher informed you and your classmates, "everyone of you is distinctive and different in your own way," the same can be stated about proper of aperture.
What Does The Term "Aperture" Mean?
Let's start with a basic definition of aperture. An aperture can be an opening, a hole, or a space between two objects. That's what most people mean when they use the phrase.
In a camera, the aperture is the size of the diaphragm opening that controls how much light reaches the film or sensor. Your camera is the only one with this specific function. The creation of a picture through the combination of a highly radiant energy source and a very light-sensitive surface is known as photography, which can be both an art form and a method (such as an optical sensor or film).
Aperture is one of the most important tools you have while taking photographs, which you could say is the procedure of catching light. By using this device, you may manage and even adjust the lighting conditions in which your photos are taken.
Aperture, or the opening of the diaphragm of the lens, determines how much light the camera can gather. A smaller room will have a lower light transmission rate than a larger one. This is measured in "f-stops," which stands for "f-number." There are a variety of numbers and symbols, such as f1.2 and f11, that you are likely to see. Although it seems paradoxical, the lower the number, the more light the camera is able to capture. The adage "little number = large opening" applies here.
First, before you say "Awesome! Put it on f1.2 for me, thanks "You should be aware of the trade-offs you're making. Every choice you make as a photographer will have consequences down the line; the third rule of Newton holds true even in the art of photography. By adjusting the aperture, we may control the depth of field. When the f-stop is decreased, the depth of field decreases along with it. Our exclusive range of Melbourne wedding photography will help you not miss a thing on your wedding day.
How Do I Determine The Ideal Aperture For Taking Portraits?
Taking photographs of individuals works best at apertures between f/2 and f/2.8. When photographing a number of subjects at once, use an aperture of f/4. If there are greater than two persons in the shot, use an aperture of f/5.6. You should not restrict yourself to only these slits; additional considerations should also be made. You can't go wrong, though, if you follow these broad principles and expect excellent outcomes.
As unfortunate as it may be, no single aperture stands head and shoulders above the rest when it comes to portrait photography. In order to get the best results from your camera, you'll need to adjust the aperture based on the subject matter you're shooting. Let's take a closer look at some specific shooting situations and the apertures we suggest for them:
The Ideal Depth Of Field For Private Portraits
The recommendation that you use an aperture of f/2 to f/2.8 remains unchanged; however, you should not treat these values as absolutes but rather as guidelines or a form of insurance. Since depth of field suffers when the aperture is wide open, it is preferable to utilise an aperture setting that is just a hair less than the maximum that your lens can produce. This will make sure that everything is taken care of.
With an aperture of f/1.2, you can take clear pictures of someone's eyelashes while obscuring their iris. When shooting with a longer focal length, the depth of field isn't as shallow, so you can get away with using higher apertures. A 35mm prime lens, for instance, can be stopped down to an aperture as wide as f/1.8 while still capturing a sizable percentage of the scene in sharp focus.
One Disclaimer
Sharpness drops off at wide open in certain lenses, especially less costly zooms and even some primes. As a result, it's best to play it safe and not always use the maximum available field of view when taking pictures. It goes without saying that every lens is unique, so try out a few different apertures until you find one that works for you.
How To Choose An Aperture For A Group Portrait When There Are Few People In It
Numerous aspects influence what aperture setting is best for private gatherings. Even while f/4 is a fantastic starting point, there are other considerations to make to make sure your photos are the best they can be. (One of the reasons f/4 is effective is because it provides some wiggle room in terms of depth of field while still generating top-notch results.) When photographing a specific topic, it is crucial to capture a clear image of their eyes or, at the at least, the gaze that is aimed at the camera.
However, having everyone's eyes in clear focus is ideal when dealing with smaller groups. As a result, if you want a deeper depth of field, you'll need to decrease the aperture. It's common practise to stand further back from a group of people you're photographing so that you can get a wider depth of focus. An aperture gap of f/4 provides a wonderful mix between sharpening the subject or blurring the background, allowing you to give your customers photographs that are capable of being framed.
Remember that you can use apertures larger than f/4, but the subjects in the photo will need to be in perfect alignment with one another. Someone is likely to be out of focus if they are not. Apertures such as f/3.5 and f/2.8 put you in danger, and you may not realise it until it's too late. If the distance between your subjects is too great, not even stopping down to f/4 will help.
When photographing small groups, f/4 is typically my go-to aperture. However, it's always a good idea to experiment with shooting at smaller apertures. Otherwise, things could grow chaotic to the point where you don't have time to double-check your shots and might not realise that you failed to get everyone in focus until you've imported the images into Photoshop.
Take some shots at f/5.6 even if you're very sure the one you captured at f/4 turned out perfect. Moreover, it is highly recommended that you make an effort to be more complete. However, keep in mind that the greater the number of individuals in the image, the less chance it is that everyone will be sharp.
What Lens Aperture Is Ideal For Taking Pictures Of Big Groups?
It makes sense that a larger gathering would require a narrower entrance. Unfortunately, things aren't quite that simple. Because of its narrower opening, a smaller aperture lens lets in less light. In this case, you'll want to increase the ISO and slow down the shutter speed. Additionally, narrowing the gap helps to maintain a sharp background, which means you can't provide your customers the plush feel they seek.
Because of this, f/5.6 is a great starting point for photographing large gatherings. But there are major exceptions to this norm as well. If you can have everyone standing (at least roughly) in line, you can use a larger aperture. Of course, this isn't always practical, especially when kids are involved because they're naturally less predictable than adults. Nonetheless, play around with wider apertures if you get the chance.
Assuming, of course, that you've already shot some low-aperture samples to cover all your bases. Unlike when photographing individuals, field depth is less of a concern when photographing large groups because of the need to stay at a substantial distance from the subject.
Be careful while using a wide aperture, but know that it's the greatest option when you need to let in a lot of light because it creates more space between the sensor and the lens.
What Aperture To Use When Taking Close-Up Photos?
Taking a portrait using a macro lens or close-up filter forces the photographer to get very near to the subject. Why? This is due to the fact that the depth of field is incredibly limited. It is advisable that images be captured in well-lit areas with an aperture as narrow as f/5.6, as larger openings amplify the issue. Wide apertures work well for motionless macro subjects; however, when photographing humans, particularly young children, who are always on the move, it is useful to provide some field breathing room depth. Planning your dream wedding and don’t want to miss out on the special moments on your big day? Worry no more, Wild Romantic Photography has you covered.
Optimal Camera Parameters For Taking Portraits
Adjust The Focus And Exposure So That The Eyes Of Your Subject Are Clear.
Out of our about five senses, sight is by far the most important. As a result, it doesn't matter how many individuals are in the photo, the eyes must be sharp. Follow these steps to ensure your subject's eyes are engaged.
To get started, let's use the autofocus setting that just uses one point. For this reason, we like to avoid the "guessing camera" options wherever possible. Focus on the nearest eye by narrowing your attention on that area. Ensure the focus is set before snapping the picture, and adjust the composition a little if you need to. After taking some shots:
- Make sure your eyesight is as good as new. The default LCD screen image is not adequate for checking the edge.
- You can begin there, but you need to use the zoom in order to keep the eyes from wandering.
- If the shots weren't accurate the first time, take another shot.
Adjusting the focus on your camera takes some practise and reading the manual to fully grasp. Your camera's settings might not be optimal for taking portraits, and this could be the source of the problem. Some of the options that can improve your portrait photography are discussed here.
Portrait Photography Shutter Speed
The internet is replete with how-to manuals covering topics like as what shutter speed is safe for hand-held photography, so you shouldn't have any trouble finding information. The majority of these resources fail to account for the reality that you are capturing a living thing that is almost certainly going to be in motion.
You can't justifiably utilise a 1/60 shutter speed because you're using a 50mm prime lens. It's possible that you'll have to boost the shutter speed to compensate for your subject's motion. Try out different approaches without worrying about failing. A faster shutter speed should be used if the eyes in your portrait are blurry (this is assuming that you have already properly adjusted the focus).
As an example, a fast shutter speed is essential for photographing a toddler because they are constantly on the move. As a photography business, one of the most difficult subjects for us to capture is children. The appearance of their constant mobility can be lessened by using quicker shutter speeds.
Optical picture stabilisation and other technological improvements won't save you this time; stop trying. While stabilisation can assist mitigate blur from the photographer's hands, it does little to counteract movement in the subject. This doesn't mean you should turn off image stabilisation, but having it isn't a guarantee that portraits will turn out sharp. Looking for a Yarra Valley wedding photographer? Look no further! Wild Romantic Photography has you covered.
Outdoor Portrait Photography: Some Advice
To get the finest possible results from taking photographs outside, it is usual practise to utilise an extremely shallow depth of field and deliberately blur the background (as opposed to studio portrait photography, where that is less of a concern). How do you get that shallow depth of field that defines the "shallow focus" effect?
To put it simply, an open aperture is what you need. If you're interested in photography but don't know where to begin, try switching to portrait mode using the mode dial on your camera. (More specifically, it uses a wider aperture and a faster shutter speed, decreasing the likelihood that your images will be blurry and increasing the likelihood that they will have a soft, dreamy background with gorgeous bokeh.)
More experienced photographers should do the same, except they should use aperture priority or manual mode and set the lens's widest aperture, or as close to it as possible. Once again, the result is an image captured with a narrow depth of field and a less obtrusive background. It may seem like simple advice, but if you aren't already doing it, you should start. The visual appeal of your images may be greatly enhanced if you do so, as doing so will likely cause viewers' eyes to be drawn to the focal point of the shot. Of course, like any photographic method, it requires forethought and, of course, there are always exceptions to the rule.
Optimal Focal Length Selection
If you want to take close-up portraits, we wouldn't recommend using a lens with a 50-millimeter focal length. Exaggerated perspective, which occurs when you go close enough for a half-body or headshot, will make the subject's nose look larger than it actually is, altering the impression of depth in the photograph.
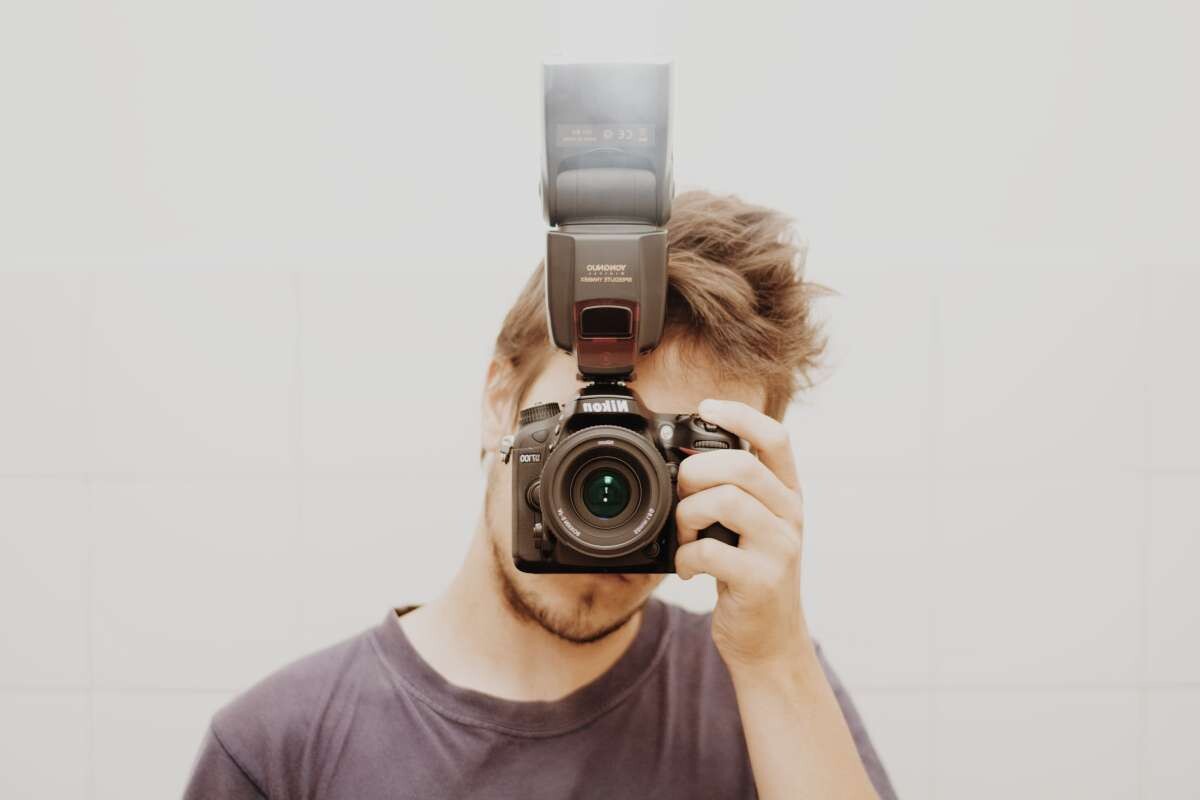
Taking images of groups of people or full-length portraits with a 50mm lens is a great idea, but we wouldn't use it for portraits of a single subject. (It's not that a 50mm lens never works; just look at the first picture in this post for proof.) However, if you want to capture a flattering close-up picture, we wouldn't recommend using a 50mm lens.
However, you've made a brilliant decision by opting to use the telephoto zoom lens at your disposal. Focus on shorter focal lengths, starting at 100 millimetres, and working your way up to longer ones. The farther you step back, the more perspective compression you'll have, which can have a really pleasing effect on people's looks. It also creates more space between you and your subject, which is very helpful when working with amateur models who may feel uncomfortable having the lens so near to their face.
It's worth noting that the bulk of telephoto zooms are made to be offered at cheap costs, which is a feature and a flaw of the industry. Despite their low price, these lenses might not have the same maximum aperture as a prime lens of equal price. On the flip side, their aperture size could be larger.
To achieve background blur, position yourself as close to your subject as you can while still maintaining a sufficient distance, and utilise the longest focal length available for your lens. If you adjust your primary 55-200mm lens to 200mm with an aperture of f/5.6, you can get a decent headshot of a toddler. Double check the subject's eyes for any signs of smudging, and if you can't get a fast enough shutter speed to freeze action, consider bumping up the ISO instead. It's possible that your camera's noise reduction capabilities are greater than you realise.
Preferences For A Larger Group Photo
Sometimes it's hard to get everyone in the shot when you're taking a group photo. How and where should you frame your photograph's subject? Instead of waiting for the people in the group to arrange themselves into a pleasing composition, you may take matters into your own hands by posing them in a creative manner. People will naturally create some distance between themselves, so it's important to urge them to approach as close as they can.
Make sure those at the back of the line put their heads between those in front of them (not just stand up taller). If your subjects are all around the same distance from the plane of focus, you won't need to utilise as tiny an aperture, and you'll have more leeway in determining the depth of field you can obtain.
You should use the 50mm lens now, because that's what it was made for. Focusing on the nearest person's eye at an aperture setting of f/8 is a suitable starting point if you don't yet have enough experience to properly comprehend the depth of field of your system. If you have not had enough practise yet, this is a great place to start. Carefully select the shutter speed, which may necessitate increasing the ISO if the default shutter speed produces blur you do not want to capture.
Snap a picture, then zoom close on it in your image editing software to see how crisp it really is. Make the necessary adjustments to the aperture and retake the shot if the field depth is not satisfactory. After a few trial shots, you'll figure out how to adjust the camera so that everyone seems like they're having a wonderful time; then, the real job can begin.
Using the tips in this article as a guide, you should be able to find the sweet spot for your camera when shooting portraits. From the shutter speed to the method of focus, this will allow you to achieve optimal results. It takes some effort to take great pictures of individuals, but the pictures and memories you'll have as a consequence are priceless. At Wild Romantic, we have the best wedding photographer in Mornington Peninsula to capture every single moment on your wedding day.
How Do You Decide Which Lens Aperture To Use?
The solution to the question of what aperture setting is best is as follows. Pick the option that provides the most immediate benefit to you. You are still expected to get the shot if the sun suddenly goes down when you are photographing a wedding. Even though it has an insanely small depth of focus, that f/1.2 aperture just saved your arse. However, if you're out in the desert and you want to shoot a wide-angle image of the scenery while still capturing all of the wonderful little details, you'd better bust out the tripod and shut that puppy down! The thing you need most is here!
These are not even the unchangeable rules of the land. When you've gotten used to manipulating aperture in different situations, you'll find that it's one of the most rewarding aesthetic decisions you can make, adding depth and personality to your images while also serving as a compositional element.
Focus as much time and energy as possible for the time being on training and discovery. You've been shooting for a while, yet you still find time to refine your skills and have fun with it. To organise your thoughts, you may find it helpful to categorise them into fixed and changeable components. " If I keep the dial at f16, what will happen?" Until you leave f16, you can't access the other functions. The positive outcomes of such predicaments may surprise you. Such exploration and experimentation have been crucial in my development as an artist, helping me refine my approach to and appreciation for this medium.
Conclusion
Aperture selection need not be difficult, but there are some rules to follow if you want your portraits to turn out well. You could define photography as the process of capturing light, and one of the most crucial tools at your disposal is aperture. How much light a camera is able to capture is dependent on its aperture, or the size of the opening in its lens' diaphragm. The f/4.6 aperture is ideal for group shots. In order to get the most out of your lens in terms of depth of field, you should use an aperture that is just a little smaller than its maximum.
It's possible to photograph someone's eyelashes in sharp detail while completely blurring their eyes thanks to an aperture of f/1.2. As the depth of field isn't as shallow when shooting with a longer focal length, wider apertures can be used. In most cases, f/4 is the aperture we use for photographing individuals or small groups. When there are more people in a photo, it becomes more difficult to get clear pictures of everyone. If you can get everyone to stand in a straight line, or at least quite close to one another, you can use a bigger aperture.
When utilising a close-up filter or macro lens for a portrait, the photographer must come in extremely close to the subject. Taking pictures with an aperture as small as f/5.6 is recommended only while shooting in bright environments. Here are a few ways to upgrade your portrait photography skills. For a portrait shot with a 50mm prime lens, a shutter speed of 1/60 is too slow. If the eyes in your portrait are out of focus, try using a faster shutter speed.
This is not a case where technology advancements like optical image stabilisation can help. We advise against using a lens with a focal length of 50 millimetres if you intend to photograph close-up portraits. Prioritize shorter focal lengths, say, 100 millimetres and under. The more you back up, the more your viewpoint will be compressed, which may be a very nice visual effect. When taking a shot, where and how should you place the subject?
Setting the aperture to f/8 and focusing on the nearest person's eye is a good place to begin. Once you've taken a few practise photos, you'll know how to set up the camera so that everyone seems like they're having a great time. When taking a portrait, how do you choose the appropriate aperture for the lens? You'll be able to get great photos no matter what shutter speed or focusing technique you use.
Content Summary
- Taking flattering portraits of individuals might be difficult for a beginner photographer.
- Being a photographer is great because of the immediate reward of seeing a completed image, however it's annoying when technological issues prohibit us from accomplishing our job.
- Consequently, we have created a list of technical pointers that should aid you in improving the quality of your portrait photography and making the most of your camera's capabilities.
- Aperture selection need not be difficult, but there are some rules to follow if you want your portraits to turn out well.
- For your next portrait shot, we'll go over the ideal aperture settings for several scenarios.
- The amount of light that reaches the film or sensor in a camera is determined by the aperture, which is the size of the diaphragm opening.
- Take control of the lighting in your images by adjusting the settings on this handy gadget.
- How much light a camera is able to capture is dependent on its aperture, or the size of the opening in its lens' diaphragm.
- Strange as it may sound, the lower the number, the more light the camera can take in.
- Please set the aperture to 1.2. " Think carefully about the costs and benefits of your decisions.
- Aperture settings allow us to manage depth of field.
- Shallower depth of field results from a smaller f-stop.
- Use an aperture of f/4 when photographing multiple subjects at once.
- When shooting different subjects, you'll want to experiment with different aperture settings to see what works best.
- It's possible to photograph someone's eyelashes in sharp detail while completely blurring their eyes thanks to an aperture of f/1.2.
- As the depth of field isn't as shallow when shooting with a longer focal length, wider apertures can be used.
- For example, at f/1.8, the aperture of a 35mm prime lens allows for clear capture of a significant portion of the picture.
- When working with smaller groups, though, it's more important than ever that everyone's eyes be sharp and focused.
- Therefore, if you're after a greater depth of field, stopping down the aperture is the way to go.
- When photographing a large group of people, it is normal practise to move back to increase the depth of field.
- Do keep in mind that if you want to utilise an aperture smaller than f/4, your subjects will need to be in dead-on alignment with each other.
- In most cases, f/4 is the aperture I use for photographing individuals or small groups.
- However, trying out different aperture sizes is usually a smart idea.
- Even if you're positive that the shot you just took at f/4 is the best possible version of the scene, you should try shooting at f/5.6 as well.
- But remember that the more people there are in the picture, the less likely it is that they will all be in focus.
- A lower aperture lens has less light entering it since the opening is smaller.
- Increasing the ISO and decreasing the shutter speed will help in this situation.
- As such, f/5.6 is a fantastic baseline for photography large events.
- If you can get everyone to stand in a straight line, or at least quite close to one another, you can use a bigger aperture.
- However, experiment with larger apertures when you can.
- When utilising a close-up filter or macro lens for a portrait, the photographer must come in extremely close to the subject.
- This is because there is very little depth of field.
- Get your subject's attention by following these instructions.
- Focusing your camera properly requires some practise and familiarity with the user manual.
- Maybe you're not using the best settings for snapping portraits with your camera.
- Here are a few ways to upgrade your portrait photography skills.
- Photographic Portraiture Rate of Shooting
- You shouldn't have any trouble locating resources online, such as guides on what shutter speed is appropriate for hand-held photography.
- A 1/60 shutter speed is too slow to utilise with a 50mm prime lens.
- To account for the subject's mobility, you may need to increase the shutter speed.
- Don't be afraid to try and fail while learning new skills.
- You shouldn't disable image stabilisation because of this, but you should know that it won't ensure sharp portraits even if you use it.
- Where does the "shallow focus" effect come from, and how can I achieve it?
- You need, in a nutshell, a wide opening.
- If you want to get into photography but don't know where to start, consider setting your camera to "portrait" mode.
- Again, this leads to a picture being taken with a shallow depth of field and a less distracting backdrop.
- If you do this, viewers' attention will be more likely to be pulled to the subject of your shot, which can substantially improve the aesthetic appeal of your photograph.
- Choosing the Appropriate Focal Length
- We advise against using a lens with a focal length of 50 millimetres if you intend to photograph close-up portraits.
- The use of the telephoto zoom lens, however, is a brilliant move on your part.
- To get a blurred background, get as close to your subject as possible without getting in the way, and use your lens's longest focal length.
- Obtaining a respectable headshot of a young child requires setting your primary 55-200mm lens to 200mm with an aperture of f/5.6.
- In order to acquire a clear shot, again check the subject's eyes for smudges, and if you can't achieve a quick enough shutter speed to freeze activity, try increasing the ISO.
- There could be more to your camera's noise reduction capabilities than you're aware of.
- Desires for More People in the Group Photo
- When taking a group photo, it might be challenging to include everyone.
- You can take matters into your own hands by posing the group in an artistic style instead of waiting for them to organise themselves into an attractive composition.
- You won't need to use as small an aperture and have more control over the depth of field you can achieve if your subjects are roughly the same distance from the plane of focus.
- If you don't have enough experience to fully understand the depth of field of your system, focusing on the nearest person's eye at an aperture setting of f/8 is a good place to start.
- Select the shutter speed with care; if the standard shutter speed results in blur you don't want to capture, you may need to increase the ISO.
- If you're unhappy with the field depth, try adjusting the aperture and taking the photo again.
- You should be able to identify your camera's optimal shooting position for portraiture by following the advice in this article.
- You'll be able to get great photos no matter what shutter speed or focusing technique you use.
- Following is the answer to the question of what aperture setting is optimal.
- If you want to maximise your immediate happiness, go with the first option.
- It doesn't matter if the sun suddenly sets when you're photographing a wedding; you still need to get the shot.
- You're in the clear thanks to that f/1.2 aperture, despite the fact that its depth of field is laughably shallow.
- However, you'd better break out the tripod and lock that puppy down if you're out in the desert and you want to snap a wide-angle photograph of the terrain while still capturing all the amazing little details!
- Moreover, these are not the immutable laws of the state.
- When you've mastered the art of controlling aperture in a variety of settings, you'll realise that it's one of the most satisfying aesthetic choices you can make, enriching your photos with depth and character and lending a hand with the composition.
- For the time being, you should put as much effort as possible into learning and exploring.
- You've been in the shooting sports for quite some time, yet you still make time to improve your technique and enjoy yourself.
- The time spent probing and playing around has been invaluable to my growth as an artist, allowing me to hone my approach to and appreciation of this medium.