The Ultimate Guide To Photography Lighting
A well-lit scene is essential for a successful photograph. How bright or dark something is, as well as the tone, mood, and overall vibe, may all be altered by the lighting. Manipulating light is essential for achieving desirable results in terms of texture, colour saturation, and overall brightness. Accurately distributing shadows and highlights allows you to create stylised, professional-looking photographs.
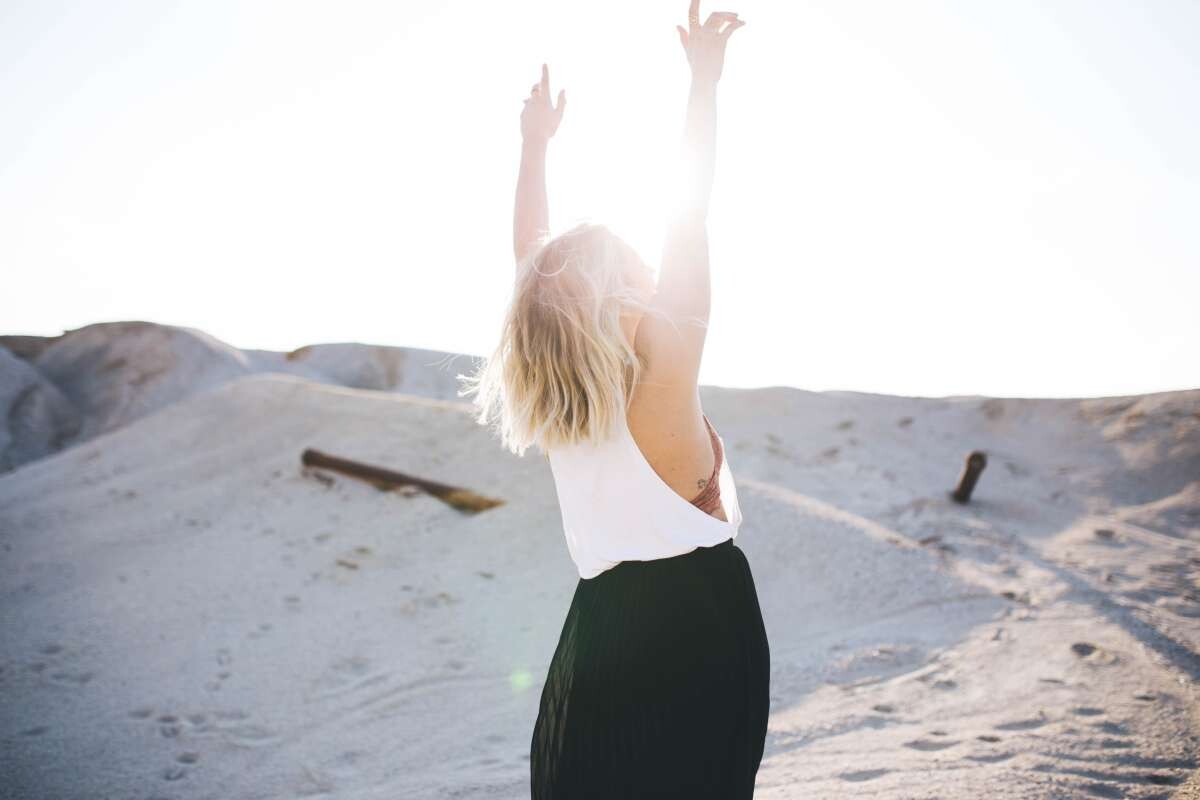
A subject's illumination is modified by the kind of its light source. Lighting that comes from behind creates a perfectly even surface. It casts shadows on the wall behind you. The dramatic effect of side lighting comes from its ability to reveal the subject's contours while casting just some of them in darkness. The lighting in a Rembrandt painting is a good example. Modified appearance of backlit subjects. This time, the issue's side is illuminated by the sun, making for a striking image.
If you need advice on your wedding photography, check out our photography packages and services at Wild Romantic Photography.
Learn the fundamentals of photography to advance your career. A diffuser softens the light, so it doesn't create sharp shadows or highlight imperfections on the subject. It diffuses and naturalises man-made illumination. Light is dispersed in numerous ways. Light modifiers like as softboxes, umbrellas, and heat-resistant sheer fabric are effective.
It is possible to direct the way light hits a surface. Photography reflectors and diffusers can alleviate the problem. Erosion in reflection Adjust the direction and intensity of a light source to draw attention to a certain object. Spotlights' beam widths and trajectories can be modified with the use of light shapers.
Light's Role in Photography
Professional photographers have a deep understanding of how changing camera parameters affects the final image. The mood of a photograph can be drastically altered by adjusting the lighting. A photographer will be able to capture the perfect shot if they consider how the light will affect the subject.
Photos are only as good as their lighting. It doesn't matter if he knows the physics behind photography light or not, a photographer nevertheless uses it. A dark, fuzzy picture that lacks detail. Photographers use different light ratios to create visual contrasts. The ratio of light hitting the bright and shadowed areas is called the lighting ratio. Photographers have a thorough understanding of how to manipulate their cameras' light settings.
There is a noticeable difference in how the picture looks in various lighting conditions. A photograph can be taken if the photographer is aware of the effects of light.
Choosing the right wedding photographer in Melbourne to capture every moment on your wedding day. Following are various factors that help you to get the best shot:
Light Quality
Whether you're shooting on location or in a controlled studio environment, the quality of the light is a crucial consideration. One of the talents necessary to enter the field of professional photography is mastery of light and its manipulation. It is often possible to evaluate the visual impact of light by looking at the "impression" it creates in a photograph. To make the most of light in your shot, you must have a firm grasp on its qualities.
The intensity of a light source is expressed in terms of the number of lux it generates. It's a measure of how much light the photographer and the surroundings are reflecting back into the camera.
The colour of the reflected light from the photographer and the background.
The position of the performer's shadow, as well as the length of the shadows created by the three-dimensional props around him, are both affected by the direction of the light.
Light Characteristics
- Intensity, or Brilliance
- hue
- Heat or cold
Contrast this with the sensitivity required to deal with colour and temperature. The colour and temperature of the lighting in a room must be manually adjusted to account for the natural light coming in through the windows. Photography is the art and practise of recording visual stimuli, either on film or digitally. A photographer's ability to manipulate the length, intensity, and quantity of light in a shot is a key part of the craft.
Light from the Sun
Wherever possible, natural light should be used in place of artificial lighting. It takes a lot of talent to capture a beautiful shot while making the most of the available natural light. The photographer would do well to rely primarily on sunshine when taking pictures. When the sky is clear and the sun is shining, you can use natural light to take a wide range of images.
Clear, well-lit, and abundant detail are the hallmarks of midday photographs. Both when it is early light and when the sun is about an hour or two from setting, its beams have very different effects. Sunlight scatters and the colours radiate through the atmosphere at oblique angles when the sun is below the horizon. This is due to the sun being at a lower horizon.
Photography in Low Light
Beginning photographers may find it especially challenging to take images in low light. If you use a flash, the subject of your photo will look grey and washed out because of the bright light. However, if you don't use the flash, the photo will turn out grainy and fuzzy.
Low-light photography can be achieved by adjusting the camera's settings to compensate for the dim environment. It is possible to increase the ISO level, allowing the camera shuttle to utilise ambient light. If you want perfectly still photos, a tripod is your best bet.
Photography with Fill Light
Fill light, a photographic method used to brighten shadowed areas, requires the use of an extra light source. It is commonly employed to give a sense of depth to portrait photographs by emphasising the contrast between the foreground and background. You are planning the wedding of your dreams, and you don't want to miss out on any of the special moments that will take place on your big day. Worry no more, Wild Romantic Photography has you covered.
One of the most crucial parts of photography is lighting. This means that the object's brightness, colour vibrancy, and structure can only be optimally achieved through careful manipulation of lighting conditions.
There are eight different forms of photography lighting
It's an excellent idea for any photographer, whether they've been doing it for years or just starting out, to review the most popular, flexible, and widely utilised lighting techniques. This is true no matter how proficient you are at the pastime. To determine the best lighting for your project, think about the subject matter, the overall mood you want to create, and the notion you are trying to present. Wild Romantic Photography has the best range of services of wedding photography Yarra Valley. Check them out here.
You'll find descriptions and advice on using several of the most popular kinds of lighting below. When employed in photography, each type of light has its own distinct impact.
Flat light
For a flat lighting effect, the light source should be positioned so that it shines directly in front of the subject. A flat light is perfect for illuminating a face since it evenly illuminates the area and eliminates any shadows that may otherwise be seen.
Broad light
When using broad light, a sort of side lighting, the subject's face is tilted away from the camera. Therefore, the side of the face that is closest to the camera will have the most light, while the side that is further away will have less light. This sort of illumination is ideal for persons with very thin faces because it creates the illusion of a bigger face.
Short light
In this short-light portrait, the subject's face is angled perpendicular to the camera's line of sight, casting a shadow on the opposite side of the head. This narrow beam of light is the antithesis of wide illumination. This type of lighting is known for its ability to create the illusion of a slimmer face.
Remember that shadows tend to draw attention to flaws and uneven surfaces. This is something to bear in mind. Although wide light works wonderfully to bring out freckles, it also brings out other facial imperfections like acne scars and blemishes.
Find out how your subject feels about those flaws so you know if you should try to disguise them with different lighting or if you can get away with highlighting them in short light.
Split light
Split lighting, another variation on side lighting, is characterised by light coming in at a 90-degree angle from the side and lighting up the subject from above.
When taking a picture, if one half of the subject is lit and the other is in the dark, this is called split lighting. The shadow line, when focused on a particular face, follows the geometric centre of the chin, the nose, and the forehead.
You should think carefully about who you plan to photograph before selecting to employ split lighting, as it gives the appearance that your subject is tough and manly.
Backlight
The term "backlight" refers to a specific type of illumination in which the subject is lit from behind. While this effect is most noticeable in images shot during the golden hour, when the sun is low on the horizon and preparing to set, it may be achieved at any time of day.
Different types of backlight exist, such as natural light from a window behind your subject during the middle of the day or artificial light from a flash with a coloured gel for a more whimsical appearance.
While backlighting can create some striking visual effects, it also has some significant downsides, the most notable of which is the blurring or lack of detail in the subject of your shot. Because of this, I've discovered a few pastimes that I really enjoy.
We have an exclusive range of wedding photography Mornington Peninsula services. Check them out here.
SEMI-SILHOUETTE:
One of our favourite ways to use a backlight is to let in very little light overall. Doing so will create a lovely light that stands out beautifully against a dark backdrop. In low-light situations like this, We often underexpose the subject to boost contrast and create a tranquil, comfortable image.
REFLECTOR:
The powerful haze that appears when the light fills the frame with its warmth is desirable on occasion, but I never want to risk blurring the subject's face. We use a reflector to bounce part of the sun's rays back onto my subject, preventing a loss of contrast.
Using a reflector effectively requires pointing it away from the light source and adjusting the angle so that the light is directed where it is needed. Bring the reflector in closer to your subject to boost the intensity of the light. To diffuse the light, simply position the reflector further from the source.
OFF CAMERA FLASH:
When shooting in circumstances with a lot of backlight, an off-camera flash can serve as a reflector to help bring out more detail in the shot. An off-camera flash can be used in place of a reflector to illuminate the subject's face.
Off-camera flash is more powerful than on-camera flash and doesn't cause subjects' eyes to squint like a reflector does, all while being smaller, cheaper, and easier to transport (very important to consider if your subject is extra sensitive to light).
Rim light
Rim light is a subset of backlight, yet it's distinct enough to be discussed on its own. When using backlight, it's easy to discern highlights due to haze or airiness from the background light, but rim light eliminates this problem.
Light shining from behind a subject is called rim light, and it is used to bring out the contours of that object. This is a great technique to use when you need to set your topic out from its surroundings.
Butterfly light
When using butterfly light, the light source is positioned above and in front of the subject. As a result, a tiny shadow, shaped like a butterfly, is projected under the subject's nose (hence the name). This type of lighting is typically utilised on ladies because of how beautifully it highlights their cheekbones.
On the opposite hand, it emphasises the depth created by the distance between widely spaced eyes. Review the face of your target and how the light will change their features. In common parlance, "butterfly light" and "paramount light" mean the same thing.
If you’d like to work with professional photographers for your wedding, book with us at Wild Romantic Photography.
Loop light
For the most part, We use loop lighting whenever You need to generate illumination. The light source in a loop is angled at an angle of around 45 degrees and placed just above eye level.
A shade is created just below and on the side of one nostril and the nose because of light is coming from that direction. When bathed in this light, most people look their best.
Conclusion
Photos are only as good as their lighting. How bright or dark something is, as well as the tone, mood, and overall vibe, may all be altered by the lighting. Accurately distributing shadows and highlights allows you to create stylised, professional-looking photographs. A photographer will be able to capture the perfect shot if they consider how the light will affect the subject. Whether you're shooting on location or in a controlled studio environment, the quality of the light is a crucial consideration.
There is a noticeable difference in how the picture looks in various lighting conditions. A photographer's ability to manipulate the length, intensity, and quantity of light in a shot is a key part of the craft. There are eight different forms of photography lighting, and each has its own distinct impact on an object's brightness, colour vibrancy, and structure. To determine the best lighting for your project, think about the subject matter, the overall mood you want to create, and the notion you are trying to present. You'll find descriptions and advice on using several of the most popular kinds of lighting below.
A flat light is perfect for illuminating a face since it evenly illuminates the area and eliminates any shadows. When using broad light, a sort of side lighting, the subject's face is tilted away from the camera. This sort of illumination is ideal for persons with very thin faces because it creates the illusion of a bigger face. Although wide light works wonderfully to bring out freckles, it also brings out other facial imperfections like acne scars and blemishes. Backlighting can create some striking visual effects but also has significant downsides, the most notable of which is the blurring or lack of detail in the subject.
Different types of backlight exist, such as natural light from a window behind your subject during the middle of the day or artificial light with a coloured gel for a more whimsical appearance. An off-camera flash can be used in place of a reflector to illuminate the subject's face. Light shining from behind a subject is called rim light, and it is used to bring out the contours of that object. In common parlance, "butterfly light" and "paramount light" mean the same thing. Review the face of your target and how the light will change their features.
Content Summary:
- A well-lit scene is essential for a successful photograph.
- How bright or dark something is, as well as the tone, mood, and overall vibe, may all be altered by the lighting.
- Manipulating light is essential for achieving desirable results in terms of texture, colour saturation, and overall brightness.
- Accurately distributing shadows and highlights allows you to create stylised, professional-looking photographs.
- A subject's illumination is modified by the kind of its light source.
- Lighting that comes from behind creates a perfectly even surface.
- It casts shadows on the wall behind you.
- The dramatic effect of side lighting comes from its ability to reveal the subject's contours while casting just some of them in darkness.
- The lighting in a Rembrandt painting is a good example.
- Modified appearance of backlit subjects.
- This time, the issue's side is illuminated by the sun, making for a striking image.
- If you need advice on your wedding photography, check out our photography packages and services at Wild Romantic Photography.
- Learn the fundamentals of photography to advance your career.
- A diffuser softens the light, so it doesn't create sharp shadows or highlight imperfections on the subject.
- It diffuses and naturalises man-made illumination.
- Light is dispersed in numerous ways.
- Light modifiers like softboxes, umbrellas, and heat-resistant sheer fabric are effective.
- It is possible to direct the way light hits a surface.
- Photography reflectors and diffusers can alleviate the problem.
- Erosion in reflection Adjust the direction and intensity of a light source to draw attention to a certain object.
- Spotlights' beam widths and trajectories can be modified with the use of light shapers.
- Professional photographers have a deep understanding of how changing camera parameters affects the final image.
- The mood of a photograph can be drastically altered by adjusting the lighting.
- A photographer will be able to capture the perfect shot if they consider how the light will affect the subject.
- Photos are only as good as their lighting.
- It doesn't matter if he knows the physics behind photography light or not, a photographer nevertheless uses it.
- There is a noticeable difference in how the picture looks in various lighting conditions.
- A photograph can be taken if the photographer is aware of the effects of light.
- Choosing the right wedding photographer in Melbourne to capture every moment on your wedding day.
- MelbourneWhether you're shooting on location or in a controlled studio environment, the quality of the light is a crucial consideration.
- One of the talents necessary to enter the field of professional photography is mastery of light and its manipulation.
- It is often possible to evaluate the visual impact of light by looking at the "impression" it creates in a photograph.
- To make the most of light in your shot, you must have a firm grasp on its qualities.
- The intensity of a light source is expressed in terms of the number of lux it generates.
- It's a measure of how much light the photographer and the surroundings are reflecting back into the camera.
- The colour of the reflected light from the photographer and the background.
- The position of the performer's shadow, as well as the length of the shadows created by the three-dimensional props around him, are both affected by the direction of the light.
- The colour and temperature of the lighting in a room must be manually adjusted to account for the natural light coming in through the windows.
- Photography is the art and practise of recording visual stimuli, either on film or digitally.
- A photographer's ability to manipulate the length, intensity, and quantity of light in a shot is a key part of the craft.
- Wherever possible, natural light should be used in place of artificial lighting.
- It takes a lot of talent to capture a beautiful shot while making the most of the available natural light.
- The photographer would do well to rely primarily on sunshine when taking pictures.
- When the sky is clear and the sun is shining, you can use natural light to take a wide range of images.
- Clear, well-lit, and abundant detail are the hallmarks of midday photographs.
- Both when it is early light and when the sun is about an hour or two from setting, its beams have very different effects.
- Sunlight scatters and the colours radiate through the atmosphere at oblique angles when the sun is below the horizon.
- This is due to the sun being at a lower horizon.
- Beginning photographers may find it especially challenging to take images in low light.
- If you use a flash, the subject of your photo will look grey and washed out because of the bright light.
- However, if you don't use the flash, the photo will turn out grainy and fuzzy.
- Low-light photography can be achieved by adjusting the camera's settings to compensate for the dim environment.
- It is possible to increase the ISO level, allowing the camera shuttle to utilise ambient light.
- If you want perfectly still photos, a tripod is your best bet.
- Fill light, a photographic method used to brighten shadowed areas, requires the use of an extra light source.
- It is commonly employed to give a sense of depth to portrait photographs by emphasising the contrast between the foreground and background.
- You are planning the wedding of your dreams, and you don't want to miss out on any of the special moments that will take place on your big day.
- One of the most crucial parts of photography is lighting.
- This means that the object's brightness, colour vibrancy, and structure can only be optimally achieved through careful manipulation of lighting conditions.
- There are eight different forms of photography lighting. It's an excellent idea for any photographer, whether they've been doing it for years or just starting out, to review the most popular, flexible, and widely utilised lighting techniques.
- This is true no matter how proficient you are at the pastime.
- To determine the best lighting for your project, think about the subject matter, the overall mood you want to create, and the notion you are trying to present.
- Wild Romantic Photography has the best range of services of wedding photography Yarra Valley.
- For a flat lighting effect, the light source should be positioned so that it shines directly in front of the subject.
- A flat light is perfect for illuminating a face since it evenly illuminates the area and eliminates any shadows that may otherwise be seen.
- When using broad light, a sort of side lighting, the subject's face is tilted away from the camera.
- Therefore, the side of the face that is closest to the camera will have the most light, while the side that is further away will have less light.
- This sort of illumination is ideal for persons with very thin faces because it creates the illusion of a bigger face.
- In this short-light portrait, the subject's face is angled perpendicular to the camera's line of sight, casting a shadow on the opposite side of the head.
- This narrow beam of light is the antithesis of wide illumination.
- This type of lighting is known for its ability to create the illusion of a slimmer face.
- Remember that shadows tend to draw attention to flaws and uneven surfaces.
- This is something to bear in mind.
- Although wide light works wonderfully to bring out freckles, it also brings out other facial imperfections like acne scars and blemishes.
- Find out how your subject feels about those flaws so you know if you should try to disguise them with different lighting or if you can get away with highlighting them in short light.
- Split lighting, another variation on side lighting, is characterised by light coming in at a 90-degree angle from the side and lighting up the subject from above.
- When taking a picture, if one half of the subject is lit and the other is in the dark, this is called split lighting.
- The shadow line, when focused on a particular face, follows the geometric centre of the chin, the nose, and the forehead.
- You should think carefully about who you plan to photograph before selecting to employ split lighting, as it gives the appearance that your subject is tough and manly.
- The term "backlight" refers to a specific type of illumination in which the subject is lit from behind.
- While this effect is most noticeable in images shot during the golden hour, when the sun is low on the horizon and preparing to set, it may be achieved at any time of day.
- Different types of backlight exist, such as natural light from a window behind your subject during the middle of the day or artificial light from a flash with a coloured gel for a more whimsical appearance.
- While backlighting can create some striking visual effects, it also has some significant downsides, the most notable of which is the blurring or lack of detail in the subject of your shot.
- We have an exclusive range of wedding photography Mornington Peninsula services.
- One of our favourite ways to use a backlight is to let in very little light overall.
- Doing so will create a lovely light that stands out beautifully against a dark backdrop.
- In low-light situations like this, We often underexpose the subject to boost contrast and create a tranquil, comfortable image.
- REFLECTOR: The powerful haze that appears when the light fills the frame with its warmth is desirable on occasion, but I never want to risk blurring the subject's face.
- We use a reflector to bounce part of the sun's rays back onto my subject, preventing a loss of contrast.
- Using a reflector effectively requires pointing it away from the light source and adjusting the angle so that the light is directed where it is needed.
- Bring the reflector in closer to your subject to boost the intensity of the light.
- To diffuse the light, simply position the reflector further from the source.
- OFF CAMERA FLASH: When shooting in circumstances with a lot of backlight, an off-camera flash can serve as a reflector to help bring out more detail in the shot.
- An off-camera flash can be used in place of a reflector to illuminate the subject's face.
- Off-camera flash is more powerful than on-camera flash and doesn't cause subjects' eyes to squint like a reflector does, all while being smaller, cheaper, and easier to transport (very important to consider if your subject is extra sensitive to light). Rim light is a subset of backlight, yet it's distinct enough to be discussed on its own.
- When using a backlight, it's easy to discern highlights due to haze or airiness from the background light, but rim light eliminates this problem.
- Light shining from behind a subject is called rim light, and it is used to bring out the contours of that object.
- This is a great technique to use when you need to set your topic out from its surroundings.
- When using butterfly light, the light source is positioned above and in front of the subject.
- As a result, a tiny shadow, shaped like a butterfly, is projected under the subject's nose (hence the name).
- This type of lighting is typically utilised on ladies because of how beautifully it highlights their cheekbones.
- On the opposite hand, it emphasises the depth created by the distance between widely spaced eyes.
- Review the face of your target and how the light will change their features.
- In common parlance, "butterfly light" and "paramount light" mean the same thing.
- If you'd like to work with professional photographers for your wedding, book with us at Wild Romantic Photography.
- For the most part, We use loop lighting whenever You need to generate illumination.
- The light source in a loop is angled at an angle of around 45 degrees and placed just above eye level.
- A shade is created just below and on the side of one nostril and the nose because of light coming from that direction.
- When bathed in this light, most people look their best.