Tips For Beginners Landscape Photographers
Pictures taken in natural settings are called "landscapes." Imagine witnessing something unbelievable. The goal of your task is to increase blood pressure. You want them to experience the same awe and wonder that you did when out in nature and sharing what you found with them. When was the last time you went on a solo hike? Crazy. The comforting familiarity of a familiar landscape can be felt in every snapshot.
Photographers who specialise in landscapes often like to use wide-angle lenses. With a wide-angle lens, the apparent size and distance of the foreground and backdrop are magnified and altered. The end result differs from what was seen. Not "real" anymore. Landscape photography has progressed since the time of Ansel Adams.
If you need advice on your wedding photography, check out our photography packages and services at Wild Romantic Photography.
There is a wide range of subjects covered by contemporary landscape photographers. Landscape photography can include anything from seascapes to cityscapes to rural scenes, and from large to little. This term leaves far too much room for interpretation, but it is also accurate. Defining landscape photography too narrowly restricts an expressive and expansive art form.
Urban landscape photography is another name for architectural photography. However, there are many who insist that the environment itself should be the focus of wildlife photography. not bothered by either case in general. It's not necessary to follow any particular guidelines when taking landscape photos. For each of the photographers, it has a unique interpretation that ultimately aids in creating better images.
What Are the Best Lenses for Landscape Photography?
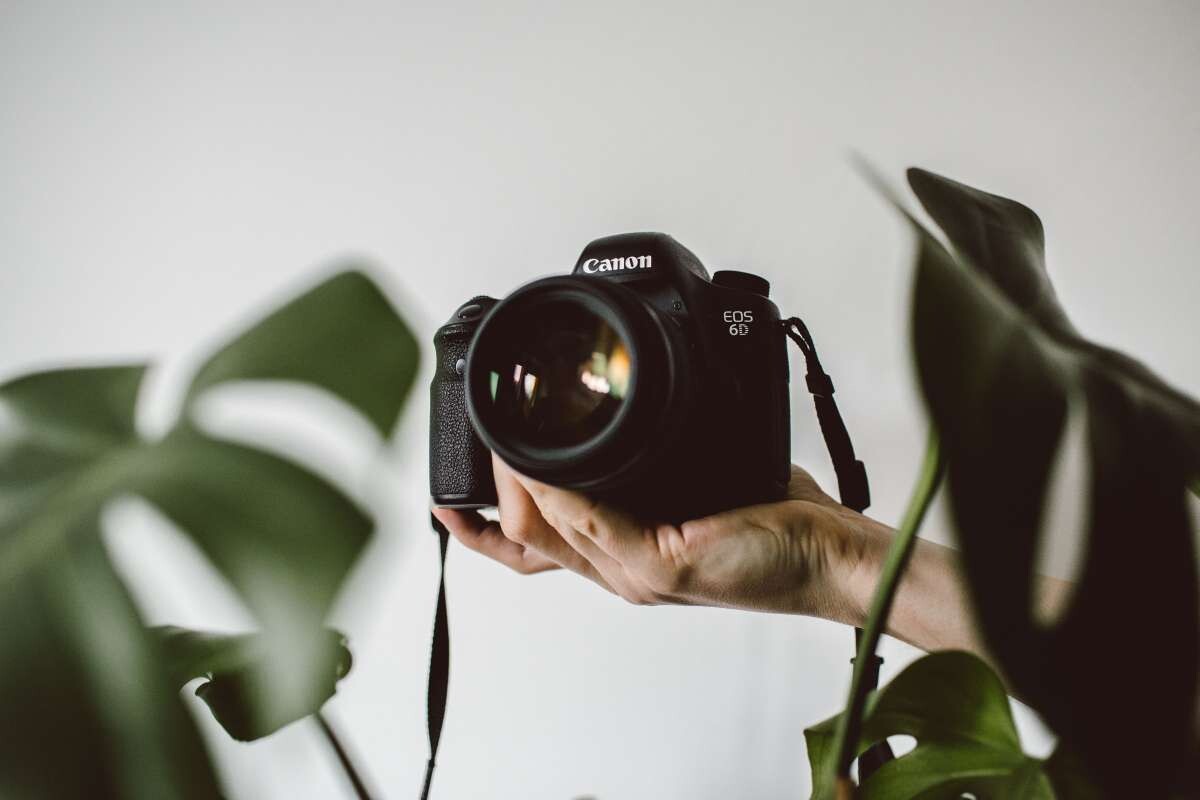
Equally essential to a high-quality landscape camera is this. To capture clearer photos, make sure your camera has a good lens. Don't bother taking the kit lenses with you because they're terrible. Depending on your subject matter, different lenses will be required. The following lenses are frequently used for landscape photography:
- 14mm
- 16-35mm
- 24-70mm
- 70-200mm
It's worth stressing that you don't have to utilise every single one of these lenses for landscape shots. Photographers who specialise in landscapes can get by with just one or two of these lenses.
The very wide-angle 14mm prime lens is inexpensive in comparison to zoom lenses, especially when acquired from a store that doesn't carry a well-known brand. It uses as much of the photograph's landscape as feasible. The 16-35mm lens provides a little more focal length flexibility, but at over $1,000, it is also much more expensive.
The 24-70mm is not the best option when shooting at either extreme of its focal length range. However, it's the most flexible choice for getting around town. Finally, the 70-200mm is a great lens to have if you're a landscape photographer who likes to take faraway shots and zoom in for detail. How to find the best Melbourne wedding photographer for your big day.
In terms of landscape photography, what do you recommend as the ideal settings?
The best time of day and the amount of time you have to shoot a landscape can affect the settings you use, but here is a good place to begin:
- Focus: f/11 to f/16
- ISO: 100
- Variable shutter speed
- Light temperature: bright sun, shady afternoon, or overcast
- There is only one autofocus point.
When shooting in bright sunlight, with the sun directly overhead, the ISO setting should be set to 100. However, if you want to capture photos at sunrise or sunset, or in a forest with a dense canopy, you'll need to adjust your ISO. Finding the correct shutter speed to obtain the desired exposure follows the process of establishing the ISO setting for your camera.
It is typically recommended that you do not use a shutter speed as low as 1/focal length when holding your camera with your hands. Accordingly, if your lens has a 200mm focal length, you should use at least a 1/200 shutter speed. The use of a tripod will allow you to take images with a slower shutter speed without blur from camera shake.
15 Landscape Photography Tips for Beginners
Tip #1: Do Your Homework
This is something that we've all probably heard a hundred times before. Yes, that's the case, and it's a solid foundation from which to build. Make sure you know the location well before setting up any landscape shots. This holds true regardless of how close or far away you are. It's easy to find stunning scenery images from all across the world. Find relevant images on 500px, Flickr, or Google Images before you leave the house. If you type in the name of a location, you'll get a tonne of pictures that you may use as a reference for your own shots.
This can also be done with the help of downloadable apps for smartphones to use in the field. As of the time this article was written, the much anticipated release of the Really Good Photo Spots (GPS) app was a little more than two weeks away. For iPhone users, this is a fantastic resource for finding new and exciting places to shoot without having to travel far.
Create lasting memories through your Yarra Valley wedding photography that will be cherished forever.
Tip #2: Go for the Gold
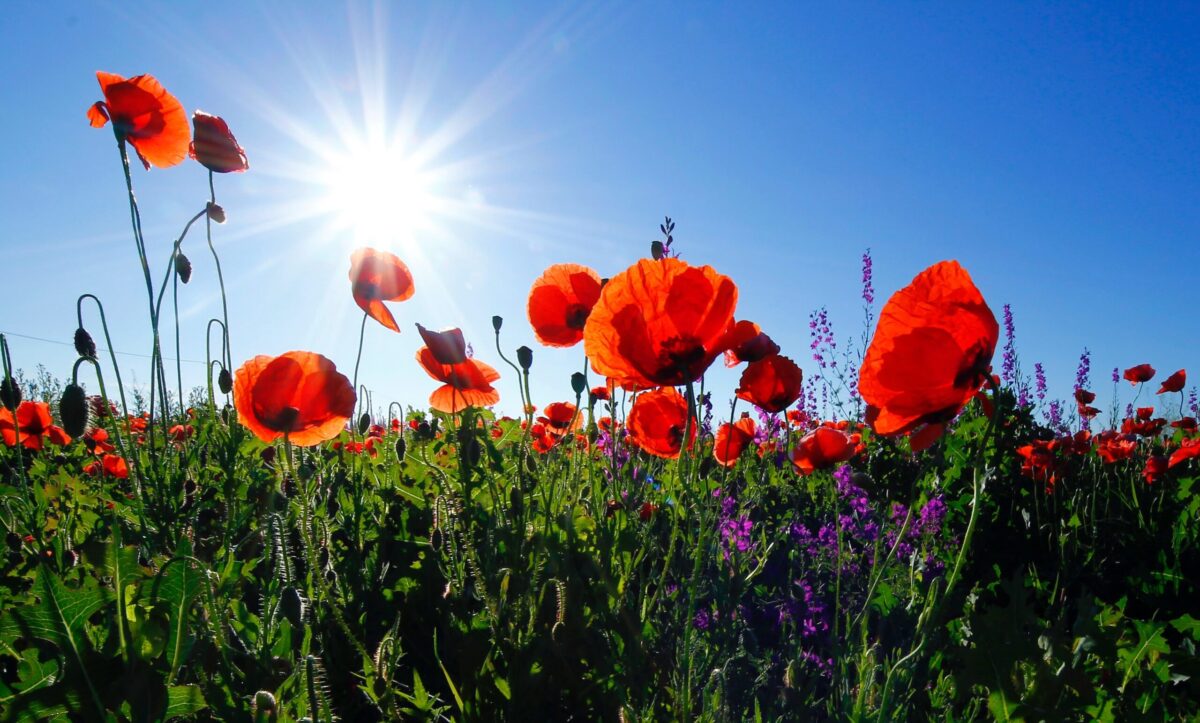
Knowing when and where to take landscape shots is crucial. Even more so. To get the greatest photos, wait for the sun to be at its highest point. Please avoid the heat of the day. Transitions from light to dark can be challenging when the sun is directly overhead. High contrast and a flattening effect are produced by direct sunlight.
When photographing landscapes, mornings and evenings seem to yield the most pleasing results. The time between dawn and sunset is known as the "golden hour" due to the high quality of light at that time. Good outcomes can be achieved even if shooting occurs later in the morning and early in the evening. Diffuse lighting, depth, and texture are created by the low sun, making for a more aesthetically beautiful and engaging picture.
Tip #3: Cut the Clutter
Selecting what to leave out of a picture is arguably more crucial. The simplest solutions are frequently the most effective ones. The theme of a landscape should be obvious to the observer. The focus of the image should be clear, but the surrounding parts should help direct the eye or give the image more depth and dimension. If there is nothing captivating about the photograph, try a different composition. Focusing in or switching perspectives might be useful. If the middle ground lacks interest, you can try angling the camera downward to focus on the foreground and obscure the middle ground.
Check the outer boundaries of the frame for distracting objects before you click the shutter. Before hitting the shutter button, give the corners of the frame a cursory glance. An obtruding tree limb, whether from above or to the side, can detract significantly from an otherwise excellent photograph.
Tip #4: Composition Is King
Good lighting is useless if the composition is weak. Poor lighting will detract from an otherwise spectacular composition. The magic of photography is in the composition and lighting.
Even if you're just starting out in photography, you've likely already heard of "composition guidelines." Master the use of leading lines, the rule of thirds, and the law of odds. Mastering these guidelines will help you make more powerful visuals. The difference between a photo and a snapshot is the quality of the composition (and the light).
It's a lot of fun to flout the supposed norms of composition. Knowing what went wrong is crucial. It's okay to simply say, "That's the way I like it." You can find a wealth of information on composition in the articles and guides available on Improve Photography. Rather than adhering to the same old norms, you might try something new like composition, which has some fascinating ideas for creating powerful compositions.
Tip #5: Have a Strong Foreground Element
The foreground of a landscape photograph can be quite important. Think about the foreground as the greeting card to your image. Having a good first impression is essential. In the foreground, of course. The focus is naturally drawn to the focal point, which is helped along by the strong foreground elements. It enriches the experience and transports the viewer to another place.
A tree, rock, bush, or plant can all make striking foreground elements. The bottom third of the frame is typically where this occurs, as it is the closest to the camera. Getting down on the ground and close to the foreground can make for an exciting photograph.
Tip #6: Get Everything in Focus
Everything in a landscape picture ought to be sharp. Keep in mind that depth-of-field is managed by the camera's aperture. Aperture settings of f/13 or f/16 combined with a focus on the central third of the frame produce pleasing results. The viewfinder and/or LCD of your camera can show grid lines. One must focus near the bottom third grid line in order to have the entire scene in sharp focus.
Unless the object in the front is somewhat close to the camera. It's possible that the foreground object and the background will both be blurry in that scenario. Try stacking 2 or 3 photographs in Photoshop if the backdrop blurs when you focus on the foreground. Adjust the aperture and the focus point until the whole image is in focus. Focus stacking is a skill that may be picked up on the fly.
Planning your dream wedding and don’t want to miss out on the special moments on your big day? Worry no more, Wild Romantic Photography has you covered.
Tip #7: Change Perspective
When they first pick up a camera, most people shoot from eye level. That may or may not work, depending on the topic, but a shift in viewpoint can do wonders for a photograph. Taking a crouched stance alters the dynamic dramatically. It can draw attention to the foreground or make the background disappear. Use a monopod or tripod to get a bird's eye view and shoot from there. Put the camera in the air and ready the timer for ten seconds. Even simpler and more enjoyable would be to use a drone, but that's material for another piece.
Tip #8: Show Scale
It's difficult to gauge scale in a landscape photograph. Add an element to the shot that represents the scale of the terrain. It ought to be recognisable and have a high degree of visual similarity to the surrounding environment. A character addition is beneficial. It's absurd, and have a hard time carrying it out. When I'm taking pictures, whether it's landscapes or anything else, We do very best to not include any people However, it might be illuminating and useful as a stock photo. Don't fret; just add one or two photographs. Looking for a Mornington Peninsula wedding photographer? Look no further! Wild Romantic Photography has you covered.
Tip #9: Zoom In
Landscapes are best photographed using a wide-angle lens. It's often said that "the picture doesn't do it justice." It is impossible to shoot a truly magnificent landscape. We go for it anyway by using a wide-angle lens. The image will distort distances so that they appear closer together. Take a close-up of the scenery, rather than a wide one. Those are private panoramas, only for the two of you. The cumulative effect of a succession of close-up landscape photographs can be striking.
Tip #10: Make Friends With Your Tripod
Landscape photography often requires the use of a tripod. This is the time to get to know a tool you may only use seldom (or never before) if you haven't already. There are a lot of great options that won't break the bank if you don't already have one. When shooting photos in low light, like first thing in the morning or after sunset, a tripod is a must have since it allows the shutter speed to be slowed down while still using a modest ISO.
The usefulness of a tripod is demonstrated in a wide variety of various contexts. A tripod is also required if you plan to keep shooting well into the night. That's why you should learn to use your tripod properly. Maintain an amicable relationship with it. If you are having trouble figuring out how to use it, you may be employing an inefficient method.
Tip #11: Show Motion in the Image
An further case is made for the necessity of a tripod in this instance. When taking a snapshot of a scene that includes a moving object, such a stream or a waterfall, it can be enjoyable to slow down the shutter speed and catch some of the motion in the scene. It's also conceivable that you don't need as slow of a shutter speed as you're using. Possible that a quarter second is too slow for a swift stream.
If a slow shutter speed is required and can't be achieved through aperture and ISO settings, a neutral density (ND) filter must be attached to the lens. By decreasing the quantity of light reaching the sensor, ND filters allow photographers to use slower shutter speeds. Read this page for more details on neutral density (ND) filters and when to use them.
Tip #12: Get Moving!
The current situation is as follows: You've finally made it to a stunning spot for landscape photography, and you're ready to start capturing images. It's almost time to turn in for the night, so get your belongings in order and leave. There are dozens of photos on your camera's memory card that are practically identical to one another when you upload them to your computer. For what reason is that happening? because you have never moved to a new location. Unfortunately, this has happened to me more often than I'd like to confess.
Allowing oneself to become engrossed in the action makes it easy to forget to keep moving about. This is one of the drawbacks of use a tripod. Once the tripod is set up, the temptation to not touch it again is strong. Don't worry about it; just get it out of there. In order to round out your repertoire, it would be beneficial to investigate alternative compositions, methods, and perspectives. If you want to keep your tripod off the ground, you can't let your feet do it for you.
Tip #13: Turn Around
This piece of guidance follows on from the last. It's vital to regularly check your rearward visibility as you make your way across unfamiliar territory. Behind those walls, you never know what kind of unbelievable things are happening. There's no way to find out what could have happened if you don't try.
Tip #14: Stay Out Late
Just because it's getting dark outside doesn't mean you have to pack up your picnic and head back inside. Put it off until you can clearly see the night sky. Wait until the astronomical twilight has entirely faded away and the night has grown completely dark, if you have the time. Depending on your location, you may or may not be able to see the Milky Way. If it isn't, you can always take multiple photos and stitch them together to make star trails. Further, it's pleasant to be outside in the evening and take in the night sky.
Tip #15: Never Stop Learning
One last piece of guidance! And it's a very big deal indeed. If you're interested in photography, you can never stop learning. We never tyre of listening to photography-related podcasts on the long commute to and from work. With five unique podcasts to choose from, photographers of all skill levels will find something of interest on the Improve Photography network. If you haven't tried the free trial of Improve Photography Plus yet, We recommend you do so now by visiting the website.
Every subgenre of photography has a corresponding video tutorial available online. If that isn't enough, there are countless fun and informative video tutorials from famous photographers available for free on YouTube. The point is to keep learning new things. Strive to better yourself by expanding your knowledge. It's a fantastic method for maintaining the enjoyment and novelty of photography.
If you’d like to work with professional photographers for your wedding, book with us at Wild Romantic Photography.
Conclusion
Landscape photography can include anything from seascapes to cityscapes to rural scenes, and from large to little. To capture clearer photos, make sure your camera has a good lens. It's not necessary to follow any particular guidelines when taking landscape photos. For each of the photographers, it has a unique interpretation that ultimately aids in creating better images. The best time of day and amount of time you have to shoot a landscape can affect the settings you use.
The 24-70mm is not the best option when shooting at either extreme of its focal length range, but it's the most flexible choice for getting around town. The 70-200mm is a great lens to have if you're a landscape photographer who likes to take faraway shots and zoom in for detail. When photographing landscapes, mornings and evenings seem to yield the most pleasing results. The time between dawn and sunset is known as the "golden hour" due to the high quality of light at that time. Selecting what to leave out of a picture is arguably more crucial.
Good lighting is useless if the composition is weak. If you're just starting out in photography, you've likely already heard of "composition guidelines". Master the use of leading lines, the rule of thirds, and the law of odds will help you make more powerful visuals. The difference between a photo and a snapshot is the quality of the composition (and the light). Landscapes are best photographed using a wide-angle lens.
It's difficult to gauge scale in a landscape photograph so add an element to the shot that represents the scale of the terrain. A character addition should be recognisable and have a high degree of visual similarity to the surrounding environment. The image will distort distances so that they appear closer together. Landscape photography often requires the use of a tripod. A tripod allows the shutter speed to be slowed down while still using a modest ISO.
If a slow shutter speed is required, a neutral density (ND) filter must be attached to the lens. ND filters allow photographers to use slower shutter speeds. Allowing oneself to become engrossed in the action makes it easy to forget to keep moving about. Once the tripod is set up, the temptation to not touch it again is strong. It's vital to regularly check your rearward visibility as you make your way across unfamiliar territory.
There's no way to find out what kind of unbelievable things are happening behind those walls if you don't try. If not, you can always take multiple photos and stitch them together to make star trails. Every subgenre of photography has a corresponding video tutorial available online. There are countless fun and informative video tutorials from famous photographers available for free on YouTube.
Content Summary:
- Pictures taken in natural settings are called "landscapes."
- Photographers who specialise in landscapes often like to use wide-angle lenses.
- With a wide-angle lens, the apparent size and distance of the foreground and backdrop are magnified and altered.
- If you need advice on your wedding photography, check out our photography packages and services at Wild Romantic Photography.
- There is a wide range of subjects covered by contemporary landscape photographers.
- Urban landscape photography is another name for architectural photography.
- However, there are many who insist that the environment itself should be the focus of wildlife photography.
- It's not necessary to follow any particular guidelines when taking landscape photos.
- Equally essential to a high-quality landscape camera is this.
- To capture clearer photos, make sure your camera has a good lens.
- Depending on your subject matter, different lenses will be required.
- The following lenses are frequently used for landscape photography:14mm 16-35mm 24-70mm 70-200mm It's worth stressing that you don't have to utilise every single one of these lenses for landscape shots.
- The 24-70mm is not the best option when shooting at either extreme of its focal length range.
- Finally, the 70-200mm is a great lens to have if you're a landscape photographer who likes to take faraway shots and zoom in for detail.
- How to find the best Melbourne wedding photographer for your big day.
- In terms of landscape photography, what do you recommend as the ideal settings?
- When shooting in bright sunlight, with the sun directly overhead, the ISO setting should be set to 100.
- However, if you want to capture photos at sunrise or sunset, or in a forest with a dense canopy, you'll need to adjust your ISO.
- Finding the correct shutter speed to obtain the desired exposure follows the process of establishing the ISO setting for your camera.
- It is typically recommended that you do not use a shutter speed as low as 1/focal length when holding your camera with your hands.
- Accordingly, if your lens has a 200mm focal length, you should use at least a 1/200 shutter speed.
- The use of a tripod will allow you to take images with a slower shutter speed without blur from camera shake.
- Make sure you know the location well before setting up any landscape shots.
- This can also be done with the help of downloadable apps for smartphones to use in the field.
- As of the time this article was written, the much anticipated release of the Really Good Photo Spots (GPS) app was a little more than two weeks away.
- For iPhone users, this is a fantastic resource for finding new and exciting places to shoot without having to travel far.
- Create lasting memories through your Yarra Valley wedding photography that will be cherished forever.
- Knowing when and where to take landscape shots is crucial.
- To get the greatest photos, wait for the sun to be at its highest point.
- Please avoid the heat of the day.
- Transitions from light to dark can be challenging when the sun is directly overhead.
- When photographing landscapes, mornings and evenings seem to yield the most pleasing results.
- The time between dawn and sunset is known as the "golden hour" due to the high quality of light at that time.
- Good outcomes can be achieved even if shooting occurs later in the morning and early in the evening.
- Diffuse lighting, depth, and texture are created by the low sun, making for a more aesthetically beautiful and engaging picture.
- Selecting what to leave out of a picture is arguably more crucial.
- The theme of a landscape should be obvious to the observer.
- Check the outer boundaries of the frame for distracting objects before you click the shutter.
- Even if you're just starting out in photography, you've likely already heard of "composition guidelines."
- Master the use of leading lines, the rule of thirds, and the law of odds.
- Mastering these guidelines will help you make more powerful visuals.
- The difference between a photo and a snapshot is the quality of the composition (and the light).It's a lot of fun to flout the supposed norms of composition.
- You can find a wealth of information on composition in the articles and guides available on Improve Photography.
- The foreground of a landscape photograph can be quite important.
- Think about the foreground as the greeting card to your image.
- Having a good first impression is essential.
- In the foreground, of course.
- The focus is naturally drawn to the focal point, which is helped along by the strong foreground elements.
- Getting down on the ground and close to the foreground can make for an exciting photograph.
- Everything in a landscape picture ought to be sharp.
- Keep in mind that depth-of-field is managed by the camera's aperture.
- Aperture settings of f/13 or f/16 combined with a focus on the central third of the frame produce pleasing results.
- One must focus near the bottom third grid line in order to have the entire scene in sharp focus.
- Unless the object in the front is somewhat close to the camera.
- It's possible that the foreground object and the background will both be blurry in that scenario.
- Planning your dream wedding and don't want to miss out on the special moments on your big day?
- Worry no more, Wild Romantic Photography has you covered.
- When they first pick up a camera, most people shoot from eye level.
- That may or may not work, depending on the topic, but a shift in viewpoint can do wonders for a photograph.
- Taking a crouched stance alters the dynamic dramatically.
- It can draw attention to the foreground or make the background disappear.
- Use a monopod or tripod to get a bird's eye view and shoot from there.
- Put the camera in the air and ready the timer for ten seconds.
- It's difficult to gauge scale in a landscape photograph.
- Add an element to the shot that represents the scale of the terrain.
- Don't fret; just add one or two photographs.
- Landscapes are best photographed using a wide-angle lens.
- It's often said that "the picture doesn't do it justice."
- It is impossible to shoot a truly magnificent landscape.
- We go for it anyway by using a wide-angle lens.
- Take a close-up of the scenery, rather than a wide one.
- Those are private panoramas, only for the two of you.
- Landscape photography often requires the use of a tripod.
- This is the time to get to know a tool you may only use seldom (or never before) if you haven't already.
- When shooting photos in low light, like first thing in the morning or after sunset, a tripod is a must have since it allows the shutter speed to be slowed down while still using a modest ISO.The usefulness of a tripod is demonstrated in a wide variety of various contexts.
- A tripod is also required if you plan to keep shooting well into the night.
- That's why you should learn to use your tripod properly.
- Maintain an amicable relationship with it.
- An further case is made for the necessity of a tripod in this instance.
- When taking a snapshot of a scene that includes a moving object, such a stream or a waterfall, it can be enjoyable to slow down the shutter speed and catch some of the motion in the scene.
- It's also conceivable that you don't need as slow of a shutter speed as you're using.
- If a slow shutter speed is required and can't be achieved through aperture and ISO settings, a neutral density (ND) filter must be attached to the lens.
- Read this page for more details on neutral density (ND) filters and when to use them.
- The current situation is as follows: You've finally made it to a stunning spot for landscape photography, and you're ready to start capturing images.
- It's almost time to turn in for the night, so get your belongings in order and leave.
- There are dozens of photos on your camera's memory card that are practically identical to one another when you upload them to your computer.
- Allowing oneself to become engrossed in the action makes it easy to forget to keep moving about.
- This is one of the drawbacks of use a tripod.
- Once the tripod is set up, the temptation to not touch it again is strong.
- Don't worry about it; just get it out of there.
- In order to round out your repertoire, it would be beneficial to investigate alternative compositions, methods, and perspectives.
- If you want to keep your tripod off the ground, you can't let your feet do it for you.
- This piece of guidance follows on from the last.
- It's vital to regularly check your rearward visibility as you make your way across unfamiliar territory.
- Late Just because it's getting dark outside doesn't mean you have to pack up your picnic and head back inside.
- Put it off until you can clearly see the night sky.
- Wait until the astronomical twilight has entirely faded away and the night has grown completely dark, if you have the time.
- Depending on your location, you may or may not be able to see the Milky Way.
- If it isn't, you can always take multiple photos and stitch them together to make star trails.
- Further, it's pleasant to be outside in the evening and take in the night sky.
- Learning One last piece of guidance!
- If you're interested in photography, you can never stop learning.
- We never tyre of listening to photography-related podcasts on the long commute to and from work.
- With five unique podcasts to choose from, photographers of all skill levels will find something of interest on the Improve Photography network.
- Every subgenre of photography has a corresponding video tutorial available online.
- If that isn't enough, there are countless fun and informative video tutorials from famous photographers available for free on YouTube.
- The point is to keep learning new things.
- Strive to better yourself by expanding your knowledge.
- It's a fantastic method for maintaining the enjoyment and novelty of photography.