What Is Flat Lay Styling?
At its most basic, a flat lay is just a group of goods taken on a smooth surface from above. Today, we'll discuss the ever-trendy flat lay, and we'll teach you how to style you personal flat lays like such a pro so you can join the ranks of the flat lay faithful. Someday we might even form a flat lay club, so who knows!
What Exactly Is a Flat Lay?
The term "flat lay" refers to any horizontal overhead image. Considered from a lofty vantage point. Even while a picture of a single product on a horizontal surface can be called a "low lay," the essential essence of this kind of shot lies in the method it is stylised.
The term "styling" is used to describe the process of arranging and arranging various elements inside a photograph to make it look more professional, editorial, and appealing to the eye.
You can get a free download by clicking the link at the end of this email. Get your hands on it as soon as possible because it has a flat lay style planner and a list from over 90 suggestions for props.
Let's move on to the next section of our tutorial, where we'll discuss how to implement these concepts into a well-styled flat lay.
Maintain Your Branding at the Top of Your Mind.
The mood and values of your brand should inform your decisions about props and the composition of your flat lays.
If you prefer to keep your look low-key and casual, you probably won't reach for jars of nail polish to spruce up your look.
Consider a few descriptors that occur to you when you consider your brand. What about the word "modern"? Comfort? Luxury? Feminine? Alternative? Edgy? Your brand's identity should direct every decision you make about props. Your photographs will be your most treasured wedding keepsake. Not sure where to start when it comes to looking for your wedding photographer of choice?
Understand the Why Behind Your Flatlays

A solid foundation for every flat lay starts with an in-depth comprehension of the reasoning behind it. With this flat lay, can you please explain your goals for using it? Is a new product launch in the works? Are you showing your clients how they can use your product or a service in their daily life?
If there is a story behind this flat lay, what is it? Your "why" is the foundation of your flatter lay, and it should inform every decision you make when you're putting it together.
Choose Your Product
No matter the size or shape of the product, photography may be adapted to showcase it effectively. This is true whether the item in question is a pair of headphones, a pair of sweatpants, a pair of shorts, a shirt, or any other type of item.
Choose Your Background.
Differentiating between a conventional flat lay as well as a styled flatter lay begins with the arrangement of the flat lay's contents.
At contrast to the traditional white background used for flat lays in print, the possibilities for a designed flat lay photoshoot are practically endless.
What matters most is that it conveys the character of your business or product and stands out from the crowd, therefore it may be patterned, textural, bright, or faded.
The background of the flat lay is equally as important as the objects themselves.
However, the decision's impact on the brand's reputation could be negative if it's poorly made. White, wooden, or marble backgrounds seem to be the most popular among online users and have been shown to increase the number of subscribers, consumers, and clients.
You can get white backdrops for your projects by using white foamy board or bristol board. Any flat wooden surface, such as a tabletop, a floor, or a deck, can serve as a backdrop. Create lasting memories through your Yarra Valley wedding photography that will be cherished forever.
Keep in mind that the golden hue of older hardwood floors, for example, would not translate well with a flat lay shot. The key takeaway is to keep things neat and simple in the backdrop so that the focus stays where it belongs: on the products and props.
Select a Clear Background
Keeping the background of your flat lay simple and uncluttered can increase its effectiveness. This is the simplest and most effective method for accomplishing that result.
When styling a flat lay, it's best to avoid choosing backdrops with complex patterns or bright colours, since they will detract attention from the items you're attempting to highlight.
You probably have a lot of great background materials laying around the house already.
Marble worktops, white bedding, wooden tables, and neutral carpets and flooring are commonplace because of their convenience and affordability.
An other option for a backdrop is to pick up some white craft paper from the stationery section of a nearby store. The most crucial step is picking a background that will serve as a blank slate.
Avoid "Noise" in the Background
In order to avoid having the background compete with or detract from the items you are displaying, you will be placing them on a prominent part.
You can provide the impression of order on your Instagram feed by choosing a handful of your favourite posts and reposting them multiple times.
Here are a few ideas for possible backdrops:
- Foamed white core (The Essential)
- Comfortable white cover Marble (Contact paper works, and if you're lucky, so does a tabletop.)
- Untreated wood with a weathered look
- folded up pieces of tissue paper
Put Your Hero Product Here
Most flat lays centre on a hero product. In most cases, it will be the product itself. The hero of the flat lay may be your computer or a schedule if the story centres on the high level of service you offer.
First, arrange your hero product where you want it to be on the flat lay, and only then should we add any other major props. As a result, if your favorite is a laptop, you might find that a beverage of choice as well as a notebook are also indispensable tools.
The next step is to play around with the links your protagonist shares with the composition's other focal points. Together, they'll form the basis for the more sophisticated props that will be used in the production.
It's a theme
Noticing how, when looking through Instagram, you can tell what a flat lay is about even before reading the caption? "Theme Success" refers to this method of making a story out of the parts of your images. The image serves as the narrative device.
Some frequent options for essay content are listed below.
- Sunday morning sleep ins are legendary (cosy socks, legs, coffee, an open magazine)
- Elements crucial to any office (cute notebook, laptop, pens, paperclips, motivational quote)
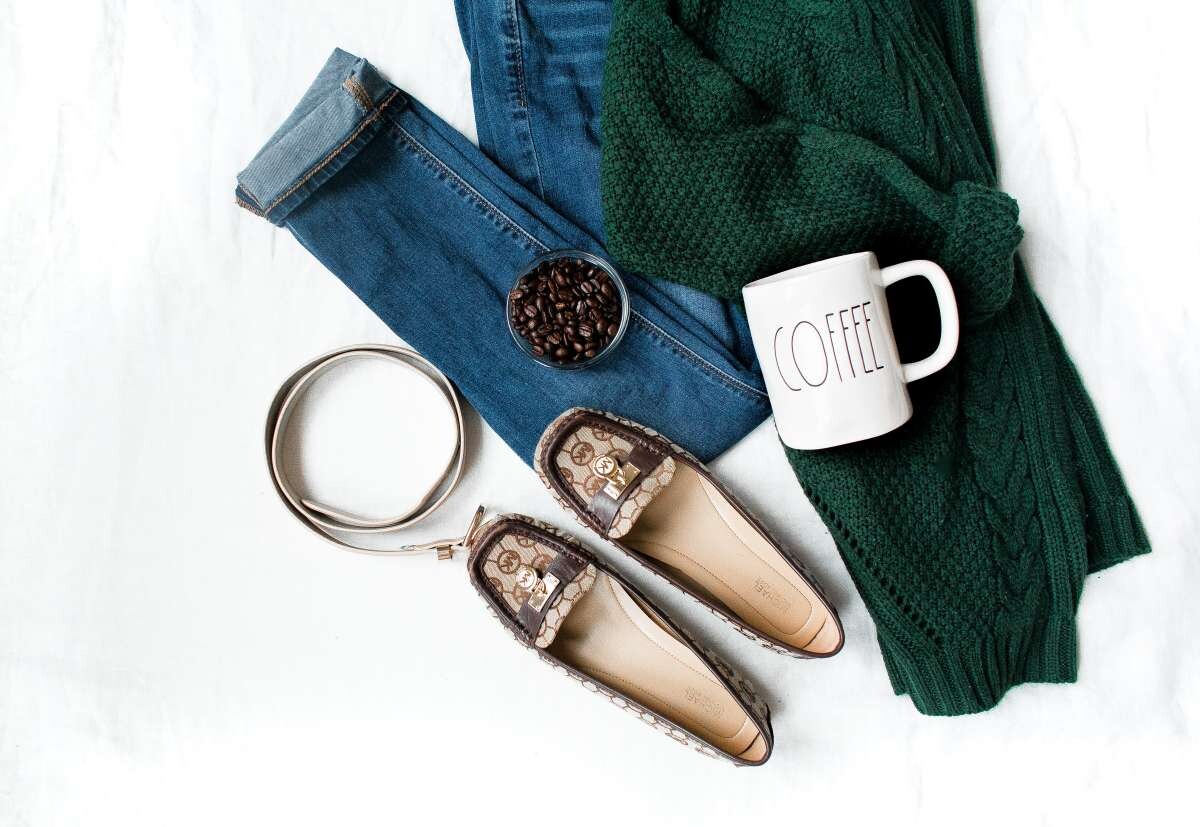
- This is the outfit I've picked for the day. (denim, shoes, beauty products as fillers)
- Just what do You have in my purse? (shades, cell phone, bracelets, cosmetics, publication)
- Check out the action in the kitchens (ingredients, food, pretty trays and linens)
Prop to It
so that people can easily identify your products while also getting a sense of who you are as a brand. By working together, the photographers and stylists would improve the shoot's lighting, composition, and prop choices.
The second step, after deciding on a theme, is picking out the props you'll utilise to visually represent the music and set the mood. After you've set up your main props, share three industry secrets that will make your flat lay much more engaging.
It's conceivable that this is simply a matter of taste, but We believe that photographs with human hands engaging with the subject of the shot are more interesting. Maybe it's because it's so easy for the viewer to imagine themselves in the situation shown, whether it's sipping coffee or a book being read. There's also a lighthearted vibe to it.
Flowers, foliage, and other natural components are the one surefire method of improving any predicament. Most commonly used are components from nature, such as succulent, wood slices, laurel, "spilt" flour or meal around over a food shot, petal, leaves, beech branches, and so on.
Many flat shams have a book, chosen for its relevance to the narrative and its compatibility with the intended colour scheme.
Make Use of Props That Make Sense.
If the hero item is the main attraction of your flat lay, then the supporting props are the supporting actors and supporting plot points.
Your account will benefit from props that offer context to the star product without taking away from it. If the laptop is the protagonist, then the supporting cast could consist of a pen, a pair of reading glasses, some paper clips, a watch, and so on.
Position the secondary props around the major pieces of your flat lay to fill in the empty area. Try several positions and orientations to determine where they work best within the whole painting. Your flat lay should feature your product prominently, therefore it's important to think about how much room to give each of the supporting elements.
Use your best judgement when selecting how to stage your flat lay. Think about what would make sense for a day at the beach if you were a blogger planned on spending the day there and wanting a lovely flat lay photo go along with it.
Undoubtedly, sunglasses are a must-have. In fact, a towel. We do sell beach bags. Not in a pair of stilettos, thanks. Do you have a purse? Naw. No one brings valuables like wallets or purses to the beach. That's why you load up on sunscreen and carry a beach bag.
Think on what "genre" or category your flats lay would fall under, and make sure the props you use fit well with that.
Arrange your props with care.
Think about the overall size on your image first. Is it intended for Instagram, but if so, it will be square? It may be a Facebook cover photo, in which case the image would need to be both small and large.
Or will this be a more conventional proportion, say 4:6? Preparation can help you arrange your objects in the best beneficial way, allowing you to get the most out of your shots.
Next, consider the feeling you want viewers to receive when they look at your picture. No room for improvement in terms of tidiness and order? How about effortless chic?
You can line up your props at sharp angles, or you could arrange them so it looks like they fell into place that way by accident and it still looks great. In any case, you can go one of two ways. Depending on the feeling you want to capture in the image, you can go either way.
Maintain Simplicity.
The best advice would be to keep things as basic as possible. Your flat-lay need not showcase ten separate objects. Many times, all that is required to make a spectacular flat is a single product as the focus and a single stylistic feature.
As more information is added, the scene becomes more crowded and the eye is pulled to more details. If there is too much going on for the viewer to take in at once, they will lose all interest and go on.
Picking one or two excellent accessories that complement your main focus is far more essential if you want to keep your audience getting back for more of the you have to offer.
Maintain a Simple Color Palette
It's helpful to adhere to a colour palette you've set when choosing your secondary props. Your aligners will be less of a focal point if they are a similar colour to the rest of your teeth.
Limit yourself to a maximum of than four or three complementary colours when you're first starting out with colour palettes. Black and white both are neutral tones that match a broad various color schemes, so accessorising with either of those colours is a safe bet.
Balance
The key to creating a visually appealing flat layout is to use a limited colour palette and a variety of different sized pieces.
Don't cluster too many circle (coasters, mugs, compact mirror), but do apply them to end things any sharper lines within your flat lay arrangement.
Avoid the similar pitfall when choosing your colours and neutrals; don't put all of your emphasis on a single side. If black is your main component, for instance, use it liberally throughout the flat lay to draw attention to it. Continue trying out new things until you find the one that suits your needs in terms of form and function.
In the Background
Mastering these straightforward methods will ensure that you always obtain the shot you desire, no matter how interesting the flat lay behind the scenes may be.
Taking images with your phone requires a higher vantage point, so consider standing on such a chair. If you don't have a steady hand, a tripod arm might be a great asset when using the DSLR.
If you find that things shift when you turned your back, you can use adhesive tape to secure them. Any object that is taped down will remain in place no matter what you throw at it.
Finally, remember to enjoy the process; after you've learned the basics, it's all about finding your own voice and style.
Make Your Flatlay Shine
It's recommended that beginners use natural light while lighting their flat lays. You can get it everywhere, and there's no fee. If you want to get the most of natural light, you should do it in the shadow, either outside or in front of a windows on the shaded side of your home.
If you don't really want your photo to have a lot of contrasts or sharp shadows, it's vital to keep the sun behind you.
Proper lighting is essential.
When attempting to take a flattering flat lie photo, lighting is a crucial element to think about.
Either artificial or natural light can be used for this purpose, but it should be bright and diffused. The result is that the indicated a positive from the origin is obscured.
Good lighting options include a spot adjacent to a window (but not in its direct line of sight), a lightbox containing lights beaming through thin white cloth, or lights with softboxes.
If this discussion of lighting has left you feeling overwhelmed, have no fear; more posts will be on the way to help you master the art of effective illumination.
Photograph Your Flatlay
Because flatlays are typically photographed from above, be sure your camera is positioned such that the centre of the flat lay is looking down at the subject. In order to be seen better, you may want to stand on a seat or a ladder.
In order to take a good flat lay photo, you need hold your camera with the lens points straight down. You can get more precise with your photo composition by using the grid feature and the square crop option on your phone's camera.
It is in your greatest interest to take numerous images of your goods, each of which needs to be produced in a distinctive way, utilising a wide range of viewpoints and flat laying arrangements.
Mastering your shot and then shooting it in variety of ways to get access to new features is a great way to keep the action fresh. You can get the most out of the time and energy you put into creating the ideal flat lay by shooting as many images as possible.
You might try shooting your flat lay from a different angle, changing the cut, or swapping out some of the key elements for something else. In addition, We enjoy snapping images of the behind-the-scenes action to share with my viewers. Getting your hands on as much information as you can is in your best interest.
Edit Your Instagram Flatlay
Here, we'll get into the nitty-gritty details. The process of editing and retouching an image goes beyond adding a filter or increasing the contrast. Expert retouchers may do a wide variety of procedures, including deep-etching, color management, manipulation, and more.
To convince your audience that what they're seeing is real while also drawing attention to what sets your product unique from the competition.
Post-shoot editing is something every photographer should learn to do.
Numerous high-quality photo-editing apps are available for use on portable electronic gadgets like smartphones and tablets. Currently, my favourite photo editing apps are VSCO, Snapseed, and Instagram's native capabilities.
Changing the crop, contrast, contrast, brightness, and clarity of your photos is one of the simplest and fastest methods to give your flat lays a more distinctive look. The easiest way to achieve the desired effect is to play around with the many tools and filters available.
You can grow better at making flat lays, like any other talent, by practising it regularly. You should use these instructions as a starting point, as there is no single "right" approach to take an image.
When you feel comfortable with your flat-laying skills, you can go out and try new techniques and ideas. In time, you'll discover what works best for you in terms of props, lighting, and post-production editing, and this will lead to the development of your own signature flat lay style. Through repeated effort, we will succeed.
Conclusion
The term "flat lay" refers to any horizontal overhead image considered from a lofty vantage point. The essential essence of this kind of shot lies in the method it is stylised. Your brand's identity should direct every decision you make about props for your wedding photos. What matters most is that it conveys the character of your business or product and stands out from the crowd. The background of the flat lay is equally as important as the objects themselves.
White, wooden, or marble backgrounds seem to be the most popular among online users. "Theme Success" refers to this method of making a story out of the parts of your images. Most flat lays centre on a hero product - in most cases, it will be the product itself. After deciding on a theme, pick out the props you'll utilise to visually represent the music and set the mood. Position secondary props around the major pieces of your flat lay to fill in the empty area.
Make use of props that offer context to the star product without taking away from it. If you're a blogger and want to show off your flat-lay at the beach, here are some tips on how to get the most out of your shots. Think about what would make sense for a beach day, and then arrange your props in such a way that makes it look natural and effortless. The key to creating a visually appealing flat layout is to use a limited colour palette and a variety of different sized pieces. Black and white are neutral tones that match a broad various color schemes.
If you don't really want your photo to have a lot of contrasts or sharp shadows, it's vital to keep the sun behind you. If you are attempting to take a flattering flat lie photo, lighting is a crucial element to think about. Artificial or natural light can be used for this purpose, but it should be bright and diffused. You can get more precise with your photo composition by using the grid feature and the square crop option on your phone's camera. The process of editing and retouching an image goes beyond adding a filter or increasing the contrast.
Expert retouchers may do a wide variety of procedures, including deep-etching, color management, manipulation, and more. The easiest way to achieve the desired effect is to play around with the many tools and filters available.
You've finished styling your flat lay, and now it's ready to be featured on your social media accounts (Instagram, Facebook, etc.), online shop, brochures, and lookbooks to attract clients who are likely to be interested in your product. Make sure your entire social media stream looks put together.
Planning your wedding and looking for a videographer? Look no further, Wild Romantic Photography is one of the most highly respected wedding film videography services in Melbourne and Sydney.
Content Summary:
- At its most basic, a flat lay is just a group of goods taken on a smooth surface from above.
- Today, we'll discuss the ever-trendy flat lay, and we'll teach you how to style you personal flat lays like such a pro so you can join the ranks of the flat lay faithful.
- Someday we might even form a flat lay club, so who knows!
- What Exactly Is a Flat Lay?
- The term "flat lay" refers to any horizontal overhead image.
- Considered from a lofty vantage point.
- Even while a picture of a single product on a horizontal surface can be called a "low lay," the essential essence of this kind of shot lies in the method it is stylised.
- The term "styling" is used to describe the process of arranging and arranging various elements inside a photograph to make it look more professional, editorial, and appealing to the eye.
- You can get a free download by clicking the link at the end of this email.
- Get your hands on it as soon as possible because it has a flat lay style planner and a list from over 90 suggestions for props.
- Let's move on to the next section of our tutorial, where we'll discuss how to implement these concepts into a well-styled flat lay.
- Maintain Your Branding at the Top of Your Mind.
- The mood and values of your brand should inform your decisions about props and the composition of your flat lays.
- If you prefer to keep your look low-key and casual, you probably won't reach for jars of nail polish to spruce up your look.
- Consider a few descriptors that occur to you when you consider your brand.
- Your brand's identity should direct every decision you make about props.
- Your photographs will be your most treasured wedding keepsake.
- Not sure where to start when it comes to looking for your wedding photographer of choice?
- If there is a story behind this flat lay, what is it?
- Your "why" is the foundation of your flatter lay, and it should inform every decision you make when you're putting it together.
- Choose Your Product No matter the size or shape of the product, photography may be adapted to showcase it effectively.
- This is true whether the item in question is a pair of headphones, a pair of sweatpants, a pair of shorts, a shirt, or any other type of item.
- Differentiating between a conventional flat lay as well as a styled flat lay begins with the arrangement of the flat lay's contents.
- At contrast to the traditional white background used for flat lays in print, the possibilities for a designed flat lay photoshoot are practically endless.
- What matters most is that it conveys the character of your business or product and stands out from the crowd, therefore it may be patterned, textural, bright, or faded.
- The background of the flat lay is equally as important as the objects themselves.
- However, the decision's impact on the brand's reputation could be negative if it's poorly made.
- White, wooden, or marble backgrounds seem to be the most popular among online users and have been shown to increase the number of subscribers, consumers, and clients.
- You can get white backdrops for your projects by using white foamy board or bristol board.
- Any flat wooden surface, such as a tabletop, a floor, or a deck, can serve as a backdrop.
- Create lasting memories through your Yarra Valley wedding photography that will be cherished forever.
- Keep in mind that the golden hue of older hardwood floors, for example, would not translate well with a flat lay shot.
- The key takeaway is to keep things neat and simple in the backdrop so that the focus stays where it belongs: on the products and props.
- Keeping the background of your flat lay simple and uncluttered can increase its effectiveness.
- This is the simplest and most effective method for accomplishing that result.
- When styling a flat lay, it's best to avoid choosing backdrops with complex patterns or bright colours, since they will detract attention from the items you're attempting to highlight.
- Another option for a backdrop is to pick up some white craft paper from the stationery section of a nearby store.
- The most crucial step is picking a background that will serve as a blank slate.
- In order to avoid having the background compete with or detract from the items you are displaying, you will be placing them on a prominent part.
- You can provide the impression of order on your Instagram feed by choosing a handful of your favourite posts and reposting them multiple times.
- In most cases, it will be the product itself.
- The hero of the flat lay may be your computer or a schedule if the story centres on the high level of service you offer.
- First, arrange your hero product where you want it to be on the flat lay, and only then should we add any other major props.
- As a result, if your favourite is a laptop, you might find that a beverage of choice as well as a notebook are also indispensable tools.
- The next step is to play around with the links your protagonist shares with the composition's other focal points.
- Together, they'll form the basis for the more sophisticated props that will be used in the production.
- It's a theme Noticing how, when looking through Instagram, you can tell what a flat lay is about even before reading the caption?
- The image serves as the narrative device.
- Some frequent options for essay content are listed below.
- By working together, the photographers and stylists would improve the shoot's lighting, composition, and prop choices.
- The second step, after deciding on a theme, is picking out the props you'll utilise to visually represent the music and set the mood.
- After you've set up your main props, share three industry secrets that will make your flat lay much more engaging.
- It's conceivable that this is simply a matter of taste, but We believe that photographs with human hands engaging with the subject of the shot are more interesting.
- Maybe it's because it's so easy for the viewer to imagine themselves in the situation shown, whether it's sipping coffee or a book being read.
- There's also a lighthearted vibe to it.
- Flowers, foliage, and other natural components are the one surefire method of improving any predicament.
- Most commonly used are components from nature, such as succulent, wood slices, laurel, "spilt" flour or meal around over a food shot, petal, leaves, beech branches, and so on.
- Many flat shams have a book, chosen for its relevance to the narrative and its compatibility with the intended colour scheme.
- If the hero item is the main attraction of your flat lay, then the supporting props are the supporting actors and supporting plot points.
- Your account will benefit from props that offer context to the star product without taking away from it.
- If the laptop is the protagonist, then the supporting cast could consist of a pen, a pair of reading glasses, some paper clips, a watch, and so on.
- Use your best judgement when selecting how to stage your flat lay.
- Think about what would make sense for a day at the beach if you were a blogger planning on spending the day there and wanting a lovely flat lay photo to go along with it.
- No one brings valuables like wallets or purses to the beach.
- That's why you load up on sunscreen and carry a beach bag.
- Think on what "genre" or category your flats lay would fall under, and make sure the props you use fit well with that.
- Arrange your props with care.
- It may be a Facebook cover photo, in which case the image would need to be both small and large.
- Preparation can help you arrange your objects in the best beneficial way, allowing you to get the most out of your shots.
- Next, consider the feeling you want viewers to receive when they look at your picture.
- No room for improvement in terms of tidiness and order?
- You can line up your props at sharp angles, or you could arrange them so it looks like they fell into place that way by accident and it still looks great.
- Depending on the feeling you want to capture in the image, you can go either way.
- The best advice would be to keep things as basic as possible.
- Your flat-lay need not showcase ten separate objects.
- Many times, all that is required to make a spectacular flat is a single product as the focus and a single stylistic feature.
- As more information is added, the scene becomes more crowded and the eye is pulled to more details.
- It's helpful to adhere to a colour palette you've set when choosing your secondary props.
- Your aligners will be less of a focal point if they are a similar colour to the rest of your teeth.
- Limit yourself to a maximum of than four or three complementary colours when you're first starting out with colour palettes.
- Black and white both are neutral tones that match a broad variety of colour schemes, so accessorising with either of those colours is a safe bet.
- The key to creating a visually appealing flat layout is to use a limited colour palette and a variety of different sized pieces.
- Don't cluster too many circles (coasters, mugs, compact mirror), but do apply them to end things any sharper lines within your flat lay arrangement.
- Avoid the similar pitfall when choosing your colours and neutrals; don't put all of your emphasis on a single side.
- If black is your main component, for instance, use it liberally throughout the flat lay to draw attention to it.
- Continue trying out new things until you find the one that suits your needs in terms of form and function.
- In the Background Mastering these straightforward methods will ensure that you always obtain the shot you desire, no matter how interesting the flat lay behind the scenes may be.
- Taking images with your phone requires a higher vantage point, so consider standing on such a chair.
- If you don't have a steady hand, a tripod arm might be a great asset when using the DSLR.If you find that things shift when you turn your back, you can use adhesive tape to secure them.
- Any object that is taped down will remain in place no matter what you throw at it.
- Finally, remember to enjoy the process; after you've learned the basics, it's all about finding your own voice and style.
- It's recommended that beginners use natural light while lighting their flat lays.
- You can get it everywhere, and there's no fee.
- If you want to get the most natural light, you should do it in the shadows, either outside or in front of a window on the shaded side of your home.
- Proper lighting is essential.
- When attempting to take a flattering flat lie photo, lighting is a crucial element to think about.
- Either artificial or natural light can be used for this purpose, but it should be bright and diffused.
- The result is that the indicated positive from the origin is obscured.
- Good lighting options include a spot adjacent to a window (but not in its direct line of sight), a lightbox containing lights beaming through thin white cloth, or lights with softboxes.
- If this discussion of lighting has left you feeling overwhelmed, have no fear; more posts will be on the way to help you master the art of effective illumination.
- Because flatlays are typically photographed from above, be sure your camera is positioned such that the centre of the flat lay is looking down at the subject.
- In order to be seen better, you may want to stand on a seat or a ladder.
- In order to take a good flat lay photo, you need to hold your camera with the lens points straight down.
- You can get more precise with your photo composition by using the grid feature and the square crop option on your phone's camera.
- It is in your greatest interest to take numerous images of your goods, each of which needs to be produced in a distinctive way, utilising a wide range of viewpoints and flat laying arrangements.
- Mastering your shot and then shooting it in a variety of ways to get access to new features is a great way to keep the action fresh.
- You can get the most out of the time and energy you put into creating the ideal flat lay by shooting as many images as possible.
- You might try shooting your flat lay from a different angle, changing the cut, or swapping out some of the key elements for something else.
- In addition, We enjoy snapping images of the behind-the-scenes action to share with my viewers.
- Getting your hands on as much information as you can is in your best interest.
- The process of editing and retouching an image goes beyond adding a filter or increasing the contrast.
- Expert retouchers may do a wide variety of procedures, including deep-etching, color management, manipulation, and more.
- To convince your audience that what they're seeing is real while also drawing attention to what sets your product unique from the competition.
- Post-shoot editing is something every photographer should learn to do.
- Numerous high-quality photo-editing apps are available for use on portable electronic gadgets like smartphones and tablets.
- Currently, my favourite photo editing apps are VSCO, Snapseed, and Instagram's native capabilities.
- Changing the crop, contrast, contrast, brightness, and clarity of your photos is one of the simplest and fastest methods to give your flat lays a more distinctive look.
- The easiest way to achieve the desired effect is to play around with the many tools and filters available.
- You can grow better at making flat lays, like any other talent, by practising it regularly.
- You should use these instructions as a starting point, as there is no single "right" approach to take an image.
- When you feel comfortable with your flat-laying skills, you can go out and try new techniques and ideas.
- In time, you'll discover what works best for you in terms of props, lighting, and post-production editing, and this will lead to the development of your own signature flat lay style.