How Can I Learn Photography?
With the widespread availability of affordable cameras and simple yet powerful picture editing programmes, photography has emerged as the most prominent artistic medium of the modern period.
Because of all of these factors, a new generation of amateur photographers has emerged, and their numbers are higher than they have ever been. But for those who want to move beyond the realm of beginners, is going to photography school necessary? If you need advice on your wedding photography, check out our photography packages and services at Wild Romantic Photography.
When it comes to people's ideals as well as their bank accounts, teaching any kind of creative discipline can be considered to be a touchy subject. When fighting against the millions of photographs published to sites like Instagram and Flickr, do you need professional training to succeed? Given that many working photographers today struggle to secure steady employment, this is a valid concern. First, you should ask yourself why you want to learn these things.
Why Learn Photography?
There is a rising need for visual material due to the proliferation of online and social media platforms. In addition to this need, there is a growing trend of documenting life's most momentous occasions with photographs so that we can look back on them and share them with loved ones years after they happened. There needs to be more images available for the public to enjoy, and more specifically, the public needs to enjoy photographs taken by you.
The catch is that you can't use just any old picture! You will not succeed unless you put in the time and effort to train your eyes to see what you need them to. How easy do you anticipate the procedure to be? To the contrary, you're here because you want to learn photography basics from me in order to enhance your camera's narrative potential.
How Do Cameras Work?
When we first start out as photographers, we rely heavily on our eyes to take in information. Furthermore, I have a duty to facilitate your entry into photography in any manner I can.
Exposure
When first picking up a camera as a hobby, the most crucial consideration should be exposure.
You'll have more control over your camera and your results if you have a firm grasp on exposure. Shutter speed, aperture, and ISO are the three parts that combine to create an exposure.
As you'll see in a moment, the impact of these variables goes beyond simply affecting the exposure. They also alter the sharpness, blurriness, and noise of digital images.
After you've mastered the automatic settings, you can move on to the manual mode. That's when you take command of the camera and stop letting it direct you.
If you want to remember all three, the exposure triangle can help you out. In combination, they allow you to control how much light enters your eyes from any given environment.
With this information in hand, you'll be better able to see how changing any one parameter affects the others. In other words, if you are photographing the same scene in precisely the same lighting conditions, your photos should seem identical.
How to control exposure:
In contemporary photography, exposure is controlled by a combination of the aperture, shutter speed, and ISO. In use since the 1840s, these parameters are still often employed today. A vast range of sophisticated shooting modes and functions are available on today's cameras.
Newbies will find the Automatic mode the most useful because it allows the camera to automatically adjust the exposure settings based on the amount of light entering the camera. The camera, no matter how sophisticated it is, cannot read the mood of the scene you're photographing.
Whether you're taking portraits, landscapes, or sports photos, your camera needs to be set up in a particular way. Aperture, shutter speed, and ISO are all examples of such controls. However, you won't be able to use your camera to its fullest extent until you've mastered all of its settings and are in complete command of them.
Your photographs will be your most treasured wedding keepsake. Not sure where to start when it comes to looking for your wedding photographer of choice?
Aperture
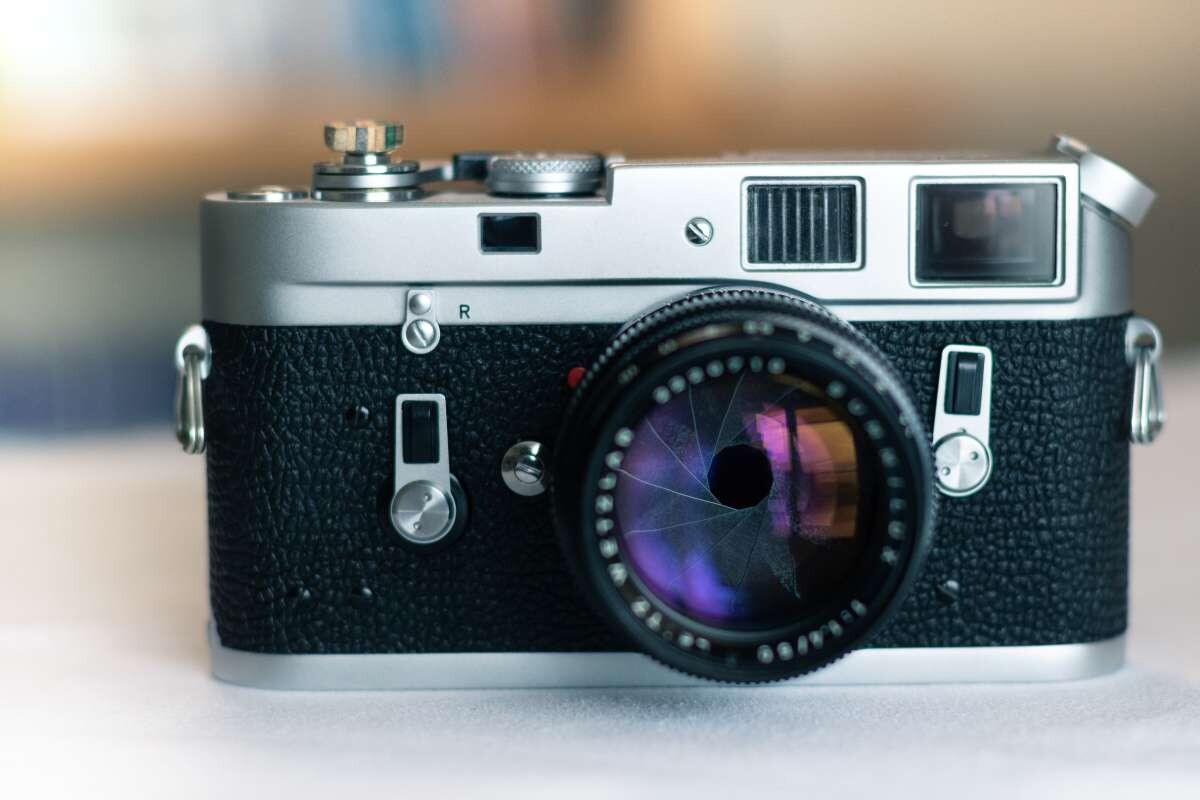
Being vulnerable entails three distinct phases. Our initial point of reference will be the aperture. This opening in the lens's interior is where the light enters.
It's similar to the shape of your eye's pupil. The aperture controls how much light enters the camera, therefore a larger aperture allows more light in while the contrary is true as well. Simple? Just barely.
In order to let in more light, decreasing the f-number by opening the aperture. The effect is particularly noticeable in low light. Just know that your depth of field will decrease dramatically if you do that. Unfortunately, this is not the best scenario for landscape photography.
This is only a brief overview; for the complete context of the conversation, see the source post. The aperture is the most important control to tweak first, as it determines how much of the scene is in focus. However, the shutter speed is particularly crucial if you wish to blur the image to give the appearance that anything is moving.
Shutter Speed
After passing through the lens's aperture, the light reaches the shutter. Making a choice on how much light will enter the camera is a crucial step at this time.
To prevent motion blur, the exposure duration should be adjusted to a very small number of seconds (1/250, for example). However, different shutter speeds work well in diverse conditions.
From super-fast (1/40,000) for action shots to super-slow (30 seconds) for nighttime landscapes, you can set your shutter speed to capture every moment perfectly. What you shoot and how much light you have available will determine everything.
One of the most important aspects of photography is mastering shutter speed.
ISO
The shutter speed will act as a filter on the light before it passes through the aperture and reaches the sensor. Currently, we are debating the best way to adjust the ISO.
When the ISO is increased, the image becomes brighter. However, over time, the image quality declines. The quantity of "grain" or digital noise will grow.
As a result, you'll have to weigh the importance of the grain against the risk of being exposed.
Exposure Summary
Having mastered ISO, shutter speed, and aperture individually, the next stage is to study their interplay with one another to get the desired exposure.
The exposure of a photograph is the most fundamental and crucial part of the art.
If you're just starting out in photography, mastering this technique is more important than worrying about things like composition and framing.
After reading this essay, you will have a firm grasp on the'stop'-based system for determining exposure. To top it all off, you'll find out what order to put the aperture, shutter speed, and ISO in for optimal results.
What is Depth of Field: The Magic Maker
Depth of field is the fraction of an image that is in focus. It's because of this that your shot's subject will be sharp while the background will be out of focus. Shallow depth of field can be achieved by using a big aperture, which does not require the photographer to adjust any other settings or use any other controls.
It is common practise to use an aperture of f2 or f2.8 to obtain a shallow depth of focus. A shallow depth of field, in which all elements of a landscape shot appear sharp, is achieved by using a tiny aperture, such as f11 or f16. A 50mm f/1.8 Nifty Fifty is the lens you should get for your camera. They're cheap, with an aperture of f/1.8 that's perfect for capturing gorgeous blurred backgrounds.
Can you learn photography on your own?
Absolutely! The best ideas and most skilled photographers from all over the world have come together in one place: the internet. You can find the answer to any photography-related question, regardless of its nature, by searching the internet. Do you want to become an accomplished flash photographer? If yes, you should study the inverse square law and understand why it is so important.
In this day and age, every problem may be solved by consulting Google. Do you want to learn the fundamentals of how to adjust your settings when taking pictures of a newborn? Find the answer by searching online. Anyone can pick up photography skills and techniques. Readers who want to learn how to use a DSLR camera for photography will find this article helpful.
Planning your dream wedding and don’t want to miss out on the special moments on your big day? Worry no more, Wild Romantic Photography has you covered.
Essential Things Every Photographer Needs to Learn
I take it that you aspire to produce some outstanding photographs. Do you want to improve as a photographer and take your work to the next level? We'll start from here on out.
A Camera's Worth Its Weight in Knowledge
Would you be surprised to learn that some photographers who label themselves "professionals" actually have no idea what they're doing? Sure enough, that's the situation we're in. If I don't know, how can I?
This is a profoundly embarrassing confession to make, but it is necessary. Then we started shooting with the camera set to Aperture Priority mode.
We decided that this would be easier and a better use of our time than attempting to understand all the technical terminology.
For this reason, it's an ideal spot to put up an act for a while. As a result of technological advancements, photographers may now acquire unprecedented access to their subjects. However, without such information, you will remain in the "fluking it" category and be unable to advance.
To clarify, I mean that you should be familiar with the inner workings of your camera and lens and how they affect the quality of your photographs.
One crucial photography skill is mastery of the aperture and its effect on image quality.
The ability to control the shutter speed of your camera is crucial for a wide range of creative photographic effects.
You need to be able to assess, with the help of your ISO, whether or not an action is justifiable given the current circumstances.
Then, you might need to familiarise yourself with the many drive modes, white balance, focusing, and stabilisation modes, among other settings, that your camera offers.
I'm relieved to report that things aren't as tough as they seem at first glance. In only a few hours, you can learn everything you need to know. In other words, once you've done this, you'll be prepared for the next challenge.
Understand Exposure
To take your photography to the next level, it's important to understand how the interplay of aperture, shutter speed, and ISO affects the final image. You can proceed to the next stage once you've finished this.
One of the trickiest tasks is determining what is meant when the term "good exposure" is used. Some folks make it seem like you're an idiot if you don't know the difference between the "proper exposure" and the "wrong exposure."
What a terrible idea.
To have a deeper knowledge, why not search it up online? I hope you succeed! All of them are extremely complicated and fail to provide a clear explanation of how to create a good exposure.
So, we came up with our own definition of "exposure":
By adjusting the brightness of the image to your liking, you can achieve a good exposure.
Brighter than desired indicates overexposure. When the image is darker than desired, this is called underexposure.
Your final say in any artistic matters rests solely with you. The photography duties should fall to you. However, you need to be familiar with your camera's controls in order to achieve the desired exposure, and you must also be able to use those controls effectively.
Looking for a Yarra Valley wedding photographer? Look no further! Wild Romantic Photography has you covered.
Shining One in Charge of All Light
Before I continue, let me emphasise that I disagree with the widely held belief that one person can genuinely control the flow of light (except maybe the Greek God Apollo). Light is master, and we photographers are its loyal subjects. Not having it prevents us from completing any tasks. And it can act like a tyrant who can't be relied on at any given moment (especially if you use natural light).
However, expanding one's knowledge of light is crucial. so that you might fully appreciate its multifaceted richness. must have the skills necessary to deal with it effectively in every situation, so that we may succeed. Intently seek it out. In all honesty, this is a job that will never end for the photographer. With sufficient awe and effort, we can get close to mastery, but we never will.
How do we get started? Simple. Outside. If you want to light up your backyard, there are always more options. Is it too hot during the middle of the day? Do you have any illumination for the witching hour? while it's absolutely dark outside? At what point will one be able to see the stars?
Get back inside as soon as possible. Take use of the daylight streaming in through the windows. There is an infinitude of options available, and you may drill down into the finer points of a scenario that first appears straightforward but is actually rather complicated.
Do you want to keep learning? Try creating your own source of illumination (like a real magician) and seeing what happens. Find another resource that teaches you how to utilise a flash. Rent, borrow, or buy a set of studio lights and start playing around with different lighting effects.
Constantly be on the lookout for new sources of light, keep studying the topic, and force yourself into unfamiliar settings. Over the course of your life, it will provide you the chance to take part in innumerable amazing picture ops and adventures.
Depth of Field
Please, no more lyrical discussions about illumination. It's time to put words into action.
You probably don't give depth of field, one of photography's most important features, the consideration it needs.
Depth of field is one of those ideas that seems straightforward at first but gets complicated as you dig more into it. However, gaining this knowledge will necessitate significant adjustments to your process at even the most fundamental levels.
If you don't know anything about depth of field, you could believe that decreasing the aperture setting is all that's needed to get background blur in an image. Your failure to understand depth of field principles is to blame.
However, you need also consider the distance between the camera and the subject, as well as the focal length of the lens being used. In addition, a number of contributing circumstances have coincided. The depth of field you get may not change much when you change the aperture, depending on the scene. Exactly, you are correct in saying so. In certain situations, the gap between f/1.4 and f/11 is so small that it's practically imperceptible to the naked eye.
If you have a strong grip on how to modify the different parameters on your very affordable point-and-shoot camera, you may achieve remarkable background blur by understanding the interaction of these aspects. This is correct even when the aperture is set to its largest opening.
Another prevalent myth concerning depth of field is that "shallow is always better." When you're first getting started, shallow depth of field is one of the most interesting and novel methods to experiment with. Overuse, however, is possible. When shooting a subject's head, have you ever viewed a photograph taken with an 85mm lens set at f/1.2? The stunning bokeh may make you forget that not a single subject's eye is in sharp focus. That's not quite right, to put it nicely.
Avoiding use of large apertures is unwarranted. in addition, restricted passageways. Actually, aperture size is completely irrelevant. Master the intricacies of depth of field so you can utilise it creatively in your photography. By doing so, you'll show off your photography prowess. They are aware of their options and make deliberate moves to get the best possible results.
Learn to See Things From Different Angles
This is one of the more neglected facets of photography. Perspective, in its simplest form, explains the sizes, positions, and distances of the objects in your frame in relation to one another. The significance of each relocated element is altered by the others. The subjects in the photo may be rendered more three-dimensionally by this, or the image may become flatter.
And yet, why isn't this very important topic discussed more frequently? Because of the difficulty involved! At least, that may be the first impression.
Let's get this celebration started then. The location you choose to stand in when snapping a photo is crucial. It's what you base your opinion on. By shifting your viewpoint, you may be able to transform a dull scene into a captivating one.
To truly understand the experiences of others, you must put in significant time and research. Plus, get those little feet going! Bend your knees, squat, ascend and descend a ladder, move one foot forwards, and one foot to the left. Don't raise any suspicions; instead, go slowly upward. These factors, which shift your perspective, have significant implications for the final look and feel of your images. Experiment. Keep track of your progress by snapping photos at regular intervals as you move between different vantage points. When does this alter the way people look at it?
To the next topic: the lens's focal length. Does it make you think differently? Specifically, the answer is not yes. An altered perspective results (that is, the angle of the scene that your camera captures). More of the environment may be captured by using a wide-angle lens. With a telephoto lens, you can zero in on a much more concentrated yet still substantial portion of the background. However, simply switching lenses won't give you a new perspective (though it may appear to).
It’s when you combine a lens change with a position change that your perspective changes. We have an exclusive range of wedding photography Mornington Peninsula services. Check them out here.
Subdue Your Writing Skills
We'll dissect some music to show how our worldview has expanded. This is a large area of research that delves into a scene's construction by examining the chronological development of its many elements. This concept goes beyond than only perspective, and includes light, lines, shapes, forms, colours, frames, textures, patterns, movement, and reflections.
You may be acquainted with some of the "rules" of composition already, such as the Rule of Thirds, Negative Space, Balance, and Visual Paths. There's a risk that many photographers are discouraged from exploring the fascinating field of composition because they believe they need to sit down and learn the rules before they're allowed to be photographers. Many people think that regulations are dull and difficult to adhere to.
But I'm here to tell you that such "rules" don't hold water under closer scrutiny. In most cases, they are presented as suggestions rather than requirements. These are the different methods in which you might arrange the elements in your frame to convey information, create an effect, or catch the eye of the viewer. In addition to being enjoyable, these activities are fundamental for developing your photographic skills.
In talks on writing, the "Rule of Thirds" is often used as an illustration. Photographs are often improved by positioning the subject at one of the "magical thirds lines" or at the intersection of the lines (what I term an Awesome Spot). This seems to be the suggestion, at least. When you know this, you may use it to your advantage by focusing the attention of your listeners where you want it to go.
You should avoid putting your subject in the exact middle of the frame, but if you're feeling fun you can do so on purpose. This might be done, for example, to draw attention to the subject's symmetry. Perhaps it has a solemn aura, and its central placement further adds to the effect. Perhaps it is something really inconsequential, and the drab, centralised composition is what really makes the tension between the two elements sing.
It's up to you, seasoned expert photographer. Learning about composition will give you the tools to make imaginative decisions like this one with every shot you take.
Become an Expert in Post-Production
Let's end on a note that, considering the subject matter, is bound to spark some discussion.
In photography, two competing philosophies have emerged. Post-processing, or altering images using software after they've been taken, is seen as useless at best and dishonest at worst by some individuals.
Counterargument: post-processing is a useful technique that may be used to make a shot truer to the photographer's original vision or to enhance the picture's mood or purpose. The history of this creative method precedes the development of photography.
If you had to guess, what classification would you give us?
It is impossible to be a competent digital photographer without knowing how to refine your shots later. (Gasp! Even traditional film photographers employ post-processing techniques.
It's no secret that the images you get printed from your digital camera don't look anything like the scenario you captured. None of the drama, subtlety, or energy is there.
Post-capture processing allows for fine-tuning of the image's contrast, brightness, sharpness, and saturation.
After that, you'll be able to progress even further.
Software like Adobe Lightroom enables several editing techniques, including dodging and burning. To emphasise a specific part of an image, you can selectively brighten or darken its pixels.
As you can see, these methods are not novel. In contrast, dodging and burning required early photographers to manually expose various parts of the print for varying durations of time. In today's modern world, it is possible to automate such tasks with computers.
If you have ever wondered how to learn photography on your own online and master your camera, this article is perfect for a beginner’s companion. If you’d like to work with professional photographers for your wedding, book with us at Wild Romantic Photography.
You can use this as a manual if you're interested in photographing everything from newborns to weddings to seniors to landscapes to natural surroundings. Professional wedding photographer and host of the Beginner Photography Podcast here. Every week I get to chat with some of the most talented photographers in the world. First-time photographers, in my view, need to have a firm grasp on the basics of how a camera detects light and operates before they can take decent pictures of anything.
Conclusion
Photography has emerged as the most prominent artistic medium of the modern period. A new generation of amateur photographers has emerged, and their numbers are higher than ever. But for those who want to move beyond the realm of beginners, is going to photography school necessary? In contemporary photography, exposure is controlled by a combination of the aperture, shutter speed, and ISO. As you'll see in a moment, the impact of these variables goes beyond simply affecting the exposure.
They also alter the sharpness, blurriness, and noise of digital images. An aperture is the most important control to tweak first, as it determines how much of the scene is in focus. The shutter speed is particularly crucial if you wish to blur the image. Depth of field is the fraction of an image that is out of focus while the background is sharp. Can you learn photography on your own?
The best ideas and most skilled photographers from all over the world have come together in one place: the internet. A 50mm f/1.8 Nifty Fifty is the lens you should get for your camera. I'm relieved to report that things aren't as tough as first glance. In only a few hours, you can learn everything you need to know. To clarify, I mean that you should be familiar with the inner workings of your camera and lens.
You can proceed to the next stage once you've finished this. Light is master, and we photographers are its loyal subjects. With sufficient awe and effort, we can get close to mastery, but we never will. Depth of field is one of those ideas that seems straightforward at first but gets complicated as you dig more into it. It's time to put words into action.
If you don't know depth of field, you could believe that decreasing the aperture setting is all that's needed to get background blur in an image. However, you need also consider the distance between the camera and the subject, as well as the focal length of the lens being used. The location you choose to stand in when snapping a photo is crucial. By shifting your viewpoint, you may be able to transform a dull scene into a captivating one. Bend your knees, squat, ascend and descend a ladder, move one foot forwards, and one foot left.
The "Rule of Thirds" is often used as an illustration. Photographs are often improved by positioning the subject at one of the "magical thirds lines". These are different methods in which you might arrange the elements in your frame to convey information, create an effect, or catch the eye of the viewer. Software like Adobe Lightroom enables several editing techniques, including dodging and burning. Post-capture processing allows for fine-tuning of the image's contrast, brightness, sharpness, and saturation. To emphasise a specific part of an image, you can selectively brighten or darken its pixels.
Content Summary
- But for those who want to move beyond the realm of beginners, is going to photography school necessary?
- First, you should ask yourself why you want to learn these things.
- Why Learn Photography?There is a rising need for visual material due to the proliferation of online and social media platforms.
- You will not succeed unless you put in the time and effort to train your eyes to see what you need them to.
- To the contrary, you're here because you want to learn photography basics from me in order to enhance your camera's narrative potential.
- You'll have more control over your camera and your results if you have a firm grasp on exposure.
- After you've mastered the automatic settings, you can move on to the manual mode.
- That's when you take command of the camera and stop letting it direct you.
- If you want to remember all three, the exposure triangle can help you out.
- How to control exposure:In contemporary photography, exposure is controlled by a combination of the aperture, shutter speed, and ISO.
- Newbies will find the Automatic mode the most useful because it allows the camera to automatically adjust the exposure settings based on the amount of light entering the camera.
- However, you won't be able to use your camera to its fullest extent until you've mastered all of its settings and are in complete command of them.
- The aperture controls how much light enters the camera, therefore a larger aperture allows more light in while the contrary is true as well.
- One of the most important aspects of photography is mastering shutter speed.
- ISOThe shutter speed will act as a filter on the light before it passes through the aperture and reaches the sensor.
- Exposure SummaryHaving mastered ISO, shutter speed, and aperture individually, the next stage is to study their interplay with one another to get the desired exposure.
- The exposure of a photograph is the most fundamental and crucial part of the art.
- After reading this essay, you will have a firm grasp on the'stop'-based system for determining exposure.
- To top it all off, you'll find out what order to put the aperture, shutter speed, and ISO in for optimal results.
- It is common practise to use an aperture of f2 or f2.8 to obtain a shallow depth of focus.
- A 50mm f/1.8 Nifty Fifty is the lens you should get for your camera.
- They're cheap, with an aperture of f/1.8 that's perfect for capturing gorgeous blurred backgrounds.
- Can you learn photography on your own?Absolutely!
- Do you want to become an accomplished flash photographer?
- Do you want to learn the fundamentals of how to adjust your settings when taking pictures of a newborn?
- Find the answer by searching online.
- Anyone can pick up photography skills and techniques.
- Readers who want to learn how to use a DSLR camera for photography will find this article helpful.
- Do you want to improve as a photographer and take your work to the next level?
- To clarify, I mean that you should be familiar with the inner workings of your camera and lens and how they affect the quality of your photographs.
- One crucial photography skill is mastery of the aperture and its effect on image quality.
- In only a few hours, you can learn everything you need to know.
- Understand ExposureTo take your photography to the next level, it's important to understand how the interplay of aperture, shutter speed, and ISO affects the final image.
- However, you need to be familiar with your camera's controls in order to achieve the desired exposure, and you must also be able to use those controls effectively.
- Light is master, and we photographers are its loyal subjects.
- And it can act like a tyrant who can't be relied on at any given moment (especially if you use natural light).However, expanding one's knowledge of light is crucial.
- must have the skills necessary to deal with it effectively in every situation, so that we may succeed.
- If you want to light up your backyard, there are always more options.
- Do you have any illumination for the witching hour?
- Take use of the daylight streaming in through the windows.
- Do you want to keep learning?
- Try creating your own source of illumination (like a real magician) and seeing what happens.
- Constantly be on the lookout for new sources of light, keep studying the topic, and force yourself into unfamiliar settings.
- Depth of FieldPlease, no more lyrical discussions about illumination.
- If you don't know anything about depth of field, you could believe that decreasing the aperture setting is all that's needed to get background blur in an image.
- Your failure to understand depth of field principles is to blame.
- However, you need also consider the distance between the camera and the subject, as well as the focal length of the lens being used.
- The depth of field you get may not change much when you change the aperture, depending on the scene.
- This is correct even when the aperture is set to its largest opening.
- Master the intricacies of depth of field so you can utilise it creatively in your photography.
- The location you choose to stand in when snapping a photo is crucial.
- It's what you base your opinion on.
- By shifting your viewpoint, you may be able to transform a dull scene into a captivating one.
- These factors, which shift your perspective, have significant implications for the final look and feel of your images.
- Experiment.
- When does this alter the way people look at it?To the next topic: the lens's focal length.
- An altered perspective results (that is, the angle of the scene that your camera captures).
- More of the environment may be captured by using a wide-angle lens.
- However, simply switching lenses won't give you a new perspective (though it may appear to).It's when you combine a lens change with a position change that your perspective changes.
- We have an exclusive range of wedding photography Mornington Peninsula services.
- These are the different methods in which you might arrange the elements in your frame to convey information, create an effect, or catch the eye of the viewer.
- In talks on writing, the "Rule of Thirds" is often used as an illustration.
- You should avoid putting your subject in the exact middle of the frame, but if you're feeling fun you can do so on purpose.
- This might be done, for example, to draw attention to the subject's symmetry.
- Learning about composition will give you the tools to make imaginative decisions like this one with every shot you take.
- Become an Expert in Post-ProductionLet's end on a note that, considering the subject matter, is bound to spark some discussion.
- Counterargument: post-processing is a useful technique that may be used to make a shot truer to the photographer's original vision or to enhance the picture's mood or purpose.
- Post-capture processing allows for fine-tuning of the image's contrast, brightness, sharpness, and saturation.
- Software like Adobe Lightroom enables several editing techniques, including dodging and burning.
- If you have ever wondered how to learn photography on your own online and master your camera, this article is perfect for a beginner's companion.
- If you'd like to work with professional photographers for your wedding, book with us at Wild Romantic Photography.
- Professional wedding photographer and host of the Beginner Photography Podcast here.
- Every week I get to chat with some of the most talented photographers in the world.
- First-time photographers, in my view, need to have a firm grasp on the basics of how a camera detects light and operates before they can take decent pictures of anything.