What Are The Tips For Editing Wedding Photographs?
Of course, editing images is a necessary part of being a wedding photographer, as you surely already know. Time-consuming and stressful tasks may be a part of your wedding photography workflow. These tasks may involve learning well how edit wedding images and being knowledgeable with each of Photoshop's brushes or tools. The following twenty pieces of advice for editing wedding pictures can entirely revolutionise your photo editing while making it lot simpler and faster.
It's a lot like training for a marathon to photograph a wedding. Still, the creative process that was fueled by the audience's endurance did not conclude with the curtain call.
After photographing the pre-ceremony preparations, the ceremony itself, the formal photographs, and the reception, you'll likely have hundreds of digital images in a single folder, if not thousands.
The last touch that editing can add to a wedding photo is sometimes the deciding factor between a decent photo and a great photo.
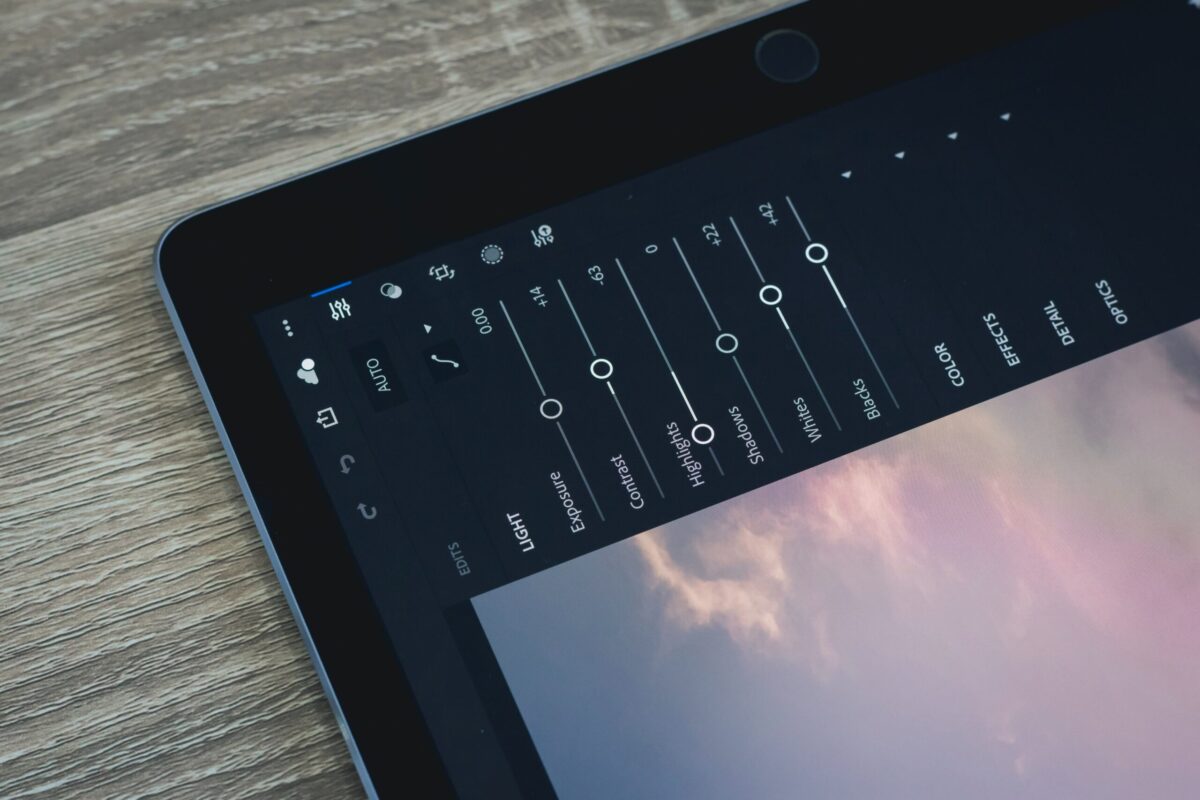
Photographers that specialise in weddings frequently utilise the photo editing software Lightroom. Lightroom's ability to merge organisation and editing into the a single workflow greatly accelerates the post-production process.
When sorting through hundreds of images, this is crucial. Lightroom's tools can speed up the editing process, but only if you know how to use them. Here are some ways to improve your wedding photos using Lightroom.
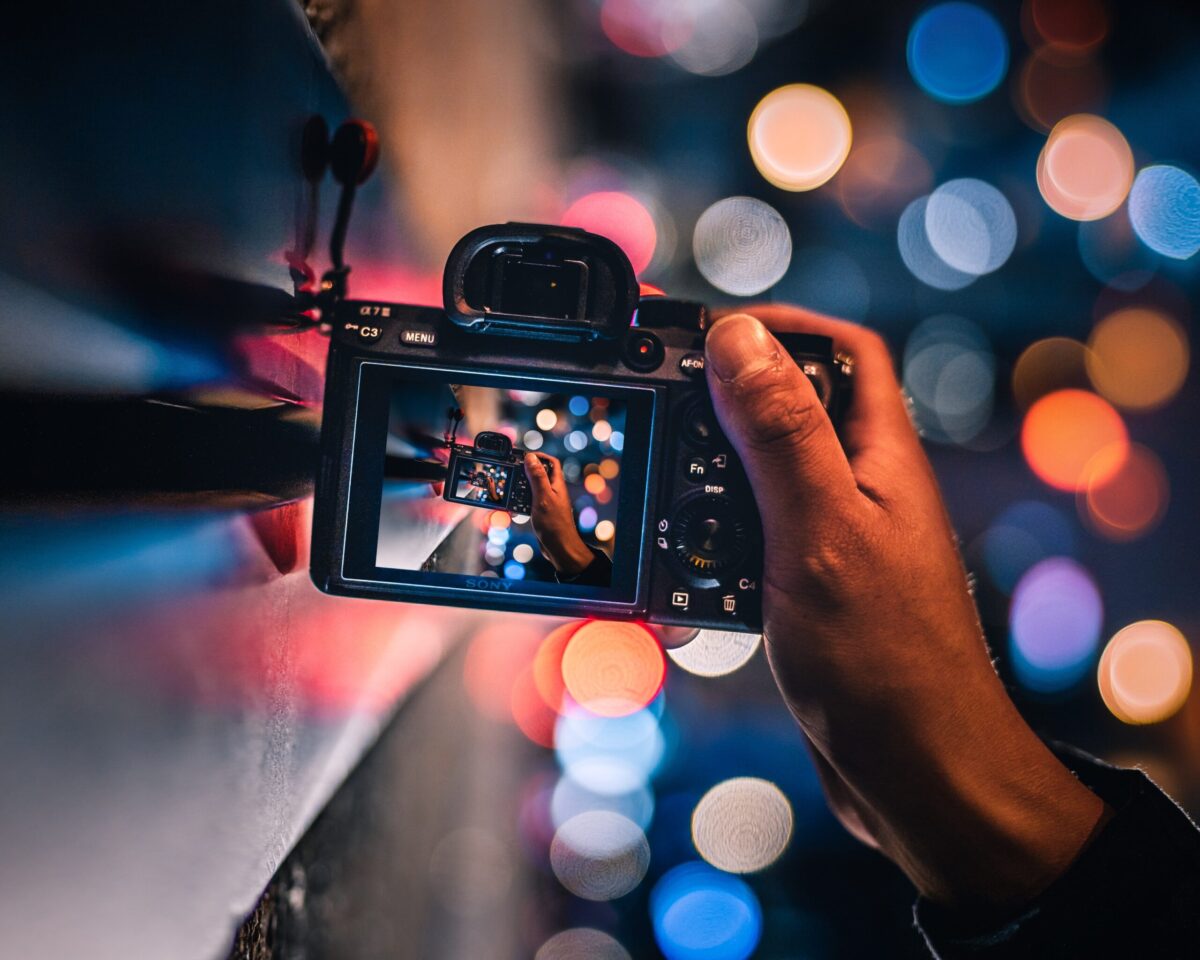
Capturing a wedding with your camera is a thrilling hobby that allows you to unleash your inner artist. Since the market is filled with cameras of incredible quality, even people with only the most basic photography skills and expertise may readily take high-quality images. However, if you desire your images to be memorable, it is likely that you will need to alter them in some kind.
Both photography and photo editing are considered to be forms of art in their own right. What to do with the photos after you photograph a wedding is a crucial consideration. Having to edit a huge number of wedding photos while still meeting the high standards that have been set may be both a creative and demanding endeavour.
In today's digital era, there is a plethora of photo editing programmes available online, some of which are free to use, while others need payment. Regardless of the editing programme you choose to use, here are a few useful hints that can be applied to your wedding photographs. Using these suggestions, you might be able to create some truly unforgettable photographs.
If you need advice on your wedding photography, check out our photography packages and services at Wild Romantic Photography.
Use Flags and Stars to Make Culling Easier
The first step in wedding photo editing is selecting the images that will require adjustments. To help users make the most of Lightroom's many features, including its ability to organise and edit photos, the programme includes a number of useful selection tools.
Select the Library's import option (bottom left) and then the destination folder (right) on your hard drive to begin importing files. Make sure you check the box labelled "Add to Collection," and then create a new Collection for the nuptials.
After importing a bunch of images into a collection, you may look through them individually in order to pick out the ones you want to save. In Lightroom, the flags and star are the two most prominent selection tools for the cull process. My use of flags is primarily for expediency.
To mark a photo for later editing, We either tap the little flag in the upper left corner of a thumbnail image in the library module or the filmstrip inside the develop module, or Just press the key P on the keyboard. You may now flag the image for later editing. (Are you having trouble keeping in mind the keyboard shortcut? Pick represents the letter P.
Giving each photo a rating out of five stars is another option. Clicking a number from the keyboard will award the specified number of stars to the selected image. After that, you can go back and change the ratings on the photographs with four or five stars, however you shouldn't remove the ability to add 3 stars just in case.
To expedite the editing process, use custom presets
Some photographers believe by the usage of presets to speed up the editorial process, while others argue that doing so would cause your photographs to look generic. Is there a right way to respond to this?
Presets in Lightroom can help you save time and effort, and they're also easy to customise to your liking. You can tailor an existing preset to your needs, or make your own from scratch to combine quickness with a unique aesthetic.
We have several great film-inspired settings, but a few of them make people's complexion look weird by boosting the contrast or adding too much orange.
After customising the preset to our liking, You can save any changes so that the preset always applies the preferences.
Modifying a preset is as simple as applying it to a photo, making the necessary changes, and then right-clicking just on preset or selecting "update to current settings." Simply click the link below to be taken to our superb article detailing the process of installing presets.
If you've been making changes manually up till now, you have the information you need to create your own presets, which is an option available to you. The altered photo can be saved as a new preset by selecting it in the main window and then clicking the plus sign at the bottom of a presets menu.
Offer the presets a name in the resulting pop-up window, and then check the box(es) beside the adjustments you made to the presently selected image that you want to save as part of the preset. Now, if you need to make an alteration that is identical to one you've made before, you may utilise the preset to quickly apply the changes.
Even though presets are great for getting started, most photos still need additional editing after they've been processed with one. The remaining sliders and dials can be used to make any necessary corrections to the image or to good the colour adjustments made by the preset.
Cropping
To crop an image is among the most fundamental operations provided to you when working with images. This holds true whether you're working with a severely unbalanced action shot or a team portrait that just needs a few tweaks to look right. Accurately cropping and slicing photographs was crucial in the initial periods of photography.
The identical result can now be achieved with the use of a mouse click. But you shouldn't crop your pictures too much, otherwise they'll look squashed and crowded. Cropping photos to a 1:1 square is also popular right now. In contrast, 16:9 is the best aspect ratio to use while making slideshows. As a matter of fact.
Get Rid of Noise
Dampen the Noise Photographs shot in low light are prone to "noise," which is the appearance of countless tiny fuzzy particles. It detracts from the foreground's prominence and the overall impact of the picture. Some images (especially those with darker tones) tend to show it only in specific areas, while photographs taken in low light tend to show it all over the picture.
You may quickly fix or remove the noise that is diverting attention from the quality of the wedding photos utilising photo fixing and retouching software. In technical terms, this process is called denoising, and it may be completed with a single click of the mouse in the Photo Enhancer.
Make It Shine
Your brightness setting is another factor to think about while editing your wedding images. Many images that appear too dark can have the scene magically brightened by a simple slide of a brightness bar (or perhaps a change in terms of the amount indicated as a figure or a percentage).
In order to get the most out of your photos, Wedding Studio can help you find the optimal brightness setting for each individual shot. An algorithm is used to analyse the image and determine the optimal level of light transmission.
Settings for Appropriate Contrast
Just as crucial as altering the white balance is increasing the contrast in your wedding shots. Achieving the correct mix of shadows and highlights can be a moment and tiresome procedure for beginners who aren't yet adept in working in Lightroom or Photoshop. Lightroom presets streamline the image editing process by automating the colour correcting steps. Don't waste time adjusting the sliders for each one individually.
Before making any adjustments, be sure the photograph's lighting has not been altered. The Color Range selection in the Select menu is where you'll find the highlights. The CTRL+J shortcut lets you make a copy of the current selection on the topmost layer. Once again, select the Significantly better, and from the Color Range menu, pick the Shadows option.
Pressing Ctrl + J will create a duplicate of the current selection on the a new layer; from there, you may adjust the blend mode of the shadow layers to multiply. Reduce the opacity to around 30%; the actual percentage will vary from image to image.
Start by creating a new layer, then filling it with a colour that will blend in well with the rest of the layers and switching the layer's blending mode to Overlaid. As a first step in adjusting light and shadow, we use the functions Dodge and Burns (O). It's also possible to create a new layer, change its blending mode to Soft Light and Overlay, and then fill in the necessary regions with a black and white brush that has a low opacity.
If you’d like to work with professional photographers for your wedding, book with us at Wild Romantic Photography.
Perfection in Exposure
When editing a photo, one of the initial things to do after applying the presets is to play around with the exposure. To start, readjust the overall exposure if necessary. The next step is to modify the image's brightest sections by dragging the lights and whites slider. Dark-area adjustments entail fiddling with image's shadow and blacks.
It's recommended that you play with with the curves-based exposure modification tools (such as the blacks and highlights) before altering the contrast slider. (Those photographers who are accustomed to working with curves can also obtain the true tone curve.)
Rather than using the contrast slider, which can result in an overexaggerated appearance, you can increase the contrast inside an image by having the highlights brighter as well as the shadows deeper. To create a matte effect, do the inverse of what you'd normally are doing and darken the brightness while lightening the darks.
When I want to enhance the realism of a ring shot, I use the clarity slider rather than the less-used presence adjustments. When dealing with haze or fog, the dehaze tool can be of assistance.
Color Adjustment Using White Balance and HSL Tools
Lightroom Classic's hue, saturation, lightness, and vibrance adjustments can be found in two main panels. The white balancing is adjusted for the entire image from the very top.
You can use the dropper tool to choose the couple's shirt or even the bride's outfit, both of which will be white, and then use the temperature or tint sliders to make any needed modifications to the selected area.
Although the primary panel also features vibrance and saturation sliders, it's simple to push them far in either direction. If you really must use them, at least run through the HSL edits to see if anything more has to be done.
You may adjust each colour in the picture independently using the HSL (hue, saturation, and luminance) panel. The brightness of a colour describes how bright or dim it is. Saturation refers to how intense a colour is, whereas hue refers to the precise tone of the that colour.
Lightroom's HSL panel features individual sliders for each colour, allowing you to alter them without influencing the others or the overall hue. For creating a specific feel in your artwork, these colour tools were invaluable. For instance, if the greens and blues in a film are altered, the entire feel of the movie might be altered.
You may make some tweaks and customise a look with the help of the HSL panel. Lifting the oranges luminance slider will lighten skin tones, while lowering its red luminance slider will hide redness.
This HSL is also required for professional-quality monochrome photo creation. After the image is converted to black and white, the HSL panel will change to the B&W panel. From this menu, you may adjust how much grey each colour is toned down to.
When you have a photo wherein two different colours look identical when viewed as black and white, then can alter one of those colours to increase the contrast inside the monochrome form of the shot.
A final HSL hint: if you're not sure where a colour sits in the HSL panel, or where it would be transformed to black and white, then can clicking on the tiny circle icon in the bottom of the HSL panel.
With the target tool active, the corresponding colour slider will become illuminated when the cursor is moved over it. It takes only one click of the tool and a drag in either way to change the real slider value for any panel you have open.
This is correct for all three panels: brightness, saturation, and monochrome.
Use the Clone Tool to correct flaws
The clarity of your wedding photos could be compromised by flaws like wrinkles, spots, or shadows. However, with a few repetitions of the cloning tool, it will appear as though these defects were never there. Excessive use of this tool can make photos look artificial, so moderation is key. Professional picture editing software which is also programmed can assist remove the element of surprise when repairing photos, letting you get stunning and consistent every time.
Vibrancy of Colour
The subject matter will either "pop" with life or look as a boring image, as if a thick veil had already been placed so over lens, depending on the colour tones of your photograph. By capturing light with separate red, white, and blue sensors, digital cameras can duplicate the full range of colours seen by the human eye and remembered by the human brain. If the camera has an extreme preference for red, green, or blue, the overall impression and impact of the image may be diminished. Do you think her evening dress was blue or lilac?
With the right software and a little bit of artistic skill, altering the color calibration in you wedding images is a breeze. It would be wise to use an automatic photo editing solution like muvee Wedding Studio in this situation. The dynamic colour palette of the actual world, as seen by the human eye, is faithfully recreated using patent-protected colour science technology. Try it! To put it mildly, it's incredible.
Use the Sharpness Tool to remove blur
It's to be expected that some of Bob the shooter's hundreds of images from a lengthy day will turn out fuzzy or more or less out of focus. This is particularly true for candid or action photographs. Images that would have been absolutely useless without sharpening tool may be salvageable. Oversharpening an image can make it look fake or even comical, so be careful. The included presets in Photo Enhancer will give your images a more professional appearance. They will all look more polished and professional as a result.
Are you organising your dream wedding or hoping to catch all the action? Stop stressing, because Wild Romance Photography has you prepared.
If you want to make a name for yourself in the world of picture editing, you'll need a steady touch, a wealth of experience and knowledge in every one of the aforementioned areas, and more. You can't learn the ropes and develop a keen eye unless you put in the time and effort required. Our engineers have combined the "tricks and tips" that photographers find most helpful and popular into a set of intelligent presets that are activated with a single click.
Among the various possibilities for altering wedding images, these are some of our favourites. We continue to have faith in our main purpose even though we acknowledge the value of learning about various photo editing techniques. Our goal is to help professional wedding photographers thrive and grow their businesses.
This means contracting out tasks like wedding photo editing that consume a lot of time but bring in little to no revenue for your company. Do you have concerns regarding the quality of our photo editing? Talk to us online to learn more about how we can take the burden of editing off your shoulders and help you focus on the creative aspects of wedding photographers that will help your business grow.
Conclusion
Photographers that specialise in weddings frequently utilise the photo editing software Lightroom. Lightroom's ability to merge organisation and editing into the a single workflow greatly accelerates the post-production process. Here are some useful hints that can be applied to your wedding photographs. Select the Library's import option and then the destination folder on your hard drive to begin importing files. To mark a photo for later editing, either tap the little flag in the upper left corner of a thumbnail image in the library module or the filmstrip inside the develop module.
Just press the key P on the keyboard. Modifying a preset is as simple as applying it to a photo, making the necessary changes, and then right-clicking just on preset or selecting "update to current settings". The altered photo can be saved as a new preset by selecting it in the main window and then clicking the plus sign at the bottom of a presets menu. Photographs taken in low light are prone to "noise," which is the appearance of countless tiny fuzzy particles. Some images (especially those with darker tones) tend to show noise only in specific areas, while others show it all over the picture.
Images that appear too dark can be magically brightened by a simple slide of a brightness bar. Lightroom Classic's hue, saturation, lightness, and vibrance adjustments can be found in two main panels. The white balancing is adjusted for the entire image from the very top. Use the dropper tool to choose the couple's shirt or even the bride's outfit, both of which will be white. You may adjust each colour in the picture using the HSL (hue, saturation, and luminance) panel.
Lightroom's HSL panel features individual sliders for each colour, allowing you to alter them without influencing the others or the overall hue. This HSL is also required for professional-quality monochrome photo creation. With the right software and a little bit of artistic skill, altering the color calibration in you wedding images is a breeze. Digital cameras can duplicate the full range of colours seen by the human eye and remembered by the brain. Images that would have been useless without sharpening tool may be salvageable.
Overharping an image can make it look fake or even comical. The included presets in Photo Enhancer will give your images a more professional appearance. Our engineers have combined the "tricks and tips" that photographers find most helpful and popular into a set of intelligent presets that are activated with a single click.
Content Summary:
- Of course, editing images is a necessary part of being a wedding photographer, as you surely already know.
- Time-consuming and stressful tasks may be a part of your wedding photography workflow.
- These tasks may involve learning how edit wedding images and being knowledgeable with each of Photoshop's brushes or tools.
- The following twenty pieces of advice for editing wedding pictures can entirely revolutionise your photo editing while making it a lot simpler and faster.
- It's a lot like training for a marathon to photograph a wedding.
- After photographing the pre-ceremony preparations, the ceremony itself, the formal photographs, and the reception, you'll likely have hundreds of digital images in a single folder, if not thousands.
- The last touch that editing can add to a wedding photo is sometimes the deciding factor between a decent photo and a great photo.
- Photographers that specialise in weddings frequently utilise the photo editing software Lightroom.
- Lightroom's ability to merge organisation and editing into a single workflow greatly accelerates the post-production process.
- When sorting through hundreds of images, this is crucial.
- Lightroom's tools can speed up the editing process, but only if you know how to use them.
- Here are some ways to improve your wedding photos using Lightroom.
- Capturing a wedding with your camera is a thrilling hobby that allows you to unleash your inner artist.
- However, if you desire your images to be memorable, it is likely that you will need to alter them in some kind.
- Both photography and photo editing are considered to be forms of art in their own right.
- What to do with the photos after you photograph a wedding is a crucial consideration.
- Having to edit a huge number of wedding photos while still meeting the high standards that have been set may be both a creative and demanding endeavour.
- In today's digital era, there is a plethora of photo editing programmes available online, some of which are free to use, while others need payment.
- If you need advice on your wedding photography, check out our photography packages and services at Wild Romantic Photography.
- The first step in wedding photo editing is selecting the images that will require adjustments.
- To help users make the most of Lightroom's many features, including its ability to organise and edit photos, the programme includes a number of useful selection tools.
- Select the Library's import option (bottom left) and then the destination folder (right) on your hard drive to begin importing files.
- Make sure you check the box labelled "Add to Collection," and then create a new Collection for the nuptials.
- After importing a bunch of images into a collection, you may look through them individually in order to pick out the ones you want to save.
- In Lightroom, the flags and star are the two most prominent selection tools for the cull process.
- To expedite the editing process, use custom presets.
- What Are The Tips For Editing Wedding Photographs?
- Some photographers believe the usage of presets to speed up the editorial process, while others argue that doing so would cause your photographs to look generic.
- Is there a right way to respond to this?
- Presets in Lightroom can help you save time and effort, and they're also easy to customise to your liking.
- You can tailor an existing preset to your needs, or make your own from scratch to combine quickness with a unique aesthetic.
- After customising the preset to our liking, You can save any changes so that the preset always applies the preferences.
- Modifying a preset is as simple as applying it to a photo, making the necessary changes, and then right-clicking just on preset or selecting "update to current settings."
- Simply click the link below to be taken to our superb article detailing the process of installing presets.
- If you've been making changes manually up till now, you have the information you need to create your own presets, which is an option available to you.
- The altered photo can be saved as a new preset by selecting it in the main window and then clicking the plus sign at the bottom of a presets menu.
- Offer the presets a name in the resulting pop-up window, and then check the box(es) beside the adjustments you made to the presently selected image that you want to save as part of the preset.
- Now, if you need to make an alteration that is identical to one you've made before, you may use the preset to quickly apply the changes.
- Even though presets are great for getting started, most photos still need additional editing after they've been processed with one.
- The remaining sliders and dials can be used to make any necessary corrections to the image or to good the colour adjustments made by the preset.
- To crop an image is among the most fundamental operations provided to you when working with images.
- Accurately cropping and slicing photographs was crucial in the initial periods of photography.
- The identical result can now be achieved with the use of a mouse click.
- But you shouldn't crop your pictures too much, otherwise they'll look squashed and crowded.
- Cropping photos to a 1:1 square is also popular right now.
- In contrast, 16:9 is the best aspect ratio to use while making slideshows.
- Photographs shot in low light are prone to "noise," which is the appearance of countless tiny fuzzy particles.
- Some images (especially those with darker tones) tend to show it only in specific areas, while photographs taken in low light tend to show it all over the picture.
- You may quickly fix or remove the noise that is diverting attention from the quality of the wedding photos utilising photo fixing and retouching software.
- In technical terms, this process is called denoising, and it may be completed with a single click of the mouse in the Photo Enhancer.
- Your brightness setting is another factor to think about while editing your wedding images.
- Many images that appear too dark can have the scene magically brightened by a simple slide of a brightness bar (or perhaps a change in terms of the amount indicated as a figure or a percentage).In order to get the most out of your photos, Wedding Studio can help you find the optimal brightness setting for each individual shot.
- An algorithm is used to analyse the image and determine the optimal level of light transmission.
- Just as crucial as altering the white balance is increasing the contrast in your wedding shots.
- Achieving the correct mix of shadows and highlights can be a moment and tiresome procedure for beginners who aren't yet adept in working in Lightroom or Photoshop.
- Lightroom presets streamline the image editing process by automating the colour correcting steps.
- Once again, select the Significantly better, and from the Color Range menu, pick the Shadows option.
- Reduce the opacity to around 30%; the actual percentage will vary from image to image.
- Start by creating a new layer, then filling it with a colour that will blend in well with the rest of the layers and switching the layer's blending mode to Overlaid.
- As a first step in adjusting light and shadow, we use the functions Dodge and Burns (O).
- It's also possible to create a new layer, change its blending mode to Soft Light and Overlay, and then fill in the necessary regions with a black and white brush that has a low opacity.
- If you'd like to work with professional photographers for your wedding, book with us at Wild Romantic Photography.
- When editing a photo, one of the initial things to do after applying the presets is to play around with the exposure.
- To start, readjust the overall exposure if necessary.
- The next step is to modify the image's brightest sections by dragging the lights and whites slider.
- Dark-area adjustments entail fiddling with the image's shadow and blacks.
- It's recommended that you play with the curves-based exposure modification tools (such as the blacks and highlights) before altering the contrast slider.
- When dealing with haze or fog, the dehaze tool can be of assistance.
- The white balancing is adjusted for the entire image from the very top.
- You can use the eyedropper tool to choose the couple's shirt or even the bride's outfit, both of which will be white, and then use the temperature or tint sliders to make any needed modifications to the selected area.
- You may adjust each colour in the picture independently using the HSL (hue, saturation, and luminance) panel.
- Lightroom's HSL panel features individual sliders for each colour, allowing you to alter them without influencing the others or the overall hue.
- For creating a specific feel in your artwork, these colour tools were invaluable.
- You may make some tweaks and customise a look with the help of the HSL panel.
- This HSL is also required for professional-quality monochrome photo creation.
- After the image is converted to black and white, the HSL panel will change to the B&W panel.
- From this menu, you may adjust how much grey each colour is toned down to.
- A final HSL hint: if you're not sure where a colour sits in the HSL panel, or where it would be transformed to black and white, then click on the tiny circle icon in the bottom of the HSL panel.
- With the target tool active, the corresponding colour slider will become illuminated when the cursor is moved over it.
- This is correct for all three panels: brightness, saturation, and monochrome.
- The clarity of your wedding photos could be compromised by flaws like wrinkles, spots, or shadows.
- However, with a few repetitions of the cloning tool, it will appear as though these defects were never there.
- The subject matter will either "pop" with life or look as a boring image, as if a thick veil had already been placed over the lens, depending on the colour tones of your photograph.
- By capturing light with separate red, white, and blue sensors, digital cameras can duplicate the full range of colours seen by the human eye and remembered by the human brain.
- If the camera has an extreme preference for red, green, or blue, the overall impression and impact of the image may be diminished.
- With the right software and a little bit of artistic skill, altering the color calibration in you wedding images is a breeze.
- It would be wise to use an automatic photo editing solution like muvee Wedding Studio in this situation.
- The dynamic colour palette of the actual world, as seen by the human eye, is faithfully recreated using patent-protected colour science technology.
- To put it mildly, it's incredible.
- Use the Sharpness Tool to remove blur It's to be expected that some of Bob the shooter's hundreds of images from a lengthy day will turn out fuzzy or more or less out of focus.
- This is particularly true for candid or action photographs.
- Images that would have been absolutely useless without sharpening tool may be salvageable.
- The included presets in Photo Enhancer will give your images a more professional appearance.
- They will all look more polished and professional as a result.
- Are you organising your dream wedding or hoping to catch all the action?
- If you want to make a name for yourself in the world of picture editing, you'll need a steady touch, a wealth of experience and knowledge in every one of the aforementioned areas, and more.
- You can't learn the ropes and develop a keen eye unless you put in the time and effort required.
- Our engineers have combined the "tricks and tips" that photographers find most helpful and popular into a set of intelligent presets that are activated with a single click.
- Among the various possibilities for altering wedding images, these are some of our favourites.
- We continue to have faith in our main purpose even though we acknowledge the value of learning about various photo editing techniques.
- Our goal is to help professional wedding photographers thrive and grow their businesses.
- This means contracting out tasks like wedding photo editing that consume a lot of time but bring in little to no revenue for your company.
- Do you have concerns regarding the quality of our photo editing?
- Talk to us online to learn more about how we can take the burden of editing off your shoulders and help you focus on the creative aspects of wedding photographers that will help your business grow.