How to Photograph Clothes?
High-quality product photography is crucial for every online clothes retailer. Many of your potential buyers will not make a purchase based solely on how well you describe the goods; the photographs you present will also be important.
One caveat, though: "basic" can mean "cheap." Professionals have more talent, better tools, and more experience than amateurs do.
If you have an eye for photography and a limited budget, you can learn from our mistakes by following these methods and producing stunning photos of clothing products.
Decide on How You Want to Display Your Products
The first step in opening an online clothes business is deciding how to display the numerous items for sale there. For the most part, shops will use one of three basic photography techniques when showing garments online:
Use an Invisible Mannequin
Products photographed on mannequins or in other settings that more closely mimic their intended use are more likely to be purchased by their intended audience.
Customers are more likely to make a purchase while shopping for clothing online if they can visualise themselves in the item.
By using a dummy to give your products a human form in your photography, you can save time and effort searching for models for each shoot. You may make your photos look more polished by cutting off the background after you've taken them.
Tips
- If you aren't trying for a strapless appearance, you should probably avoid wearing anything that reveals your amputated arms. Whether you want to remove the background or not, it will take a lot of effort and talent to give a hanging, empty sleeve a natural appearance in Photoshop.
- You should always have the mannequin in front of you facing forwards. Brick-and-mortar store forms are often made to stand in a variety of stances to prevent them from all looking the same when displayed together.
- When you take an image of a mannequin and crop off the background, the result can be highly unsettling if the mannequin has an odd pose, such as one hand resting on its waist or a protruding hip.
Hire a Model
You should employ a model if financial resources allow. Models have the freedom to strike any stance and work with any viewpoint in order to produce an image that effectively promotes your item.
This will help you get the best possible "product in use" photo so that you may promote it on your website and various social media platforms. Think about Pinterest and Instagram.
Tip
- Experiment with different poses, but don't try to hide the product too much. The buyer needs clear imagery of the product in order to make a confident purchase decision. Models also help give your goods more character and add to the growth of your brand. Many e-commerce sites, for instance, employ models that they think most closely resemble their "target consumer." Zara and Arnhem are like night and day when it comes to their models, clothing, and general vibe.
Flat Lay Photography
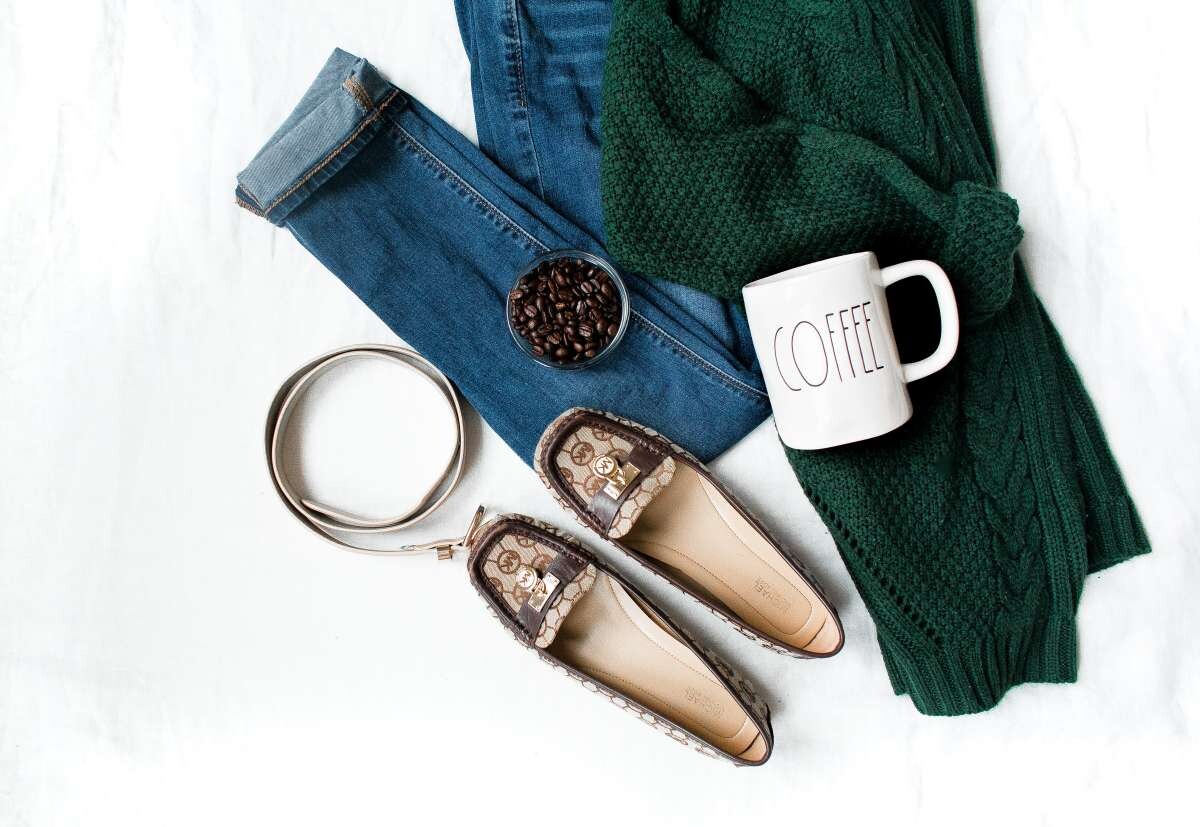
The flat-lay photography method is the quickest and most cost-effective approach to take pictures of your garments. In addition to shirts, we've experienced success using flat-lay photography to showcase pants and socks for guys.
Using a flat lay to show products on your eCommerce store's website isn't recommended if you need an eye-catching graphic to publish on social media. Displaying products as close as possible to how they would appear in real life would greatly increase their value to customers.
Your photographs will be your most treasured wedding keepsake. Not sure where to start when it comes to looking for your wedding photographer of choice?
Tips
- To take a great flat lay, you'll need a large piece of white paper or a white sheet to lay on the ground.
- Make sure your products are looking their best — iron your clothes and make confident collars are in place and buttons are done up. You can give your products an extraordinarily smooth and flat shape with a piece of cardboard.
Remember that your customers can't try on your things before they buy them, so they're understandably wary of making purchases they're not sure about.
The reason for this shift in photography is the widespread popularity of "knolling" on social media; eCommerce businesses would be foolish to overlook these channels as a possible source of new customers.
If you're not familiar with the phrase, "knolling" means arranging things in a grid. Social media users, particularly those interested in fashion and lifestyle who frequent platforms like Instagram and Pinterest, curate these themed product arrangements. The majority of Instagram and Pinterest users are fashion and lifestyle bloggers. The key to getting more followers, repins, and likes on Pinterest is to create your own original, high-quality flat lay compositions.
Select complementary accessories or homegoods to complement at least one of your products. Directing people to a social network page in the hopes that they'll click over to your online shop is a roundabout way to promote your business. This means that you can stock your shop with products from other manufacturers as well as your own.
It is crucial to think about how your different items relate to one another. A photograph's subject matter, event, or colour palette should all have something in common to prevent visual chaos.
Prepare Your Clothing Photography Equipment
Getting the tools you need doesn't have to involve going into debt or spending a tonne of money. Digital cameras are getting cheaper and smartphones are getting better at taking pictures, so it makes sense that the price of cameras would drop.
Here is a rundown of the various photography extras you'll need:
Camera
If you have the right camera, you can take pictures that look much more professional than those you would take with an amateur camera. We have the best wedding photographers in Yarra Valley to capture your beautiful moments on your wedding day.
Mirrorless cameras are better to typical DSLRs for fashion photography because of their greater image quality, ease of use, and ability to connect to studio lighting. However, if a mirrorless camera isn't something you need, don't give in to the temptation to get one.
It's unnecessary when you have a smartphone that can do the same things.
Lighting Equipment
Photographing garments requires special lighting. Having lights that are compatible with your camera is crucial, as customers want to be able to see all of the intricacies of the product being sold.
Starting with a light set that includes three bulbs allows for a three-point lighting setup to be built (one key light, one fill light, and a back or hair light).
A continuous light kit is ideal for smartphone photography since it eliminates the need to time the flash with the camera's shutter. Better photography is now within your reach.
This type of lighting equipment can also be used with a mirrorless camera, however traditional studio lighting combined with a wireless trigger will produce the greatest results.
Studio Backdrop Kit
The backdrop is one of the most crucial components of a photography studio, alongside the lighting, for creating crisp, well-defined images. A white, portable photography backdrop with a stand is what you need.
It is suggested that the kit be around 1020 feet in size, since this will allow you to photograph a mannequin at full length for any potential longer gowns or clothing you may offer.
Studio (wireless) Lighting Trigger
The backdrop is one of the most crucial components of a photography studio, alongside the lighting, for creating crisp, well-defined images. A white, portable photography backdrop with a stand is what you need.
It is suggested that the kit be around 1020 feet in size, since this will allow you to photograph a mannequin at full length for any potential longer gowns or clothing you may offer.
Tripod
Studio photography requires the use of a sturdy tripod to eliminate the blurring that results from hand-holding the camera.
Look for a tripod that extends to a height about similar to your eye level, and ideally one that also includes a spirit level for use when positioning the tripod's legs.
Mannequin or Model
In addition to saving money, utilising mannequins can provide a number of benefits to the overall look. You should get a dummy that has both its arms and legs intact, as was previously specified. Although paying for a model's services can be pricey, the benefits of a photo shoot can often justify the added cost.
To make the clothing look as though it were being worn by a real person, you would have to pin it in place if you were displaying it on a mannequin. However, a professional model will alter their physique to look good in the clothes they are displaying.
A model's body can help the garments flow in a more organic way, which can be both reassuring and motivational to the consumer.
Also, if possible, have your model pose outside in a more natural situation rather than inside a studio. The market for photographs of lifestyle items is growing, so it's crucial to keep the vibe you're striving for in mind.
Photography Toolbox
Having a toolkit of techniques at your disposal can be invaluable when the time comes to photograph your garment. Using pins to secure specific folds or labels before importing the image into Photoshop is a good example of how this may be done.
Clothes pegs are also useful for eliminating the appearance of wrinkles by gathering and securing any excess fabric at the back of a model or mannequin.
Tape, for positioning cloth precisely where it needs to be, spare batteries for your camera, spare bulbs for your studio lights, and a steam iron are also useful.
Prepare Your Clothing Products
Preparation is the key to a good photo shoot. I can't tell you how many times I've done a photograph just to realise that some minor detail was in the wrong place.
The effort you put in now will pay off in spades when it comes time to edit, and may even prevent you from having to start over with an entirely new shoot. We advise you to organise a manufacturing line to get everything prepared, and then to take pictures of all the garments you have assembled.
The first order of business is to go through your closet and iron or steam everything while jamming to some of your favourite tunes from your phone. Do this first to make sure there are no creases when you hang everything else.
Second, have all of your photography equipment out and ready to go, including spare batteries and pins. First, drape the first article of clothes over your mannequin to achieve the mannequin effect.
Always remember to check the tiniest of buttons and hems.
Make sure that every button is securely fastened. Make sure the tassels or ties, if any, on your item are all tied in the same, tidy fashion. Make sure your sleeves are always nicely folded and stay folded. Verify that there are no stains on the garments.
Set up Your Photography Studio
It is up to you to decide whether your clothing photography studio will be a specialised professional area or a spare room in the back of your shop. As long as you have good lighting and a good camera, it won't matter.
The backdrop must be up first. After that is complete, you can move on to establishing your camera and lighting. Photographing garments requires a lighting setup with three points of light.
Put one light next to your camera and aim it at the mannequin to begin. The photograph's primary light source will be this source of illumination.
As a fill light, the second light should be angled at 45 degrees away from the mannequin and closer to the background than the key light. The final location of light should be midway between the form and the background.
Check Your Camera Settings
Shutter speed, aperture, and ISO sensitivity are the three factors that need to be considered when taking pictures.
Aperture
You should use a high f-stop, between f/8 and f/11, when taking pictures of garments. It will help you get a picture that emphasises the clothing you're selling.
Shutter Speed
Shutter speed refers to how long your camera's shutter remains open for. The sweet spot for shutter speed for photographing people while they are dressed is around 1/125.
Iso Sensitivity
When photographing garments, an ISO value between 400 and 800 is recommended. The light sources you employ will have a significant impact on this. Setting the iso between 600 and 800 can help you to capture clearer images even while shooting in artificial light.
Start Taking Your Product Photos
Taking pictures of your stuff is where things really start to heat up. Make sure that the shutter isn't shaky when you take images. Make use of a tripod. Pictures of the item will improve as a result.
If you don't have a tripod, you can rest your camera on any stable, flat surface.
Put your model dead centre in the viewfinder or frame of your camera for the best results. Make this a top priority so that it fills the page. You can use either the tripod's height or the camera's optical zoom to achieve closer shots.
Tips:
- Do not use digital zoom because it reduces the quality of your product photos because it crops the image while it is being shot.
- Digital zoom should be avoided.
- Adjust the timer setting on your camera to two seconds. After you have pressed the shutter button, your camera will be able to refocus on your subject if you have done this.
- Put the focus on the specifics.
- When you are photographing clothing, be sure not to ignore the smaller details.
For a customer, nothing is more upsetting than receiving an item when they were under the assumption that the fabric was soft, only to find out upon inspection that it is in fact stiff. Or that it was button-fastening when it was actually a zip-up.
Get close-up shots of the garment's construction, fabric, tags, zippers, buttons, and anything else the buyer would find important before making a purchasing decision.
Including specifications will reduce the need for customer care enquiries and increase conversion rates because the customer will have all the information they need to make a purchase decision.
Allowing users to zoom in and out at will is always an option. You should provide the client a few well-chosen close-ups to help them zero in on the most important details. If you want to take flattering photos of your apparel, using props and gadgets might help you get in just the right position.
Tips:
- Ironing the article of clothing will remove any wrinkles that may have formed. In my experience, using a steamer is the most effective method.
- Put a padded bra on the mannequin if you need to give an item of clothing more volume in the bust area.
- If an item of clothing is too large for the form or model, you can secure it in place with pins and pegs or clips.
- It might be a good idea to use a fan if you want to give your product some motion.
- Make use of tape that is see-through to move any tags or labels out of the way.
Editing Your Product Photos to Increase Sales
After you have completed photographing your products, you should edit them so that they all have a consistent style and look great in your online shop.
During the project's post-production stage, you should consider how you want the images to look on your online shop's homepage. Make sure the alignment, white backdrop, cropping, and colour correction are all taken care of for uniformity's sake.
To obtain the highest possible degree of professionalism in your apparel photos, you might think about creating ghost mannequins.
Your product photos will look as though they feature a model by using the "ghost mannequin" effect. A product's perceived depth can be increased by just revealing a small fraction of the inside on the outside.
Instead of paying for a model if you want to make a ghost image, just use a mannequin. I assure you that the trouble involved in catching a ghost mannequin is well worth it.
How to Create a Ghost Mannequin Effect
Snap a snapshot of the item's front side. Next, turn the product around so that the front is facing you and take a picture from behind.
Use a tripod and don't fiddle with the focus or zoom in or out too much for this.
You should also make a mark on the floor where your mannequin will stand for both photo shoots. Because of this, "stitching" the components together will be much easier.
If you want to see what's on the front from the back, you'll have to get rid of the background. If the two photographs were taken from the same location and perspective, you may simply layer one over the other in Photoshop to create a seamless composite. Don't worry; this is something you should be able to handle easily.
Upload Your Product Photos to Sell Online
Last but not least, have all of your products photographed properly and uploaded to your online shop and any other marketplaces where you plan to sell them.
Remember that taking pictures of clothes can be fun, and that good pictures will make your shop stand out from the others. Please use the space provided below to offer any recommendations you may have.
Common Mistakes Clothing & Apparel Photography
As a whole, the e-commerce sector is constantly evolving. In the realm of apparel photography, however, there are several aspects that must be maintained year-round regardless of the ebb and flow of seasonal trend.
Not Preparing the Garment
It's important to present your wares in the best light possible to attract customers. But as you know from experience, clothing can get wrinkled and creased during storage and transportation, and can even start to seem worn after a while.
It's very uncommon for clothes samples to arrive worn out, ripped, or even incomplete. First and first, while taking photographs of clothing, is preparing the items to be shot.
On the other hand, many fashion photographers forgo this stage and instead rely on Photoshop to correct wrinkles, stains, and other faults that may have emerged as a result of the object being stored or transported.
However, Photoshop is not a magic wand; learning more sophisticated editing techniques takes time and practise, and any changes you make to an image are "destructive" to the image, meaning they lower the quality of the image in some way.
Therefore, make sure that you get the finest possible shot of the clothing in-camera, and utilise Photoshop simply to add finishing touches and colour correction to your ideas.
There must be a thorough examination of the product from top to bottom, inside and out. Is it required to take off any labels, stickers, or other identifying materials?
Do so. Have the garments crumpled or creased because of the storage conditions? They'll steam nicely, or you can press them. Make use of the tools at your disposal to fix any more damage or interruptions you find.
Lint rollers and tape are indispensable for removing pet hair and threads from clothing. Because of unforeseen changes in the design, samples may arrive that are unacceptable (e.G. Fit, colours, patterns, etc.).
In order to properly alter the sample in Photoshop or wait until the actual piece that will be sold has been photographed, you should be aware of the design changes that have been done for each garment.
Not Utilizing a Mannequin or Live Model
Many photographers of clothing don't appreciate how crucial it is to convey the garment's cut and fit to the viewer of the shot. As an alternative, they take pictures of mannequins or actual models wearing the clothing.
They don't iron their garments but rather just fold them or put them in hangers. What a disastrous omission! The best method to show off a garment's silhouette and for customers to see themselves in it is to take pictures of it while it's being worn, whether on a form or a real person.
(If you need to take photos of garments but don't have access to a dummy, you don't have to shell out a lot of cash for real models; instead, you might discover that strategically utilising a buddy is the ideal answer.)
If you're on a tighter budget, a dummy will have to do, but real people make garments come to life. If you don't have the resources to use real people as models, a dummy will have to do.
Customers will have a better notion of how a garment will fit them and have a more positive buying experience in general if they can see the product's shape and natural draping.
Sometimes, even a little bit of effort put into your appearance may make a huge difference. If your clothing doesn't look right on your mannequin, try pinning and tucking it in to get it to fit your body properly. Alternatively, your mannequin might be too big for the clothing.
Having your products photographed while they are exhibited on mannequins allows you to create a sophisticated post-production effect known as the ghost mannequin effect.
Not Providing Enough Imagery
It's a frequent fallacy that all you need to do to sell clients on the value and quality of your inventory is show them one or two photos of each item. That is not the case at all.
Therefore, it is critical to give buyers as much information as possible about each product, and the easiest way to accomplish this is by posting at least three photographs for each product, and preferably between five and ten.
Though many e-commerce platforms permit up to 12 photos per product set, few merchants actually make use of this feature. When you get an opportunity, snap photos of your wares from every possible angle.
You should take pictures of the front, side, and back of each product at the very least. In addition, you should include close-ups of key product embellishments like buttons, zippers, or embroidery – the details that set your blouse, dress, and so on apart from the rest.
Different from the vast majority of other clothing items available for purchase online. Customers will feel more confident in their purchase if further photographs of the goods are shown.
Online stores claim that doing so will benefit their customers by improving the buying experience overall, showcasing product quality, and ensuring that buyers are happy with their purchases once they receive them (and thus minimise returns).
Not Utilizing Enough Light When Taking Apparel Photos
It's important to take care not to be "that" internet store whose products are poorly photographed due to poor lighting. Making sure your online apparel store has sufficient lighting should be a top priority.
In order to provide the appearance that your stock is neat and well-maintained, it is important to properly expose your ideas.
The correct lighting and demonstration of the differences in the garments will help customers see the value in your wares. If there is enough light, your camera will be able to take clearer pictures with less "noise" or "grain" and more detail.
As you may already know, the quality of your photos degrades when there is less light available, which does not bode well for your business or its offerings.
If you need to illuminate a large area with artificial light, renting the necessary equipment allows you the most flexibility in how to lay out the area.
If you cannot afford to rent equipment, you may use a large window as a light source or construct a reflector panel out of foam board. One of your first priorities as an online clothes business should be investing in good lighting.
Not Using the Correct Camera Settings
If your camera's settings are off, no amount of post-processing magic can recover your photographs and make them look professional.
Photos taken with a digital single-lens reflex (DSLR) camera have the potential to be of extraordinary quality, but this potential can be greatly diminished if the camera is used with less than ideal settings. You should make sure you have a firm knowledge of the ISO, aperture, and white balance settings before you begin photographing your merchandise.
Not Setting the Correct Color Space Profile
Many photographers who focus on fashion either don't realise the importance of or aren't aware that they need to convert their retouched photographs into a colour space profile acceptable for the web. The term "colour space" is used to describe the range of colours that can be represented in a given image.
In answer to the inevitable enquiry "what is RGB? ", some of the colour spaces that can be used are Adobe RGB, CMYK, and RGB. Products' colours will appear differently on different monitors, browsers, and websites if the correct colour space isn't used. This occurs because colour representation varies across various computer monitors.
If you want your photographs to look the same and as vibrant on all devices, browsers, and websites, utilise the RGB colour space profile. You can avoid extra steps and save time by shooting in srgb, which is an option on most modern cameras.
But srgb records a more limited colour palette than your camera's default RGB preset. As a result, many experts wait to convert their files until after they are satisfied with the final product, so as to preserve as much flexibility as possible when making further edits.
Not Editing Product Images Properly
Many online shops fail to properly edit the photographs of their products, often making mistakes in the areas of cropping, alignment, colour, and backdrops.
Consistency in cropping, alignment, and placement of all of the photographs in your collection is essential.
It's important to establish a uniform set of shooting and editing criteria to ensure that your photographs are consistent and to cut down on post-production time. If you're looking to standardise and automate the post-production process, using a picture editing service like pixels can help.
Alignment
Verify that each product is the same size and centred within the photo. In this way, you may rest assured that your products' edges, corners, and angles will be perfectly aligned. More customers will be interested in what you have to offer if your stock is always in order and presented in a unified manner on your website.
The simplest way to guarantee precise alignment is to generate guidelines inside of a Photoshop template.
Cropping
Alignment isn't the only thing that needs to be consistent when selling products online; cropping the photos of those products must also be uniform. Cropping and resizing photos consistently to meet the needs of your website's image standards shouldn't be a problem as long as you adhere to simple rules for alignment.
Backgrounds
Some online retailers will swap out the wallpaper to highlight a special sale or new arrivals.
Having uniform product photos is a certain way to boost your website's credibility and make your inventory more appealing to customers. Despite the fact that this may not appear to be significant, it is accurate.
Selecting a single background style and sticking with it throughout the project can significantly reduce post-production time. Nearly everyone agrees that white or very light grey backdrops draw less attention away from the merchandise being displayed, whether it's clothing or some other kind of good.
Colours
Another common mistake in the field of apparel photography is a failure to capture the true colours of the garments being shot.
Neons, reds, and pinks are notoriously challenging to capture in camera, necessitating post-capture adjustments. White balance is the process by which a camera determines how accurately colours are captured. In auto mode, cameras do a good job of producing colours that are true to life. If you let the camera choose its own white balance, though, it may be challenging to capture certain colours accurately.
Spending a few minutes more than is strictly necessary to ensure that the colours of your items are accurate before posting them to your website can prevent your customers from becoming angry and unsatisfied. Misrepresenting colours in marketing materials can make buyers angry.
It's important to give the customer an accurate depiction of the goods before they order it so they know what to expect when it arrives.
Get to know the several colour editing options available in Photoshop, and then select the one that you like most for your image.
After finishing up with colour corrections, check that your photographs have been saved in RGB format. If you take these steps, you may rest assured that your consumers will always see the precise colours you've painstakingly worked to design, regardless of which web browser they use or which computer monitor they use.
Experience Is the Best Teacher
Making everything on your own is a difficult task. The very first attempt won't be flawless, but that's perfectly normal. Planning your wedding and looking for a videographer? Look no further, Wild Romantic Photography is one of the most highly respected wedding film videography services in Melbourne and Sydney.
Each photo session should bring you closer to your goal of taking the best possible pictures of the goods you're selling. The more attractive your product photos are, the more likely it is that consumers will buy them and return for more.
All you have to do is remember the standard operating method for taking amazing images of garments, and you'll be fine.
You need to get your product ready, set up your studio, put your lighting, style your product, tweak your camera settings, take shots, and then fine-tune the images in post-production. If you stick to those guidelines, you should have no trouble generating high-quality product photos.
Conclusion
High-quality product photography is crucial for every online clothes retailer. Products photographed on mannequins or in settings that more closely mimic their intended use are more likely to be purchased by their intended audience. Professional photographers have more talent, better tools, and more experience than amateurs. The flat-lay photography method is the quickest and most cost-effective way to show off your products on your eCommerce store's website. The key to getting more followers, repins, and likes on Pinterest is to create your own original, high-quality flat lay compositions.
Select complementary accessories or homegoods to complement at least one of your products. Digital cameras are getting cheaper and smartphones are getting better at taking pictures. Having lights that are compatible with your camera is crucial, as customers want to see all of the intricacies of the product being sold. The backdrop is one of the most crucial components of a photography studio. A white, portable photography backdrop with a stand is what you need.
It is suggested that the kit be around 1020 feet in size for any potential longer gowns or clothing you may offer. Preparation is the key to a good photo shoot. Tape, spare batteries and steam irons are useful for positioning cloth precisely where it needs to be. Photographing garments requires a lighting setup with three points of light. The photograph's primary light source will be the mannequin.
When photographing garments, an ISO value between 400 and 800 is recommended. A high f-stop, between f/8 and f/11, will help you get a picture that emphasises the clothing you're selling. Make sure that the shutter isn't shaky when you take images. If you want to take flattering photos of your apparel, using props and gadgets might help you get in just the right position. Your product photos will look as though they feature a model by using the "ghost mannequin" effect.
A product's perceived depth can be increased by just revealing a small fraction of the inside on the outside. Make sure your products are photographed properly and uploaded to your online shop. Photoshop is not a magic wand; learning more sophisticated editing techniques takes time and practise, and lower the quality of an image in some way. Photographers of clothing don't appreciate how crucial it is to convey the garment's cut and fit. Lint rollers and tape are indispensable for removing pet hair and threads from clothing.
Having your products photographed while they are exhibited on mannequins allows you to create a sophisticated post-production effect. Many e-commerce platforms permit up to 12 photos per product set. When you get an opportunity, snap photos of your wares from every possible angle. If there is enough light, your camera will be able to take clearer pictures with less "noise" and more detail. Products' colours will appear differently on different monitors, browsers, and websites if the correct colour space isn't used.
You can avoid extra steps and save time by shooting in srgb, which is an option on modern cameras. Having uniform product photos is a certain way to boost your website's credibility. Selecting a single background style and sticking with it can significantly reduce post-production time. If you let the camera choose its own white balance, though, it may be challenging to capture certain colours accurately. Misrepresenting colours in marketing materials can make buyers angry.
It's important to give the customer an accurate depiction of the goods before they order it. The more attractive your product photos are, the more likely it is that consumers will buy them and return for more.
Content Summary
- High-quality product photography is crucial for every online clothes retailer.
- Decide on How You Want to Display Your ProductsThe first step in opening an online clothes business is deciding how to display the numerous items for sale there.
- By using a dummy to give your products a human form in your photography, you can save time and effort searching for models for each shoot.
- Hire a ModelYou should employ a model if financial resources allow.
- Flat Lay PhotographyThe flat-lay photography method is the quickest and most cost-effective approach to take pictures of your garments.
- Using a flat lay to show products on your eCommerce store's website isn't recommended if you need an eye-catching graphic to publish on social media.
- The reason for this shift in photography is the widespread popularity of "knolling" on social media; eCommerce businesses would be foolish to overlook these channels as a possible source of new customers.
- Select complementary accessories or homegoods to complement at least one of your products.
- Directing people to a social network page in the hopes that they'll click over to your online shop is a roundabout way to promote your business.
- Prepare Your Clothing Photography EquipmentGetting the tools you need doesn't have to involve going into debt or spending a tonne of money.
- Here is a rundown of the various photography extras you'll need:CameraIf you have the right camera, you can take pictures that look much more professional than those you would take with an amateur camera.
- However, if a mirrorless camera isn't something you need, don't give in to the temptation to get one.
- This type of lighting equipment can also be used with a mirrorless camera, however traditional studio lighting combined with a wireless trigger will produce the greatest results.
- It is suggested that the kit be around 1020 feet in size, since this will allow you to photograph a mannequin at full length for any potential longer gowns or clothing you may offer.
- Studio (wireless) Lighting TriggerThe backdrop is one of the most crucial components of a photography studio, alongside the lighting, for creating crisp, well-defined images.
- A white, portable photography backdrop with a stand is what you need.
- TripodStudio photography requires the use of a sturdy tripod to eliminate the blurring that results from hand-holding the camera.
- Look for a tripod that extends to a height about similar to your eye level, and ideally one that also includes a spirit level for use when positioning the tripod's legs.
- Although paying for a model's services can be pricey, the benefits of a photo shoot can often justify the added cost.
- To make the clothing look as though it were being worn by a real person, you would have to pin it in place if you were displaying it on a mannequin.
- However, a professional model will alter their physique to look good in the clothes they are displaying.
- Photography ToolboxHaving a toolkit of techniques at your disposal can be invaluable when the time comes to photograph your garment.
- Tape, for positioning cloth precisely where it needs to be, spare batteries for your camera, spare bulbs for your studio lights, and a steam iron are also useful.
- Prepare Your Clothing ProductsPreparation is the key to a good photo shoot.
- We advise you to organise a manufacturing line to get everything prepared, and then to take pictures of all the garments you have assembled.
- Second, have all of your photography equipment out and ready to go, including spare batteries and pins.
- First, drape the first article of clothes over your mannequin to achieve the mannequin effect.
- Set up Your Photography StudioIt is up to you to decide whether your clothing photography studio will be a specialised professional area or a spare room in the back of your shop.
- As long as you have good lighting and a good camera, it won't matter.
- After that is complete, you can move on to establishing your camera and lighting.
- Photographing garments requires a lighting setup with three points of light.
- Shutter speed, aperture, and ISO sensitivity are the three factors that need to be considered when taking pictures.
- Make sure that the shutter isn't shaky when you take images.
- Make use of a tripod.
- Adjust the timer setting on your camera to two seconds.
- Put the focus on the specifics.
- If you want to take flattering photos of your apparel, using props and gadgets might help you get in just the right position.
- Editing Your Product Photos to Increase SalesAfter you have completed photographing your products, you should edit them so that they all have a consistent style and look great in your online shop.
- During the project's post-production stage, you should consider how you want the images to look on your online shop's homepage.
- To obtain the highest possible degree of professionalism in your apparel photos, you might think about creating ghost mannequins.
- Your product photos will look as though they feature a model by using the "ghost mannequin" effect.
- Instead of paying for a model if you want to make a ghost image, just use a mannequin.
- How to Create a Ghost Mannequin EffectSnap a snapshot of the item's front side.
- If you want to see what's on the front from the back, you'll have to get rid of the background.
- Upload Your Product Photos to Sell OnlineLast but not least, have all of your products photographed properly and uploaded to your online shop and any other marketplaces where you plan to sell them.
- Remember that taking pictures of clothes can be fun, and that good pictures will make your shop stand out from the others.
- First and first, while taking photographs of clothing, is preparing the items to be shot.
- Therefore, make sure that you get the finest possible shot of the clothing in-camera, and utilise Photoshop simply to add finishing touches and colour correction to your ideas.
- Lint rollers and tape are indispensable for removing pet hair and threads from clothing.
- As an alternative, they take pictures of mannequins or actual models wearing the clothing.
- The best method to show off a garment's silhouette and for customers to see themselves in it is to take pictures of it while it's being worn, whether on a form or a real person.(If you need to take photos of garments but don't have access to a dummy, you don't have to shell out a lot of cash for real models; instead, you might discover that strategically utilising a buddy is the ideal answer.)If you're on a tighter budget, a dummy will have to do, but real people make garments come to life.
- If your clothing doesn't look right on your mannequin, try pinning and tucking it in to get it to fit your body properly.
- Alternatively, your mannequin might be too big for the clothing.
- Therefore, it is critical to give buyers as much information as possible about each product, and the easiest way to accomplish this is by posting at least three photographs for each product, and preferably between five and ten.
- When you get an opportunity, snap photos of your wares from every possible angle.
- You should take pictures of the front, side, and back of each product at the very least.
- Making sure your online apparel store has sufficient lighting should be a top priority.
- The correct lighting and demonstration of the differences in the garments will help customers see the value in your wares.
- As you may already know, the quality of your photos degrades when there is less light available, which does not bode well for your business or its offerings.
- One of your first priorities as an online clothes business should be investing in good lighting.
- Not Setting the Correct Color Space ProfileMany photographers who focus on fashion either don't realise the importance of or aren't aware that they need to convert their retouched photographs into a colour space profile acceptable for the web.
- Products' colours will appear differently on different monitors, browsers, and websites if the correct colour space isn't used.
- If you want your photographs to look the same and as vibrant on all devices, browsers, and websites, utilise the RGB colour space profile.
- It's important to establish a uniform set of shooting and editing criteria to ensure that your photographs are consistent and to cut down on post-production time.
- The simplest way to guarantee precise alignment is to generate guidelines inside of a Photoshop template.
- CroppingAlignment isn't the only thing that needs to be consistent when selling products online; cropping the photos of those products must also be uniform.
- Cropping and resizing photos consistently to meet the needs of your website's image standards shouldn't be a problem as long as you adhere to simple rules for alignment.
- Having uniform product photos is a certain way to boost your website's credibility and make your inventory more appealing to customers.
- Selecting a single background style and sticking with it throughout the project can significantly reduce post-production time.
- If you let the camera choose its own white balance, though, it may be challenging to capture certain colours accurately.
- Spending a few minutes more than is strictly necessary to ensure that the colours of your items are accurate before posting them to your website can prevent your customers from becoming angry and unsatisfied.
- Misrepresenting colours in marketing materials can make buyers angry.
- Get to know the several colour editing options available in Photoshop, and then select the one that you like most for your image.
- After finishing up with colour corrections, check that your photographs have been saved in RGB format.
- Planning your wedding and looking for a videographer?
- Each photo session should bring you closer to your goal of taking the best possible pictures of the goods you're selling.
- The more attractive your product photos are, the more likely it is that consumers will buy them and return for more.
- If you stick to those guidelines, you should have no trouble generating high-quality product photos.