How Do I Take Sharp Photos With Low Light?
Using a tripod and, maybe, a flash, you can take sharp pictures regardless of the lighting conditions. Of course, in practise, this isn't always practicable. But this doesn't rule out the possibility of getting sharp pictures without a steady hand or a flash.
Shooting at shutter speeds no slower than the numerical equivalent of the focal length of the lens being used was conventional wisdom before six-digit ISO ratings, four- and five-way image stabilisation, and sophisticated HDR technology.
The recommended shutter speed for a 15mm lens is 1/15th of a second, for a 50mm lens it's 1/50th of a second, and for a 500mm lens it's 1/500th of a second. A slow shutter speed shouldn't be used unless you have a really steady hand or are otherwise well-supported, so set it as high as it can go and hope for the best.
You can achieve sharp results hand-holding at slower speeds if you take some simple measures, such as bracing yourself against a sturdy structure like a pole, vehicle roof, or side of a building, and breathing calmly before gently pressing down on the shutter button. Exhaling has a calming effect on the body and the mind. However, if you forget to breathe before pressing the shutter button, your body will be tight, increasing your pulse and other physical movements, making it more difficult to capture a sharp image.
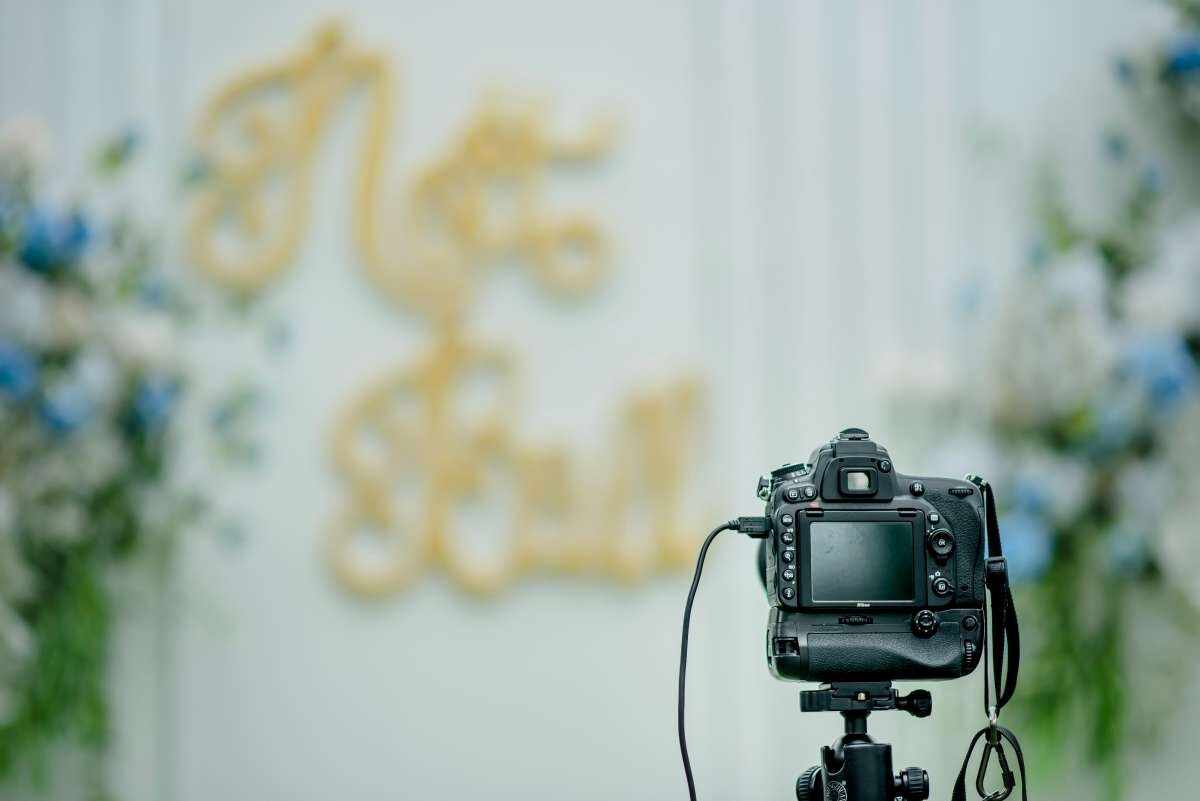
If you need advice on your wedding photography, check out our photography packages and services at Wild Romantic Photography.
You can increase the likelihood of capturing a clear image by taking multiple frames quickly in rapid succession, rather than relying on your camera's single-frame preview.
FAQs About Photography
Aspects of Low Lighting
Visible
These are the daytime shadows. Larger than average temperature differences can be expected between the shaded area and the surrounding area, and as much as two stops darker in the case of shade cast by large buildings or trees.
Low Light
There may be spots that can be seen after sunset but are too dark to photograph.
Dark
Only the brightest stars and planets will be visible at night.
How to Take Great Low-Light Photos
Taking good photos when there isn't a lot of light is a challenging art form. Using the camera in modes other than Auto will be necessary.
For low-light photography, use a slow shutter speed.
So, how do you go about photographing in low light? The slower the shutter speed, the less light will enter the camera. At lower sensitivity settings, more light will reach the sensor.
However, a slow shutter speed can also create motion blur without the need for a tripod. So, how does one go about taking a sharp photo when the light is low? For brief, blur-free shots when shooting handheld, setting the shutter speed to a fraction of the focal length is a decent rule of thumb.
A shutter speed of 1/30 of a second is optimal for taking pictures with a 30mm lens. Image blurring will occur at a slower speed. You should remember that this guideline is exclusive to full-frame cameras. With a crop sensor, the 30mm lens requires a shutter speed of 1/45 rather than 1/30.
Looking for wedding photography Melbourne? Look no further! Wild Romantic Photography has you covered.
You Can Lower Your Shutter Speed With Image Stabilisation
A shutter speed of 1/30 or 1/40 of a second might not be fast enough to get an adequately exposed image in low light. Both rapid and moderate speeds produce blurry images due to motion.
The challenge then becomes figuring out how to fix this while using a hand-held camera. This is due to the employment of a technique known as "image stabilisation," which is why it is the best choice. Sony, Nikon, and even third-party manufacturers all produce stabilisation lenses for your camera. Not all lenses have this function, however it comes standard on most modern lenses.
Image stabilisation is so efficient that it can make up to 4.5 stops of difference. As a result, shutter speeds as slow as 1/15 of a second will provide sharp images. This extraordinary skill shines best in natural light.
Discover Alternatives to Using a Tripod to Stabilise Your Camera
Figure Out How to Maintain Camera Steadiness Without a Tripod When shooting in low light, there are a few tricks you may use to avoid blurry or underexposed photos.
Two methods exist for stabilising a camera. Tightening the screws reduces camera shaking.
You can also use a wall as a leaning post. If you do this, the slightest movement will ruin your shot. However, if you set up your camera on a firm surface like a table or ledge, you may eliminate the shakiness that results from hand-holding.
In most cases, these strategies really shine under low-key conditions.
When your shutter speed is lower than 1/60, you should use a tripod.
However, the techniques we discussed cannot be used to totally minimise blur while shooting handheld. You only need the slightest shake in your hands to ruin our shot. Don't take any chances; use a tripod instead. Also, always remember to bring it along if you plan on taking photos in low light.
In low-light situations, use a fast lens
The lens you use will have a significant impact on your ability to obtain the maximum aperture.
Using the widest aperture feasible is your best chance if you need to snap images in low light. When using an aperture of f/1.4, four times as much light enters the camera as when using an aperture of f/2.8. Typically, a kit zoom lens will have a maximum aperture of f/3.5-f/5.6. Standard maximum apertures for professional zoom lenses are f/2.8 or wider. Most high-quality prime lenses don't come cheap. However, inexpensive options like the Canon EF 50mm f/1.8 II are available for novice photographers.
Many prime lenses are capable of an aperture of f/1.4, and even the most specialised can achieve an aperture of f/0.95. One can expect a larger aperture from a faster lens (and the smaller its f-number).
Choose a large aperture to allow more light in
The aperture of your lens is the size of that opening. More light is let in by an enlarged aperture. Remember that the smaller the f-number, the greater the aperture.
Skipping this step is not recommended if you are still using the normal kit lens, which probably has a maximum aperture of f/3.5. Insufficient light will enter due to that value's inefficiency. That inexpensive prime lens with an aperture of f/1.8 is a wise choice.
If your lens has an aperture of f/1.8, you'll be able to let in four times as much light as if it were f/3.5. That is to say, you can shoot quicker without as much concern about blurring caused by motion. Remember that a large aperture means less depth of field.
Avoid using an aperture of f/1.4 or f/1.8 when photographing people in low light. It would cause certain faces and the surroundings to blur. Use a larger aperture, like f/8, to guarantee sharpness instead. Create lasting memories through your Yarra Valley wedding photography that will be cherished forever.
Adjust Your ISO for Proper Exposure
Increase the ISO setting if tinkering with the shutter speed, aperture, and ISO settings does not yield satisfactory results.
How light-sensitive your camera's sensor is is controlled by the ISO setting. Increasing this amount will make it simpler to take photos in dim conditions.
Still, it's not easy to keep digital noise in check when shooting at high ISO settings. Don't bump my ISO any higher than 1600; after that, noise will make my photos worthless.
Use a Camera with a Large Sensor to Capture More Light
The sensor reads the world and builds an image for you. The correlation between sensor size and image quality and resolution is stronger than before.
In general, cellphones and compact cameras have the smallest sensors. Micro Four Thirds sensors are the next step up from full-frame models. An APS-C sensor, which is used in most consumer DSLRs and mirrorless choices, is the most common type. When it comes to cameras, the full-frame sensor found in professional models is the one to beat. Due to its 35mm focal length, it is quite similar in size to standard film 35mm SLRs.
Where can I get the greatest camera for taking images in low light? The quick response is a full-frame camera, such as the Canon 5D Mark IV. Because of its big sensor, taking pictures in quiet environments is a breeze. That means you can increase ISO without suffering from an overload of digital noise.
Use the RAW format to gain additional exposure latitude when shooting
Always shoot in RAW format for the most flexibility in post-production. Therefore, why is it crucial to photograph in RAW format when conditions are low-light? As an example, you can safely increase your exposure by two or three stops without any noticeable drop in image quality.
AF Assist Will Assist You in Using Auto-Focus in Low-Light Situations
If you're shooting in dim conditions, your camera might not be able to auto-focus effectively. When light levels are low, a camera may have trouble determining how far away an object actually is.
Recently, "AF assist" has become a standard feature on many digital cameras. On many occasions, the autofocus lamp will be visible. It will turn on to illuminate the space if it determines that it is too dim. Your camera's settings menu should provide this option. When the shutter button is depressed halfway, it turns on automatically in low light.
Planning your dream wedding and don’t want to miss out on the special moments on your big day? Worry no more, Wild Romantic Photography has you covered.
To focus in the dark, zoom in while in Live View
The "AF Assist" feature may be ineffective if the subject is too far away. A flashlight might help here by illuminating the area and making it easier to focus.
Turn on Live View and digitally zoom in on your topic to better examine the tiny details. Fine-tune the focus ring to bring your subject into focus by following the on-screen reticle's focusing position. From now on, all you have to do is push the shutter button.
Use Flashlights to Make Colorful Effects
Blur will occur whenever the subject moves, regardless of how steady you hold the camera. The term "light painting" is used to describe a specific type of photographic technique that involves the manipulation of various light sources.
Here's how to take pictures of lightning strikes:
- Taking pictures using a tripod and a slow shutter speed (between 2 to 30 seconds).
- Use the self-timer or remote to take a photo as you pose in front of the camera.
- Once you hear the click, begin making patterns with your flashlight movements.
Freeze Images Using Flash
Keep in mind that faster shutter speeds effectively freeze motion while slower ones result in blurring. What role, if any, does flash play in this?
With the strong beam of the flash, you can employ quick shutter speeds. With a shutter speed of only 1/250 of a second, you can snap sharp photographs even when the light is low. Using a flash prevents you from switching back to ISO 100, though. If you do that, the image will blur and the background will become less clear.
Your camera's pop-up flash may produce unflattering photos in some situations. However, it is still an effective means of halting activity. To get the most out of an external flash, reflect it against a wall or ceiling. However, a diffuser can reduce the intensity of the light, making it more tolerable.
Blurred Motion
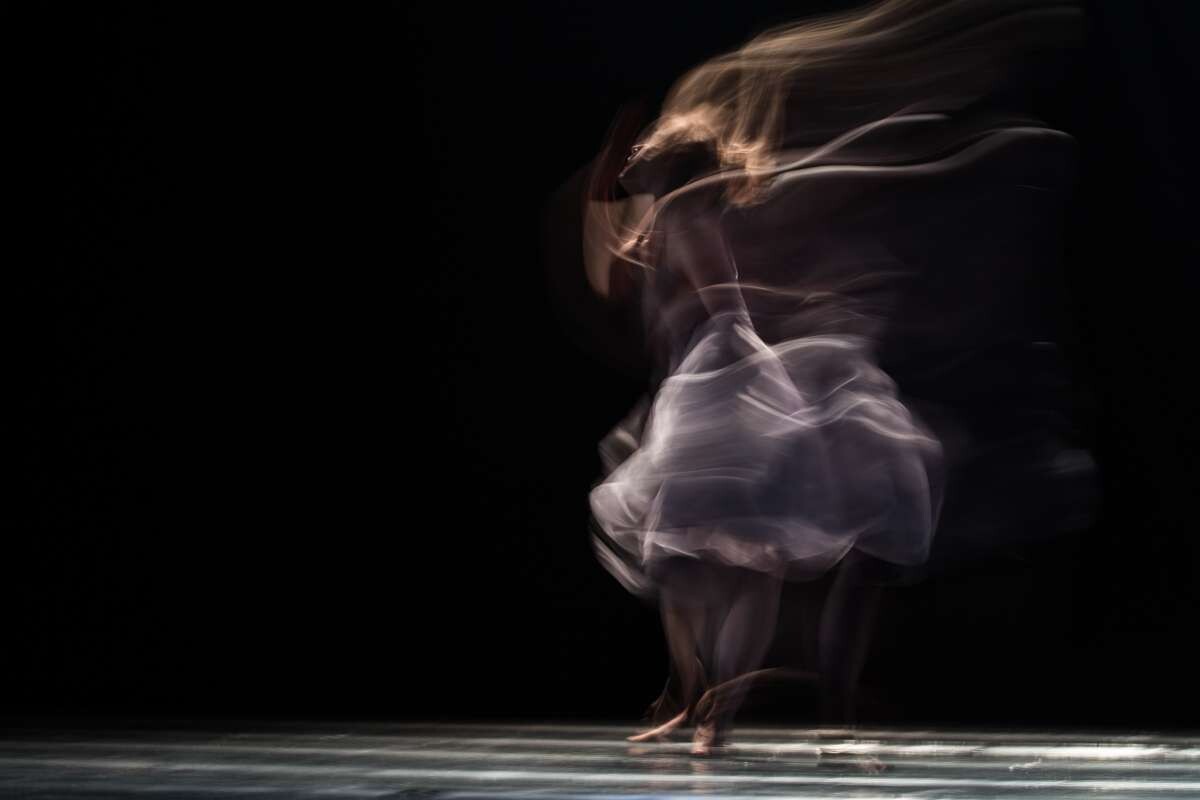
As a rule, motion blur is to blame for poorly exposed photographs taken in low light. If the shutter is left open for too long, motion, whether from the subject or the photographer, will be recorded by the sensor and result in fuzzy photographs. This can happen if either the subject moves too quickly or the camera shakes too much while the shutter is open.
The use of motion blur to emphasise speed, action, or motion is not always a bad thing, though. When trying to show the fluidity of playing the guitar, for example, a slightly out-of-focus photograph of the hand is more effective than a highly focused one. A fuzzy image is unsatisfactory and can't be fixed in post-processing when it's anticipated. Producing clear photographs in low light requires attaining best outcomes in-camera.
We have an exclusive range of wedding photography Mornington Peninsula services. Check them out here.
Here are some techniques that can be used to lessen the impact of low-light motion blur.
Set your camera to manual mode
When the camera is set to automatic, it will determine the optimal shutter speed, aperture, and ISO for the shot. The camera can't tell how the final image will turn out because of the movement and shaking. Therefore, it is crucial to learn how to operate the camera in order to take clear pictures.
Aperture and Shutter Priority options are available, but I have the greatest creative control when shooting in full manual mode. You'll see that playing about with your camera's aperture, shutter speed, and ISO settings is crucial for getting sharp photos when the light is dim.
For moving subjects, increase the shutter speed
To get a good exposure in low light, you need to ensure that enough light reaches your camera's sensor. To blur or freeze motion in a photograph, the shutter speed must be either too fast or too slow. To have complete control over the shutter speed, shoot in Shutter Priority or Manual mode.
In low light, what is the optimal shutter speed to use?
Keep in mind that the focal length of the lens and the specifics of the situation both play a role. Because of the need for greater caution when shooting with a longer focal length, I'll address this problem in the section below devoted to camera shake.
For semi-static situations like people sitting at a table or standing still for a portrait, a shutter speed of at least 1/60s is recommended when shooting handheld at focal lengths under 85mm. Within that range, sharp photos can be captured in almost all circumstances.
If your subjects are moving quickly, whether because they are sprinting, dancing, or even just laughing and swaying, you may need to increase the shutter speed from 1/200s to 1/400s.
Activate the aperture
By increasing the lens's aperture, the duration of the exposure time will be increased. For every stop that the aperture is opened, two stops more light will enter the camera. If you change the aperture to f/2.8 from f/4, for instance, twice as much light will enter the camera. As a result, we will typically employ a large aperture size in low-light conditions.
Since You nearly always need the largest aperture when shooting in low light, we always set the aperture to its widest possible setting before deciding on the shutter speed.
Raise the ISO
There may be a need to boost the ISO if you have tried shooting with the aperture wide open (or as wide as it can go without the depth of field being too shallow) and there is still a fuzzy part of the subject.
While it's true that a higher ISO results in a noisier picture, most current cameras still produce passable shots at ISO 1600 or higher. In addition, clouded vision caused by a too-slow shutter speed is worse than a little bit of noise in the image. If raising the ISO helps reduce motion blur, do so.
Practice is the key to success in any endeavour. Knowing the range of available light will help you choose your goals and assess your options. One of the most intriguing types of photography to explore is that of low-light circumstances.
If you’d like to work with professional photographers for your wedding, book with us at Wild Romantic Photography.
Conclusion
You may produce clear shots in either bright or low light by using a tripod and a flash. For low-light photography, use a slow shutter speed and basic hand-holding precautions. Using the camera in modes other than Auto will be necessary for best results. The slower the shutter speed, the less light will enter the camera. A shutter speed of 1/30 of a second is optimal for taking pictures with a 30mm lens.
Image stabilisation can make up to 4.5 stops of difference in shutter speed. Using the widest aperture feasible is your best chance if you need to snap images in low light. When using an aperture of f/1.8, you'll be able to let in four times as much light as if it were f/3.5 or f/2.8. How light-sensitive your camera's sensor is is controlled by the ISO setting. Increasing this amount will make it simpler to take photos in dim conditions.
Increase the ISO if tinkering with the shutter speed, aperture, and ISO settings does not yield satisfactory results. How to take pictures of lightning strikes using a tripod and a slow shutter speed. Faster shutter speeds effectively freeze motion; slower ones result in blurring. Using a flash prevents you from switching back to ISO 100, though. If you do, the image will blur and the background will become less clear.
Motion blur is to blame for poorly exposed photographs taken in low light. If the shutter is left open for too long, motion will be recorded by the sensor and result in fuzzy photographs. Here are some techniques that can be used to lessen the impact of motion blur. A shutter speed of 1/60s is recommended when shooting handheld at focal lengths under 85mm. For semi-static situations, you may need to increase the shutter speed from 1/200s to 1/400s. Activate the aperture by increasing the duration of the exposure time.
Content Summary
- You may produce clear shots in either bright or low light by using a tripod and, depending on the topic, a flash.
- This, however, does not rule out the potential of capturing clear images without the use of a tripod or flash.
- The shutter speed should be as fast as possible, although using a slow shutter speed is not recommended unless you have a very stable hand or are otherwise well-supported.
- If you need advice on your wedding photography, check out our photography packages and services at Wild Romantic Photography.
- You can increase the likelihood of capturing a clear image by taking multiple frames quickly in rapid succession, rather than relying on your camera's single-frame preview.
- DarkOnly the brightest stars and planets will be visible at night.
- How to Take Great Low-Light PhotosTaking good photos when there isn't a lot of light is a challenging art form.
- So, how do you go about photographing in low light?
- The slower the shutter speed, the less light will enter the camera.
- However, a slow shutter speed can also create motion blur without the need for a tripod.
- So, how does one go about taking a sharp photo when the light is low?
- For brief, blur-free shots when shooting handheld, setting the shutter speed to a fraction of the focal length is a decent rule of thumb.
- A shutter speed of 1/30 of a second is optimal for taking pictures with a 30mm lens.
- You Can Lower Your Shutter Speed With Image StabilisationA shutter speed of 1/30 or 1/40 of a second might not be fast enough to get an adequately exposed image in low light.
- The challenge then becomes figuring out how to fix this while using a hand-held camera.
- Sony, Nikon, and even third-party manufacturers all produce stabilisation lenses for your camera.
- Discover Alternatives to Using a Tripod to Stabilise Your CameraFigure Out How to Maintain Camera Steadiness Without a Tripod When shooting in low light, there are a few tricks you may use to avoid blurry or underexposed photos.
- When your shutter speed is lower than 1/60, you should use a tripod.
- Don't take any chances; use a tripod instead.
- Also, always remember to bring it along if you plan on taking photos in low light.
- In low-light situations, use a fast lensThe lens you use will have a significant impact on your ability to obtain the maximum aperture.
- Using the widest aperture feasible is your best chance if you need to snap images in low light.
- When using an aperture of f/1.4, four times as much light enters the camera as when using an aperture of f/2.8.
- Typically, a kit zoom lens will have a maximum aperture of f/3.5-f/5.6.
- Most high-quality prime lenses don't come cheap.
- One can expect a larger aperture from a faster lens (and the smaller its f-number).Choose a large aperture to allow more light inThe aperture of your lens is the size of that opening.
- More light is let in by an enlarged aperture.
- That inexpensive prime lens with an aperture of f/1.8 is a wise choice.
- If your lens has an aperture of f/1.8, you'll be able to let in four times as much light as if it were f/3.5.
- Increase the ISO setting if tinkering with the shutter speed, aperture, and ISO settings does not yield satisfactory results.
- How light-sensitive your camera's sensor is is controlled by the ISO setting.
- Increasing this amount will make it simpler to take photos in dim conditions.
- Still, it's not easy to keep digital noise in check when shooting at high ISO settings.
- Use a Camera with a Large Sensor to Capture More LightThe sensor reads the world and builds an image for you.
- Where can I get the greatest camera for taking images in low light?
- The quick response is a full-frame camera, such as the Canon 5D Mark IV.
- That means you can increase ISO without suffering from an overload of digital noise.
- Use the RAW format to gain additional exposure latitude when shootingAlways shoot in RAW format for the most flexibility in post-production.
- Therefore, why is it crucial to photograph in RAW format when conditions are low-light?
- AF Assist Will Assist You in Using Auto-Focus in Low-Light SituationsIf you're shooting in dim conditions, your camera might not be able to auto-focus effectively.
- Recently, "AF assist" has become a standard feature on many digital cameras.
- Planning your dream wedding and don't want to miss out on the special moments on your big day?
- Worry no more, Wild Romantic Photography has you covered.
- To focus in the dark, zoom in while in Live ViewThe "AF Assist" feature may be ineffective if the subject is too far away.
- Turn on Live View and digitally zoom in on your topic to better examine the tiny details.
- Fine-tune the focus ring to bring your subject into focus by following the on-screen reticle's focusing position.
- Use Flashlights to Make Colorful EffectsBlur will occur whenever the subject moves, regardless of how steady you hold the camera.
- The term "light painting" is used to describe a specific type of photographic technique that involves the manipulation of various light sources.
- Here's how to take pictures of lightning strikes:Taking pictures using a tripod and a slow shutter speed (between 2 to 30 seconds).Use the self-timer or remote to take a photo as you pose in front of the camera.
- With a shutter speed of only 1/250 of a second, you can snap sharp photographs even when the light is low.
- Using a flash prevents you from switching back to ISO 100, though.
- Your camera's pop-up flash may produce unflattering photos in some situations.
- To get the most out of an external flash, reflect it against a wall or ceiling.
- Blurred Motion
- As a rule, motion blur is to blame for poorly exposed photographs taken in low light.
- If the shutter is left open for too long, motion, whether from the subject or the photographer, will be recorded by the sensor and result in fuzzy photographs.
- The use of motion blur to emphasise speed, action, or motion is not always a bad thing, though.
- Producing clear photographs in low light requires attaining best outcomes in-camera.
- We have an exclusive range of wedding photography Mornington Peninsula services.
- Here are some techniques that can be used to lessen the impact of low-light motion blur.
- Set your camera to manual modeWhen the camera is set to automatic, it will determine the optimal shutter speed, aperture, and ISO for the shot.
- Therefore, it is crucial to learn how to operate the camera in order to take clear pictures.
- You'll see that playing about with your camera's aperture, shutter speed, and ISO settings is crucial for getting sharp photos when the light is dim.
- For moving subjects, increase the shutter speedTo get a good exposure in low light, you need to ensure that enough light reaches your camera's sensor.
- To blur or freeze motion in a photograph, the shutter speed must be either too fast or too slow.
- To have complete control over the shutter speed, shoot in Shutter Priority or Manual mode.
- Because of the need for greater caution when shooting with a longer focal length, I'll address this problem in the section below devoted to camera shake.
- For semi-static situations like people sitting at a table or standing still for a portrait, a shutter speed of at least 1/60s is recommended when shooting handheld at focal lengths under 85mm.
- If your subjects are moving quickly, whether because they are sprinting, dancing, or even just laughing and swaying, you may need to increase the shutter speed from 1/200s to 1/400s.
- Activate the apertureBy increasing the lens's aperture, the duration of the exposure time will be increased.
- As a result, we will typically employ a large aperture size in low-light conditions.
- Since You nearly always need the largest aperture when shooting in low light, we always set the aperture to its widest possible setting before deciding on the shutter speed.
- Raise the ISOThere may be a need to boost the ISO if you have tried shooting with the aperture wide open (or as wide as it can go without the depth of field being too shallow) and there is still a fuzzy part of the subject.
- In addition, clouded vision caused by a too-slow shutter speed is worse than a little bit of noise in the image.
- If raising the ISO helps reduce motion blur, do so.
- Knowing the range of available light will help you choose your goals and assess your options.
- One of the most intriguing types of photography to explore is that of low-light circumstances.
- If you'd like to work with professional photographers for your wedding, book with us at Wild Romantic Photography.