Is Auto ISO a good idea?
Exposure in a photograph is controlled by the combination of the aperture, shutter speed, and ISO. Film photographers were limited to utilising a fixed ISO, even if their aperture and shutter speed changed from shot to picture (and at 24 or 36 exposures that were usually a ways away).
Mid-shoot adjustments to ISO, along with shutter speed and aperture, are now possible with digital photography. This comes particularly handy when photographing in situations when the light level abruptly changes, such as when moving from indoors to outside, when the sky is partly clouded, or when moving from deep shadows to bright sunlight.
Setting your camera to automatically change the ISO will let you to concentrate more on your subject and less on the camera settings that affect the exposure.
For the purpose of argument, let's say you're filming a party that's taking place in both indoor and outdoor settings. It's possible to spend a considerable amount of time altering the light levels outside. By switching to Auto ISO, you won't need to fiddle with your camera's ISO, shutter speed, or aperture settings every time you go into a different light situation. The Auto ISO feature automatically adjusts the ISO to the best setting for the current shooting environment. In low light situations, you can tell the camera the highest ISO setting you're willing to use, and it will automatically increase the ISO until you reach that point.
If you need advice on your wedding photography, check out our photography packages and services at Wild Romantic Photography.
If you don't mind blurry handheld photos, you can adjust Auto ISO to "jump" to a higher ISO at 1/60 sec. shutter speed. That shutter speed setting should be considered lowest viable. You should set your shutter speed to at least 1/250 second if you want your photos to turn out clear and sharp without blurring from camera shake. Auto ISO tells the camera to automatically adjust the exposure in response to variations in ambient light. When lighting conditions deteriorate, a camera's shutter speed slows to let more light in and maintain the subject's sense of direction. When the'minimum' shutter speed is achieved, the ISO must be adjusted to keep the exposure proper.
FAQs About Photography
What is Auto ISO?
Almost all contemporary digital cameras offer a "Auto ISO" function that allows the camera to choose the ISO value automatically. Manual, Aperture, and Shutter Priority modes all support Auto ISO, but the latter is where it truly shines. By switching to Shutter Priority, you can choose a shutter speed and have the camera automatically choose both the aperture and ISO.
When shooting in Shutter Priority with Auto ISO, the camera will choose the best aperture and then, if necessary, boost the ISO to keep the shutter speed constant regardless of the lighting conditions. It is common practise to use a wide aperture when photographing subjects that are in motion, such as wildlife or people. However, if you need a smaller aperture to achieve a greater depth of field, you may want to switch to Manual mode, which gives you full control over shutter speed and aperture while leaving ISO up to the camera.
Choosing the right wedding photographer in Melbourne to capture every moment on your wedding day.
Where Auto Got Its Name
Despite popular belief, "Auto" does not stand for "Automatic" in this context. The company got its name from the corruption of the first name of Otto Barnack, the more discerning sibling of Oskar Barnack, the man generally credited with inventing the first Leica and popularising 35mm photography. For some reason, I just can't believe you were unaware of this.
This History of ISO
The name "ISO" originates from the days of film photography, when consumers would buy an entire roll of film from a camera store, labelled with an ASA rating like "100," "200," or "400." A film with an ASA of 200 is twice as sensitive as film with an ASA of 100, a film with an ASA of 400 is four times as sensitive as film with an ASA of 100, and so on. The ASA setting could not be changed midway through a roll of film; the full roll had to be used up first.
In bright conditions, ASA 100 film delivered results comparable to those of a digital camera set to ISO 100. Film having a greater sensitivity rating, such as ASA 400, was prefered while photographing indoors in low light. ASA 800 and 1000 film were available if one looked hard enough, but anything higher was about as frequent as a Polysepalous bos Taurus (two-headed cow).
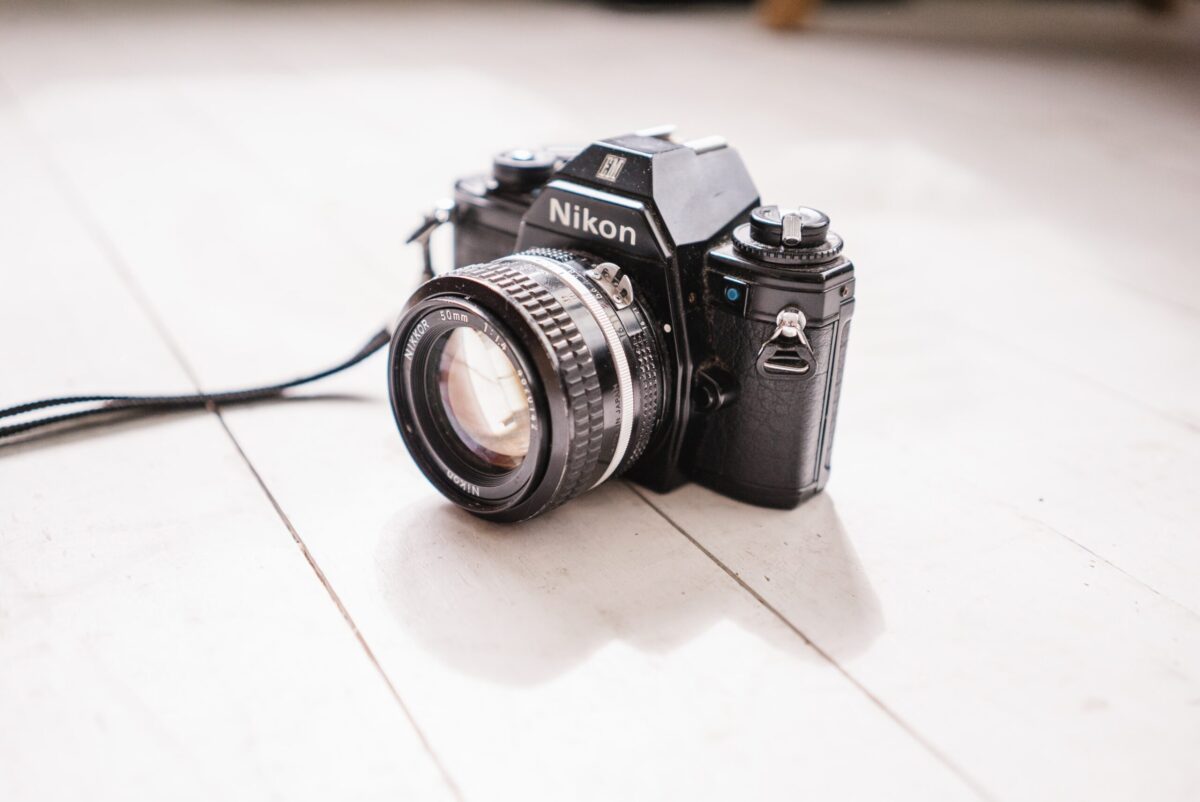
We used my ancient D200 and ISO 400 to take this picture of a professional marksman posing. Close inspection of the trees reveals image noise, yet doing so will distract you from the scene's main subject: the forest.
This portrait of a world-class marksman was taken with my tried-and-true D200 using ISO 400. Looking closely at the trees, you can pick out some noise in the image, but doing so kind of ruins the idea of the photo.
Even my well-used Nikon D200 from the early days of digital photography didn't have much of an advantage over its film-based predecessors in dim conditions. If you wanted to capture images in low light before the last decade, you might as well grab a roll of high-ASA film because most digital cameras weren't particularly competent at their (about comparable) high ISO numbers. (ISO and ASA measures are not exactly the same, but they are close enough to be comparable.)
Instead, consumer cameras are now widely available that can shoot at ISO 3200 or even 6400 (a value inconceivable with analogue film) with minimal loss of detail in terms of colour and luminance noise thanks to the steady improvement of digital sensor technology over the years.
For the most part, current digital cameras can determine the correct ISO level on their own (thus the phrase "Auto ISO"), leaving you free to worry only about aperture and shutter speed.
How Auto ISO Became Cool
The two possible outcomes were both necessary and achieved. The first phase was an increase in the quality of both image sensors and in-camera image processing engines (including noise reduction algorithms), allowing for flawless shots to be obtained at ISO 1600 and ISO 3200. Second, you can often customise your camera by choosing a maximum ISO value for Auto ISO as well as a minimum ISO value for manual ISO.
By adjusting my camera's settings to a maximum ISO of 3200, a default ISO of 200, and a slowest shutter speed of 1/60 sec, I can assure that my camera uses a low ISO setting whenever possible and only increases the gain when absolutely necessary.
Looking for a Yarra Valley wedding photographer? Look no further! Wild Romantic Photography has you covered.
Automatic ISO - Exposure Management
When there's a lot going on and you don't have time to adjust to the changing light, auto ISO is a lifesaver.
Adjusting the ISO setting allows you to modify the sensitivity of the camera's light sensor. If you adjust the ISO, the picture will either lighter or darker.
If you use one of these shooting modes, Auto ISO will be used automatically:
- Primacy Aperture Mode
- Mode de Shutter Priorité
- Method: By Hand
- Operating Mode
In this section, we will examine the first three shooting settings and how to utilise auto ISO.
To What End Should One Employ Automatic ISO?
With auto ISO enabled, the camera may adjust the ISO value on its own, giving you finer-grained control over the exposure of your photos. More precise control over depth of field, motion blur, and action freezing is possible by focusing on all three at once.
PROS
You simply need to adjust the aperture, like you would in aperture priority, and the camera automatically chooses the shutter speed for you. When you use auto ISO, you won't have to worry about adjusting the ISO setting yourself.
Based on the parameters you choose, your camera will adjust the ISO and shutter speed to get the desired exposure. A camera's ISO will be set automatically if a minimum shutter speed has been set.
Priority mode settings that we propose for your camera are as follows:
- Aperture
- ISO
- Shutter
CON
In low-light situations, your camera will choose for a slower shutter speed when given the choice between that and increasing the ISO. The highest ISO setting you allow will be utilised.
Using auto ISO in shutter priority
PRO
In shutter priority mode, you set the shutter speed and the camera figures out the aperture to match it to produce the correct exposure. Once more, the camera will intelligently select an acceptable ISO value for you.
Some of the most crucial exposure settings on your camera are as follows:
Shutter\sISO\sAperture\sCON
Additional attention must be used while shooting in aperture priority or auto ISO to prevent either over- or underexposure.
Your lens's aperture stops down to a certain value. Underexposed photos occur when the ISO is higher than the lens' maximum aperture, like in the above example.
Using a slower shutter speed than your lens's maximum aperture allows for or an ISO lower than your camera's lowest ISO might cause an extremely bright shot.
We have an exclusive range of wedding photography Mornington Peninsula services. Check them out here.
Shooting in manual mode while using auto ISO
PRO
When shooting in manual mode or with the shutter speed priority option, you can choose a shutter speed as slow as you like, regardless of the minimum shutter speed you choose in the ISO sensitivity menu.
When shooting in aperture priority or programme mode, the camera will automatically utilise the slowest shutter speed possible.
CON
If you push the shutter speed or aperture past the minimum or maximum ISO you have set, you run the danger of overexposing or underexposing the image.
Instances when automatic ISO setting is most helpful
In the end, everything comes down to personal preference.
In fact, many established photographers rely on it exclusively. Although I prefer shooting in manual mode, I do acknowledge auto ISO's utility in some scenarios. We utilise automatic ISO when we need the best quality images.
Too busy to fiddle with settings like ISO, aperture, and shutter speed every time I want to take a picture.
If you're having trouble deciding between manual and auto ISO, here are a few scenarios in which the latter is preferable:
- Sports
- Any type of performance or event where the lighting changes is a rock concert.
- Photos of a family's everyday life taken in the midst of a forest filled with active youngsters.

What to consider when shooting in automatic ISO
High ISO performance has greatly enhanced in modern DSLR cameras, especially those at the higher price ranges. If you shoot with a high ISO level, the image quality will deteriorate regardless of how inexpensive your camera is.
A high ISO allows you to do a variety of tasks, including the following:
- The ambient noise is getting louder.
- Changes in dynamic range narrow
- Lower colour accuracy
Utilizing the auto ISO settings, you may prevent your camera from using excessively high ISO settings, which will reduce the amount of quality loss.
Implementing Automatic ISO Settings
Highest possible ISO setting
Do not let the camera decide on the maximum ISO possible; instead, select an ISO that you are comfortable with.
Slowest possible shutter rate
A very slow shutter speed is available for those who like it. When the shutter speed is chosen manually, blur from camera shake is eliminated.
Intensity of the Light in the Camera
The ISO sensitivity may be adjusted to suit your needs.
When using the aperture priority or shutter priority modes, the camera will automatically adjust the aperture and shutter speed to the ISO value you've selected.
If the combination of my aperture and shutter speed requires an ISO sensitivity change beyond what we have defined, "Auto ISO" will flash in the viewfinder regardless of whether I am shooting in aperture priority, shutter priority, or full manual mode. The ISO sensitivity has deviated from the setting we put it at, thus this is a warning.
Planning your dream wedding and don’t want to miss out on the special moments on your big day? Worry no more, Wild Romantic Photography has you covered.
Auto-Drawbacks ISO's
Difficult-to-meter situations
The exposure metre in your camera may get thrown off by the scene, causing you to take photos that are either too bright or too dark. To give only one illustration:
- Taking photos on a sunny beach, for instance, will result in your camera underexposing the backdrop.
- If you took a close-up of a black cat, for instance, the camera would try to overexpose the backdrop.
Altering the exposure setting will assist you shoot in low-light circumstances. There has to be a one or two stop exposure compensation added for scenes with lots of available light. Using a negative exposure compensation of one or more stops is recommended when shooting against a black background.
Constraints on auto-ISO functionality are possible.
Over or underexposed images might result from using auto ISO, which could affect any of the photography modes.
There is no apparent light-level indicator
Your camera's exposure indicator will not warn you of over or underexposure when using auto ISO in aperture or shutter priority.
Reasons to Avoid Using Auto ISO
If you're taking shots of landscapes, buildings, or anything where the aperture and depth of field are more important than the shutter speed, you shouldn't use auto ISO. Long exposures are required to capture even the smallest of details while photographing in low light, and a tripod is a must for maintaining camera stability throughout these exposures. In low light, auto ISO would choose a higher ISO than necessary, resulting in digital noise that would make photos appear blurrier than intended.
If you're working in really strong light and photographing things like animals or movement, your camera may automatically convert to a smaller aperture in order to retain your set shutter speed (where you need shallow depth of focus). When shooting with a larger aperture, you may need to either off Auto ISO entirely or increase the shutter speed.
If you’d like to work with professional photographers for your wedding, book with us at Wild Romantic Photography.
Conclusion
Auto ISO allows the camera to choose the ISO value automatically. By switching to Shutter Priority, you can choose a shutter speed and ISO. The name "ISO" comes from the days of film photography when consumers would buy rolls labelled with ratings like "100," "200," or "400". Digital cameras can determine the correct ISO level on their own leaving you free to worry only about aperture and shutter speed. You can often customise your camera by choosing a maximum ISO value for Auto ISO and a minimum ISO for manual ISO.
The result is stunning images with minimal loss of detail thanks to improved digital sensor technology. Adjusting the ISO setting allows you to modify the sensitivity of the camera's light sensor. A camera's ISO will be set automatically if a minimum shutter speed has been set. Additional attention must be used while using aperture priority or auto ISO to prevent over- or underexposure. Many established photographers rely on the auto ISO setting for all their photographic work.
If you're having trouble deciding between manual and auto ISO, here are a few scenarios in which the latter is preferable. High ISO performance greatly enhanced in modern DSLR cameras, especially those at the higher price ranges. If the combination of my aperture and shutter speed requires an ISO sensitivity change beyond what we have defined, "Auto ISO" will flash in the viewfinder regardless of whether I am shooting in aperture priority, shutter priority, or full manual mode. Using a negative exposure compensation of one or more stops is recommended when shooting against a black background. Over or underexposed images might result from using auto ISO, which could affect any of the photography modes.
Long exposures are required to capture even the smallest of details while photographing in low light. In low light, auto ISO would choose a higher ISO than necessary, resulting in digital noise.
Content Summary
- What is Auto ISO?Almost all contemporary digital cameras offer a "Auto ISO" function that allows the camera to choose the ISO value automatically.
- Manual, Aperture, and Shutter Priority modes all support Auto ISO, but the latter is where it truly shines.
- By switching to Shutter Priority, you can choose a shutter speed and have the camera automatically choose both the aperture and ISO.When shooting in Shutter Priority with Auto ISO, the camera will choose the best aperture and then, if necessary, boost the ISO to keep the shutter speed constant regardless of the lighting conditions.
- However, if you need a smaller aperture to achieve a greater depth of field, you may want to switch to Manual mode, which gives you full control over shutter speed and aperture while leaving ISO up to the camera.
- Where Auto Got Its NameDespite popular belief, "Auto" does not stand for "Automatic" in this context.
- The company got its name from the corruption of the first name of Otto Barnack, the more discerning sibling of Oskar Barnack, the man generally credited with inventing the first Leica and popularising 35mm photography.
- This History of ISOThe name "ISO" originates from the days of film photography, when consumers would buy an entire roll of film from a camera store, labelled with an ASA rating like "100," "200," or "400."
- In bright conditions, ASA 100 film delivered results comparable to those of a digital camera set to ISO 100.
- We used my ancient D200 and ISO 400 to take this picture of a professional marksman posing.
- Even my well-used Nikon D200 from the early days of digital photography didn't have much of an advantage over its film-based predecessors in dim conditions.
- If you wanted to capture images in low light before the last decade, you might as well grab a roll of high-ASA film because most digital cameras weren't particularly competent at their (about comparable) high ISO numbers. (
- For the most part, current digital cameras can determine the correct ISO level on their own (thus the phrase "Auto ISO"), leaving you free to worry only about aperture and shutter speed.
- The first phase was an increase in the quality of both image sensors and in-camera image processing engines (including noise reduction algorithms), allowing for flawless shots to be obtained at ISO 1600 and ISO 3200.
- Second, you can often customise your camera by choosing a maximum ISO value for Auto ISO as well as a minimum ISO value for manual ISO.By adjusting my camera's settings to a maximum ISO of 3200, a default ISO of 200, and a slowest shutter speed of 1/60 sec, I can assure that my camera uses a low ISO setting whenever possible and only increases the gain when absolutely necessary.
- Automatic ISO - Exposure ManagementWhen there's a lot going on and you don't have time to adjust to the changing light, auto ISO is a lifesaver.
- Adjusting the ISO setting allows you to modify the sensitivity of the camera's light sensor.
- If you use one of these shooting modes, Auto ISO will be used automatically:Primacy Aperture ModeMode de Shutter PrioritéMethod: By HandOperating ModeIn this section, we will examine the first three shooting settings and how to utilise auto ISO.To What End Should One Employ Automatic ISO?With auto ISO enabled, the camera may adjust the ISO value on its own, giving you finer-grained control over the exposure of your photos.
- More precise control over depth of field, motion blur, and action freezing is possible by focusing on all three at once.
- When you use auto ISO, you won't have to worry about adjusting the ISO setting yourself.
- Based on the parameters you choose, your camera will adjust the ISO and shutter speed to get the desired exposure.
- Using auto ISO in shutter priorityPROIn shutter priority mode, you set the shutter speed and the camera figures out the aperture to match it to produce the correct exposure.
- Some of the most crucial exposure settings on your camera are as follows:Shutter\sISO\sAperture\sCONAdditional attention must be used while shooting in aperture priority or auto ISO to prevent either over- or underexposure.
- When shooting in manual mode or with the shutter speed priority option, you can choose a shutter speed as slow as you like, regardless of the minimum shutter speed you choose in the ISO sensitivity menu.
- When shooting in aperture priority or programme mode, the camera will automatically utilise the slowest shutter speed possible.
- Instances when automatic ISO setting is most helpfulIn the end, everything comes down to personal preference.
- We utilise automatic ISO when we need the best quality images.
- What to consider when shooting in automatic ISOHigh ISO performance has greatly enhanced in modern DSLR cameras, especially those at the higher price ranges.
- If you shoot with a high ISO level, the image quality will deteriorate regardless of how inexpensive your camera is.
- Changes in dynamic range narrowLower colour accuracyUtilizing the auto ISO settings, you may prevent your camera from using excessively high ISO settings, which will reduce the amount of quality loss.
- Implementing Automatic ISO Settings Highest possible ISO settingDo not let the camera decide on the maximum ISO possible; instead, select an ISO that you are comfortable with.
- If the combination of my aperture and shutter speed requires an ISO sensitivity change beyond what we have defined, "Auto ISO" will flash in the viewfinder regardless of whether I am shooting in aperture priority, shutter priority, or full manual mode.
- The ISO sensitivity has deviated from the setting we put it at, thus this is a warning.
- Planning your dream wedding and don't want to miss out on the special moments on your big day?
- Worry no more, Wild Romantic Photography has you covered.
- Auto-Drawbacks ISO'sDifficult-to-meter situationsThe exposure metre in your camera may get thrown off by the scene, causing you to take photos that are either too bright or too dark.
- Altering the exposure setting will assist you shoot in low-light circumstances.
- Constraints on auto-ISO functionality are possible.
- Over or underexposed images might result from using auto ISO, which could affect any of the photography modes.
- There is no apparent light-level indicatorYour camera's exposure indicator will not warn you of over or underexposure when using auto ISO in aperture or shutter priority.
- Reasons to Avoid Using Auto ISOIf you're taking shots of landscapes, buildings, or anything where the aperture and depth of field are more important than the shutter speed, you shouldn't use auto ISO.
- Long exposures are required to capture even the smallest of details while photographing in low light, and a tripod is a must for maintaining camera stability throughout these exposures.
- When shooting with a larger aperture, you may need to either off Auto ISO entirely or increase the shutter speed.